Why I Started Using Long Exposure
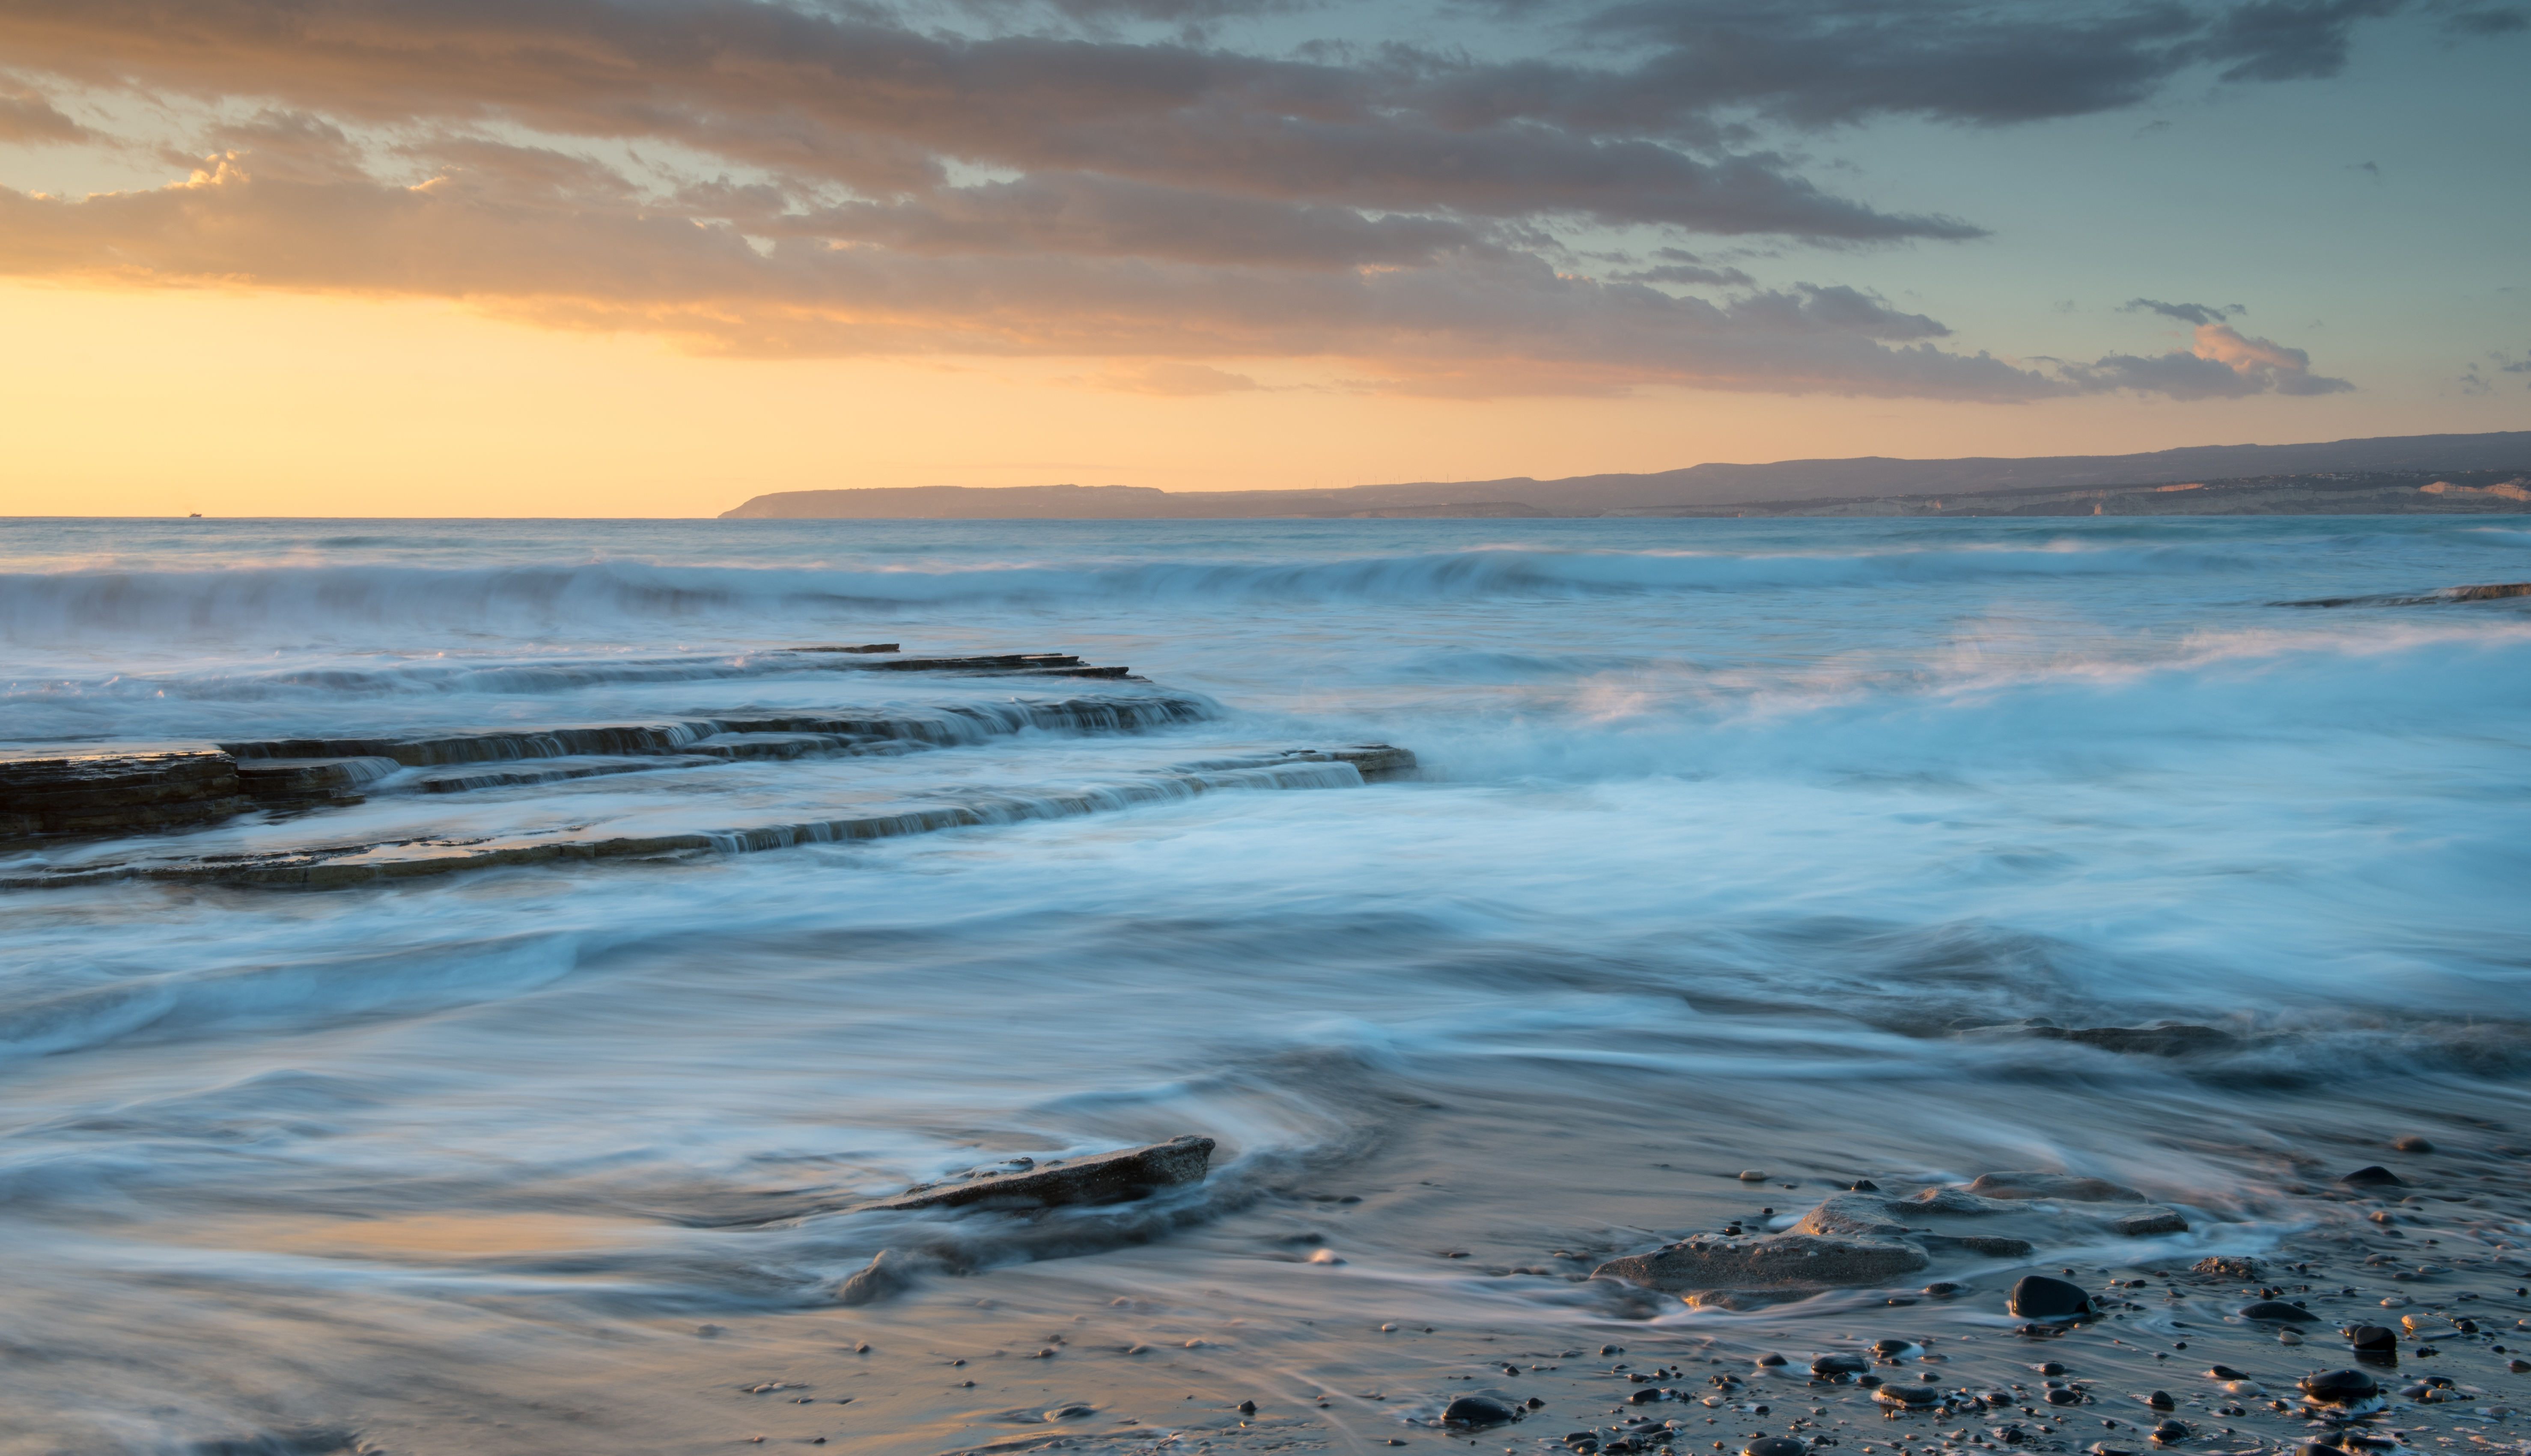
I remember the first time I truly understood long exposure photography. I was standing at a coastal inlet at dawn, watching the tide push through channels of dark rock. My instinct was to capture the movement—the energy of the water. But when I slowed my shutter to eight seconds and looked at the result, something shifted. The chaos had become silk. The urgency had transformed into calm. That’s when I realized: long exposure isn’t about capturing what’s there. It’s about revealing what happens when we stop rushing.
Long exposure has become central to how I see landscapes now. It teaches patience, both in the field and in processing. More importantly, it transforms ordinary scenes into something that feels almost otherworldly—the way our eyes can never quite see them in real time.
Understanding the Technical Foundation
Long exposure requires three fundamental changes to your typical setup. First, you’ll need a sturdy tripod—non-negotiable. Any movement during a 10-second exposure becomes a blur, and not the intentional kind. I use a carbon fiber tripod that’s light enough to carry but stable enough to hold firm in wind.
Second, dial your ISO down to 100 or lower. You’re controlling light through shutter speed, not sensor sensitivity. Third, you’ll almost certainly need neutral density filters—ND filters. These are essentially sunglasses for your lens. A 6-stop ND filter is my workhorse, cutting light enough to allow shutter speeds of 2–10 seconds in daylight. For truly long exposures (20+ seconds), I stack a 6-stop and 10-stop filter together.
Without these filters in bright conditions, your shutter speed would max out at 1/4000th of a second, and you’d end up with overexposed images. The filters are what make daytime long exposure possible.
Finding the Right Settings in the Field
Once your filters are attached, I typically start with these baseline settings: aperture around f/8–f/16 for maximum depth of field, ISO at 100, and shutter speed at 2–4 seconds. From there, I adjust based on what I see in live view.
Here’s what I do: take a test shot, check your histogram, and adjust the shutter speed. Longer shutter means more motion blur—silky water, ghosted clouds, ethereal foregrounds. The longer you go, the more dramatic the effect. But there’s a threshold; past 30 seconds, the effect can feel unnatural.
The time of day matters enormously. Overcast conditions let you use longer exposures without the ND filter getting too dense. Early morning and late evening, when light is softer, often reward longer exposures more than harsh midday light.
The Meditative Practice
What I love most about long exposure isn’t just the final image. It’s the enforced slowness. You can’t check your phone while waiting for an 8-second exposure. You can’t rush from one composition to the next. You’re forced to stand there, watching light move across your scene, noticing details you’d otherwise miss.
This is where the real work happens. I’ve noticed that my best long-exposure images come not from my first location of the morning, but from my third or fourth—once I’ve stopped trying and started observing.
Practical Field Tip
Always bring a spare ND filter and a lens cloth. Filters attract dust and water droplets, and a smudged filter will soften your entire image. I keep a microfiber cloth attached to my filter pouch specifically for this.
Long exposure teaches you to see differently. Not everything needs to be sharp and immediate. Sometimes the best landscape photography happens when you slow down enough to let the world reveal itself.
Comments
Leave a Comment