I’ve been doing this long enough to remember when planning a landscape shoot meant a paper map, a printed tide table, and a phone call to the local pub to ask what the weather was doing. Twenty years in, my camera bag has barely changed. My phone has changed everything. Not the camera on it, though that’s impressive enough. The apps. The ability to stand in a car park at 5am in the dark and know, within a few minutes, whether the light is going to break over the ridge the way I need it to, whether the cloud base is sitting at the right elevation, and exactly where the sun will rise relative to that ridge. That’s the difference between a wasted drive and a keeper.
When I came across Watch the full tutorial on YouTube from Nigel Danson, who took a single shoot in the Peak District as his working example, I kept nodding through the whole thing. He lays out a complete workflow, from research through to reviewing your shots in the field, built entirely around apps most photographers already have or can grab for free. What I want to do here is walk you through each stage of that workflow with enough detail that you can apply it on your next shoot without needing to pause and rewind.
Step 1: Research the Location Before You Leave Home
 Instagram hashtag search showing landscape location photos
Start with Instagram, but use it differently than you probably do. Search a location tag or a regional hashtag and scroll through what others have shot there. You’re not looking for shots to copy. You’re reading the landscape. What does the terrain look like? Are there obvious foreground elements? Is the location wide and open or tight and enclosed? This kind of visual reconnaissance takes ten minutes and tells you things a written description never will. I do this for any location I haven’t visited, whether it’s somewhere two hours away or somewhere I’m planning a dedicated trip around. Flickr still has value here too, especially for older or more remote spots where Instagram coverage is thin.
Instagram hashtag search showing landscape location photos
Start with Instagram, but use it differently than you probably do. Search a location tag or a regional hashtag and scroll through what others have shot there. You’re not looking for shots to copy. You’re reading the landscape. What does the terrain look like? Are there obvious foreground elements? Is the location wide and open or tight and enclosed? This kind of visual reconnaissance takes ten minutes and tells you things a written description never will. I do this for any location I haven’t visited, whether it’s somewhere two hours away or somewhere I’m planning a dedicated trip around. Flickr still has value here too, especially for older or more remote spots where Instagram coverage is thin.
Step 2: Check the Weather with the Right Apps
 Clear Outside app showing cloud layer forecast by hour
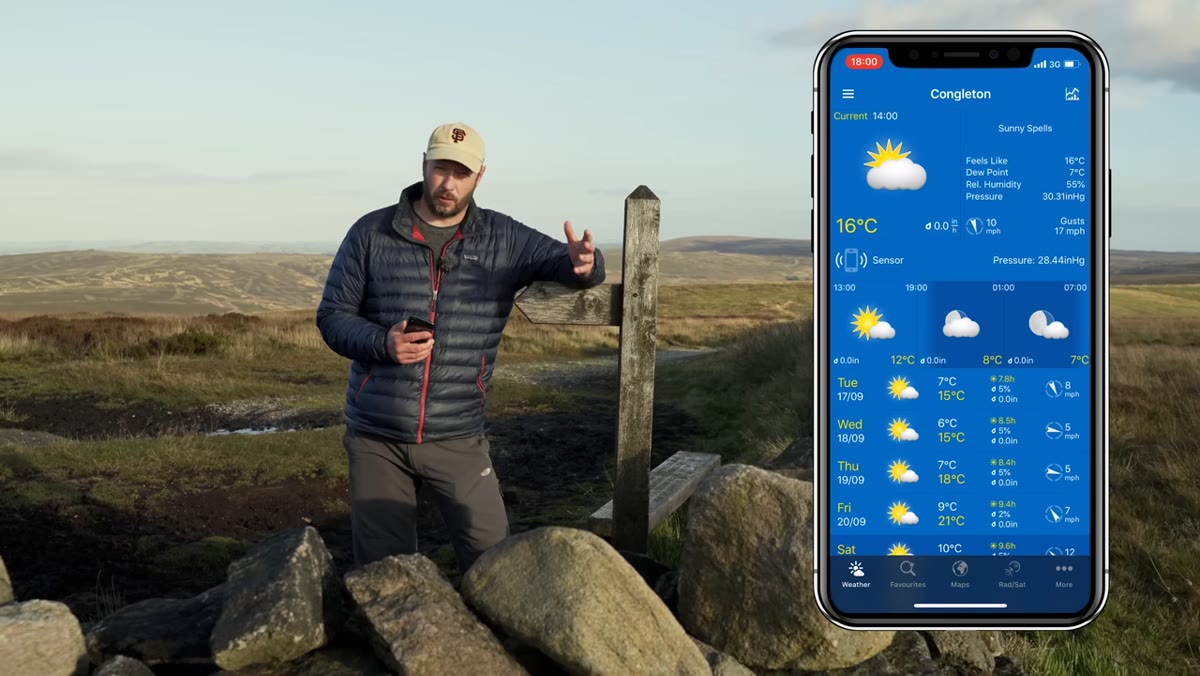
Not all weather apps are built for photographers. Nigel singles out two worth having on your phone: Weather Pro and Clear Outside. Clear Outside is the one to pay attention to. It shows cloud cover broken into low, medium, and high layers, which matters enormously when you’re trying to predict whether you’ll get a dramatic sky or a flat grey lid. It also helps flag the conditions that produce fog, which can either ruin a shoot or make it extraordinary depending on what you’re after. Before this particular shoot, Nigel could see the cloud was clearing from the west through the evening, which told him a sunset was possible. That’s the kind of forecast reading a standard weather app won’t give you.
Clear Outside app showing cloud layer forecast by hour
Not all weather apps are built for photographers. Nigel singles out two worth having on your phone: Weather Pro and Clear Outside. Clear Outside is the one to pay attention to. It shows cloud cover broken into low, medium, and high layers, which matters enormously when you’re trying to predict whether you’ll get a dramatic sky or a flat grey lid. It also helps flag the conditions that produce fog, which can either ruin a shoot or make it extraordinary depending on what you’re after. Before this particular shoot, Nigel could see the cloud was clearing from the west through the evening, which told him a sunset was possible. That’s the kind of forecast reading a standard weather app won’t give you.
Step 3: Scout the Location Using Maps and Satellite View
 Google Maps satellite view showing terrain and footpaths
Once the weather looks promising, move into Google Maps and switch to satellite view. You’re looking for access points, footpaths, ridgelines, bodies of water, anything that suggests compositional possibilities before you’ve set foot there. In the UK, Nigel uses an Ordnance Survey app called Outdoor GPS for more detailed topographic mapping. Outside the UK, look for equivalent topo apps for your region. The goal is to arrive at a location with a shortlist of spots to check, not to wander hoping something presents itself. I’ve wasted enough dawning light walking in the wrong direction to know the value of that preparation.
Google Maps satellite view showing terrain and footpaths
Once the weather looks promising, move into Google Maps and switch to satellite view. You’re looking for access points, footpaths, ridgelines, bodies of water, anything that suggests compositional possibilities before you’ve set foot there. In the UK, Nigel uses an Ordnance Survey app called Outdoor GPS for more detailed topographic mapping. Outside the UK, look for equivalent topo apps for your region. The goal is to arrive at a location with a shortlist of spots to check, not to wander hoping something presents itself. I’ve wasted enough dawning light walking in the wrong direction to know the value of that preparation.
Step 4: Predict the Light with TPE 3D
 TPE 3D app showing sun position and shadow direction over terrain
This is the one that changes how you think about planning entirely. TPE 3D, which stands for The Photographer’s Ephemeris 3D, lets you set a specific location and then scrub through different times of day to see exactly how sunlight will fall across the terrain. You can visualize where shadows will be cast, what the golden hour angle looks like relative to your shooting position, and whether the sun will be behind or in front of you. For landscape work, this is not a nice-to-have. It is fundamental. Knowing that the sun will be at 15 degrees above the horizon and slightly to the south of your composition at 7:22am means you can pre-build your shot mentally before you’re standing in the cold trying to figure it out.
TPE 3D app showing sun position and shadow direction over terrain
This is the one that changes how you think about planning entirely. TPE 3D, which stands for The Photographer’s Ephemeris 3D, lets you set a specific location and then scrub through different times of day to see exactly how sunlight will fall across the terrain. You can visualize where shadows will be cast, what the golden hour angle looks like relative to your shooting position, and whether the sun will be behind or in front of you. For landscape work, this is not a nice-to-have. It is fundamental. Knowing that the sun will be at 15 degrees above the horizon and slightly to the south of your composition at 7:22am means you can pre-build your shot mentally before you’re standing in the cold trying to figure it out.
Step 5: Use GPS to Mark and Record Your Locations
 Phone GPS map showing marked waypoints in the field
Once you’re in the field, your phone’s GPS becomes a field notebook that never gets wet and never loses a page. Mark the spots that catch your eye, even ones that don’t work on that particular day. I have dozens of saved pins from shoots that didn’t deliver what I hoped, and several of them have become the foundation of my best work on return visits. Nigel makes this point clearly: scouting and shooting are often separate trips. The phone lets you record your scouting work precisely, so when you come back in different light or different season, you’re standing in exactly the right place, not roughly the right place.
Phone GPS map showing marked waypoints in the field
Once you’re in the field, your phone’s GPS becomes a field notebook that never gets wet and never loses a page. Mark the spots that catch your eye, even ones that don’t work on that particular day. I have dozens of saved pins from shoots that didn’t deliver what I hoped, and several of them have become the foundation of my best work on return visits. Nigel makes this point clearly: scouting and shooting are often separate trips. The phone lets you record your scouting work precisely, so when you come back in different light or different season, you’re standing in exactly the right place, not roughly the right place.
Step 6: Compose and Focus-Check in the Field
 Phone screen being used to compose and check focus on location
Your phone can also serve as a composition tool in real time. Use it to quickly test framings before you commit to setting up your tripod. Nigel mentions using the phone to check focus as well, which is a technique worth exploring depending on your camera system. Some photographers use a phone as a second screen via camera control apps for more precise live view work in low light. It is faster than squinting through a viewfinder in pre-dawn darkness, and it keeps you moving through potential compositions rather than locking in on the first one that looks acceptable.
Phone screen being used to compose and check focus on location
Your phone can also serve as a composition tool in real time. Use it to quickly test framings before you commit to setting up your tripod. Nigel mentions using the phone to check focus as well, which is a technique worth exploring depending on your camera system. Some photographers use a phone as a second screen via camera control apps for more precise live view work in low light. It is faster than squinting through a viewfinder in pre-dawn darkness, and it keeps you moving through potential compositions rather than locking in on the first one that looks acceptable.
A Word from Twenty Years in the Field
I want to add something Nigel doesn’t say explicitly but that underpins everything in his workflow. These apps work best when you’ve already built the habit of arriving early, leaving late, and returning to the same location multiple times. The apps remove uncertainty and reduce wasted effort, but they don’t replace presence. I once drove six hours to a location in the Cascades, sat in fog for two days, and came home with one usable shot. It became my best-selling print. The fog I couldn’t plan for was the whole point. Use every app in this list, plan obsessively, and then stay flexible when the landscape decides to do something different.
The single biggest shift this workflow creates is moving you from reactive to intentional. You stop arriving at locations and hoping. You arrive knowing, roughly, what the conditions should be and where you want to stand, which frees your attention for the things that can’t be planned, the unexpected light, the moment the mist lifts, the composition you only see because you’re already in position. That’s where the real work happens.
Watch the full tutorial on YouTube to see Nigel walk through each of these apps on location in the Peak District. His shoot is a good case study in how the planning paid off.
Comments
Leave a Comment