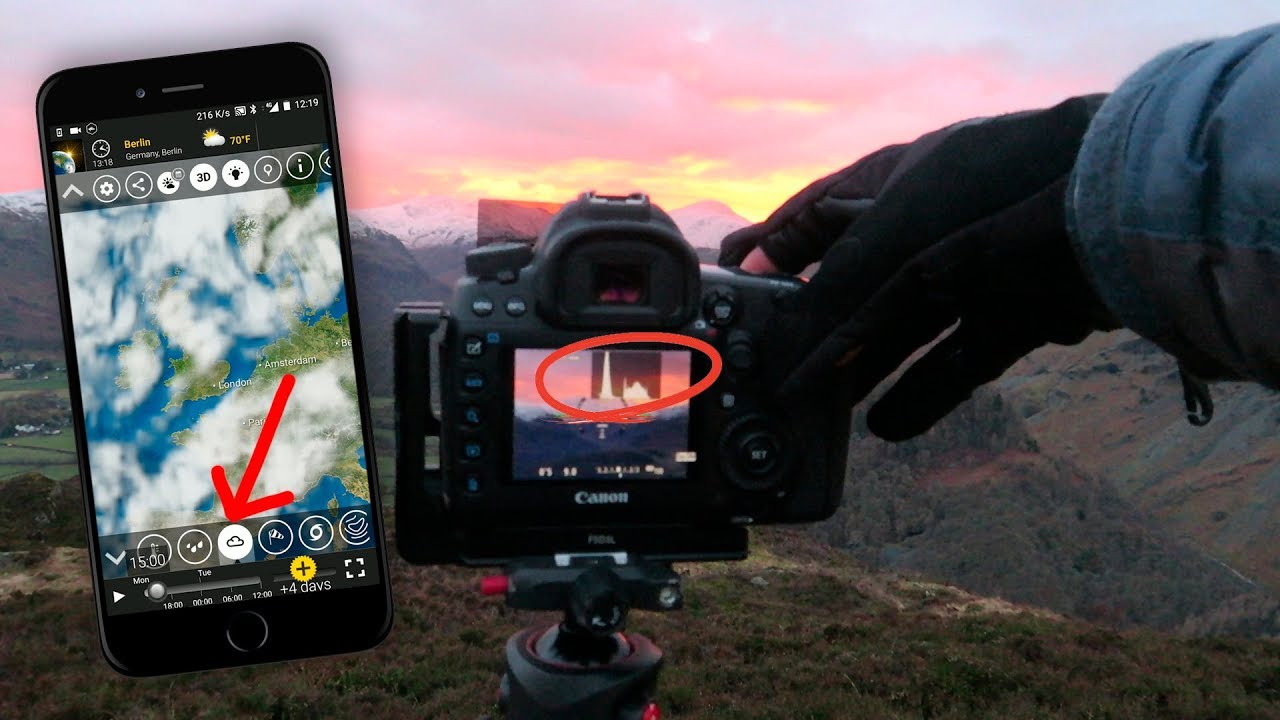
There’s a version of me from about fifteen years ago who would drive to a location on pure hope. I’d seen a photograph someone else made there, I’d circled it on a mental map, and I’d show up whenever I could carve out a morning. Sometimes I got lucky. More often I got flat light, a milky white sky, and a long drive home with nothing on the card worth keeping. The turning point wasn’t a new lens or a better camera. It was learning to read weather the way a sailor reads water.
That’s why when I came across Watch the full tutorial on YouTube from Thomas Heaton, it stopped me mid-scroll. Heaton is one of those photographers who thinks out loud in a way that’s genuinely useful, and in this tutorial he lays out a weather-first philosophy for landscape photography that lines up almost exactly with how I plan shoots now. He opens with a disclaimer that photography is subjective and full of contradictions. Fair. But what follows is as close to a repeatable system as this craft gets.
What I want to do here is pull out the actual technique from his walkthrough and expand on it with what I’ve learned doing this work full-time from the high desert and mountain ranges of the Pacific Northwest. If you’re still leaving weather to chance, this is the framework that will change how you plan every shoot from here forward.
Step 1: Accept That Weather Is the Shot
 Thomas Heaton standing outdoors discussing weather importance
Before any app gets opened, Heaton makes a philosophical point that deserves to land. Weather isn’t a variable you work around. It is the subject. The light that makes a landscape photograph extraordinary is almost always a product of specific atmospheric conditions: moisture in the air, the height of clouds, wind speed, what’s happening between the sun and the horizon. Most photographers plan around locations. The better habit is to plan around conditions, and then match a location to those conditions.
This reframe changed how I schedule my shoots entirely. I no longer pick a Saturday and a spot and hope. I watch a five-day window, wait for the conditions to develop, and then move. Yes, that requires flexibility. But it also means I’m not standing in dead light wondering why the scene doesn’t look like the photo that brought me there.
Step 2: Use Mountain-Specific Forecasts When Shooting at Elevation
 Phone screen showing Mountain Weather Information Service website
Heaton is specific here, and the specificity matters. For anyone shooting in the UK highlands, he points to the Mountain Weather Information Service as the primary forecast tool. The principle translates globally: valley-level weather apps give you valley-level data. If you’re heading to elevation, you need elevation-specific forecasts.
In Oregon, I use the same logic. A forecast for Bend might show calm and clear while the summit of South Sister is locked in wind and low cloud. NOAA’s mountain zone forecasts and the avalanche center weather reports give me the high-elevation picture. Whatever region you shoot in, find the forecast source built for that terrain. The five-minute lookup will save you more failed shoots than any piece of gear.
Step 3: Layer Multiple Apps Rather Than Trusting One
 Multiple weather apps displayed on phone screen
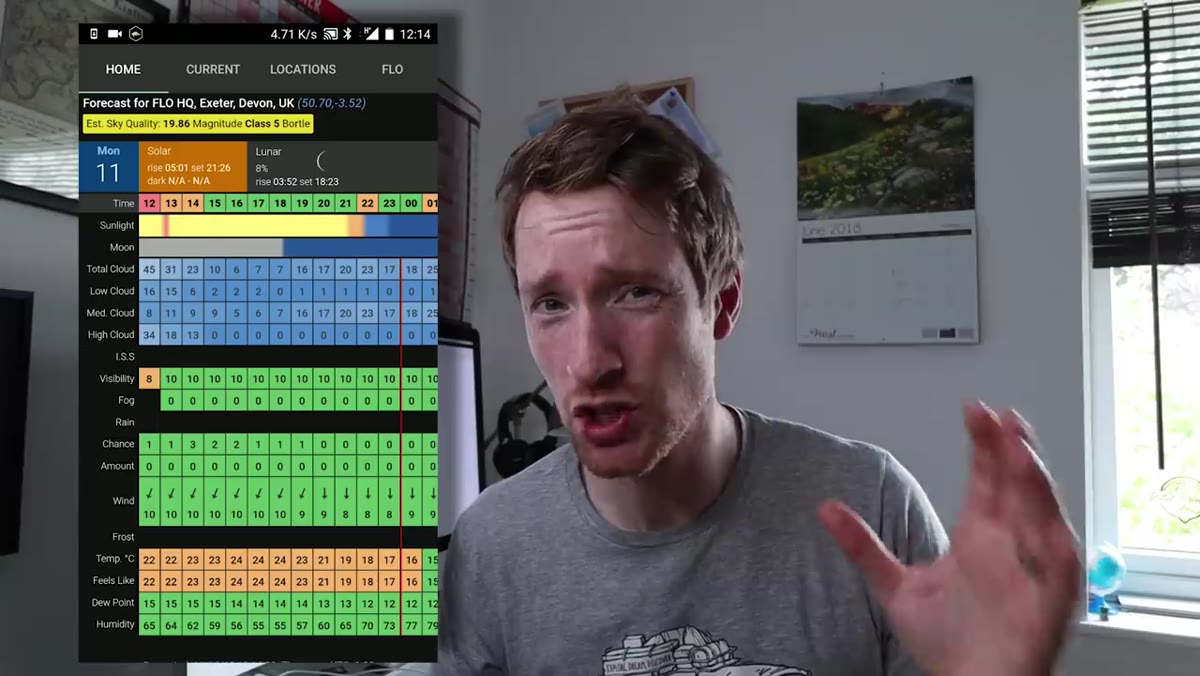
This is where Heaton’s workflow gets practical. He cross-references several tools: Clear Outside for dew point and humidity data, YR for an accurate hourly display, Meteo Earth for animated cloud cover, pressure, and wind charts, and Skippy Sky for separating low, mid, and high cloud layers. No single app gives the full picture. Used together, they let you build a working hypothesis about what the light is going to do.
I run a similar stack. I’ll add a wind forecast tool specific to alpine terrain because nothing ruins a long-exposure composition like branches blurring in a 25-mph gust you didn’t see coming. The goal isn’t certainty. The goal is an educated guess that’s better than the one you’d make with one source. Heaton puts it simply: cross-reference, then commit.
Step 4: Understand What Dew Point and Humidity Actually Mean for Your Shoot
 Clear Outside app showing humidity and dew point readings
Heaton flags something most photography tutorials skip entirely: dew point. When humidity is high and the dew point is close to or matching the ambient temperature, the air is saturated and mist becomes likely. For valley floors near rivers and lakes, this is the condition that produces those low fog layers that make a landscape look like it exists in another world.
Learning to read these numbers turned several locations near me from “okay in good light” to “I need to be there at 5am when the fog is sitting.” You’re not a meteorologist. You don’t need to be. You just need to know that when those two numbers converge, you set the alarm and go.
Step 5: Read Cloud Type to Predict Light Quality
 Heaton explaining low mid and high cloud cover types
Heaton breaks cloud types into three tiers and explains what each one is likely to do to your image. Low cloud is a wildcard. It can suffocate a scene completely, stripping away contrast and color. But it can also produce dramatic, brooding skies if you lean into it and match your location accordingly. Mid-level cloud sits in the middle: some drama, some chance of color at golden hour, unpredictable but workable. High cloud is the prize. When high cloud catches sunrise or sunset light, it ignites. That’s the classic epic sky. The cloud base might be 30,000 or 40,000 feet up, but those cirrus layers go orange and pink and hold the color longer than anything closer to the ground.
Knowing this changes your decision-making in real time. If I’m out and the sky is full of high cloud with a clear band near the horizon, I’m not leaving. That band will let the low light in, hit the high cloud from below, and the sky will do things that justify every cold morning I’ve ever spent in waders.
Step 6: Use the Photographer’s Ephemeris to Connect Cloud Data to Light Direction
 Photographer’s Ephemeris app showing sun position and cloud interaction
Heaton ties his cloud-layer data to the Photographer’s Ephemeris, a tool that maps sun and moon position to any location on earth at any time. The combination is the key step most people miss. Knowing there are cloud breaks means nothing unless you know where the sun is going to be, what direction the light will travel, and whether it will actually strike the part of the scene you’re trying to photograph.
This is the closest thing to a predictive system landscape photography has. Open Ephemeris, mark your location, note sunrise direction and time. Cross that with your cloud data from Skippy Sky or Meteo Earth. If the break in the cloud aligns with the sun’s path during the golden window, you have a target. Go.
What I’d Add From Twenty Years in the Field
Heaton’s framework is excellent. The one thing I’d add is margin. I’ve found that conditions shift faster than any app predicts, and the photographers who get the best shots are usually the ones who arrived early enough to be in position when the light broke unexpectedly. A mentor once told me the mountain doesn’t care about your schedule. That’s true. But if you show up early enough, you can make the mountain’s schedule your own.
Build in at least 30 to 45 minutes of buffer before your forecasted golden hour. Sit with the scene. Watch how the light is moving. Let the conditions come to you rather than chasing them.
Weather is the discipline that separates photographers who occasionally get lucky from those who consistently come home with images worth printing. Learn the tools, learn to read what the tools are telling you, and let that information drive your decisions before you ever pick up your bag.
Watch the full tutorial on YouTube and hear Heaton walk through this system in the field. It’s well worth your time.
Comments
Leave a Comment