There’s a particular kind of frustration that comes from driving hours into the high desert before dawn, nailing the light, and then sitting down at the computer to find the RAW file looks… flat. Washed out. Like a photograph of a photograph. The dunes don’t glow. The shadows don’t pull you in. That gap between what your eyes saw and what the sensor recorded is exactly the problem this workflow is designed to close.
Watch the full tutorial on YouTube
In this Aaron Nace (PHLEARN) tutorial, Aaron walks through a desert dune landscape in Adobe Camera Raw, using a combination of local adjustments, targeted color work, and clarity to bring weight and drama back to an image that started life looking overexposed and lifeless. I’ve been shooting landscapes full-time for two decades, and what caught my attention here is the sequencing. The order in which he makes decisions is worth studying as much as the settings themselves.
Step 1: Reset to Camera Raw Defaults and Apply Lens Corrections
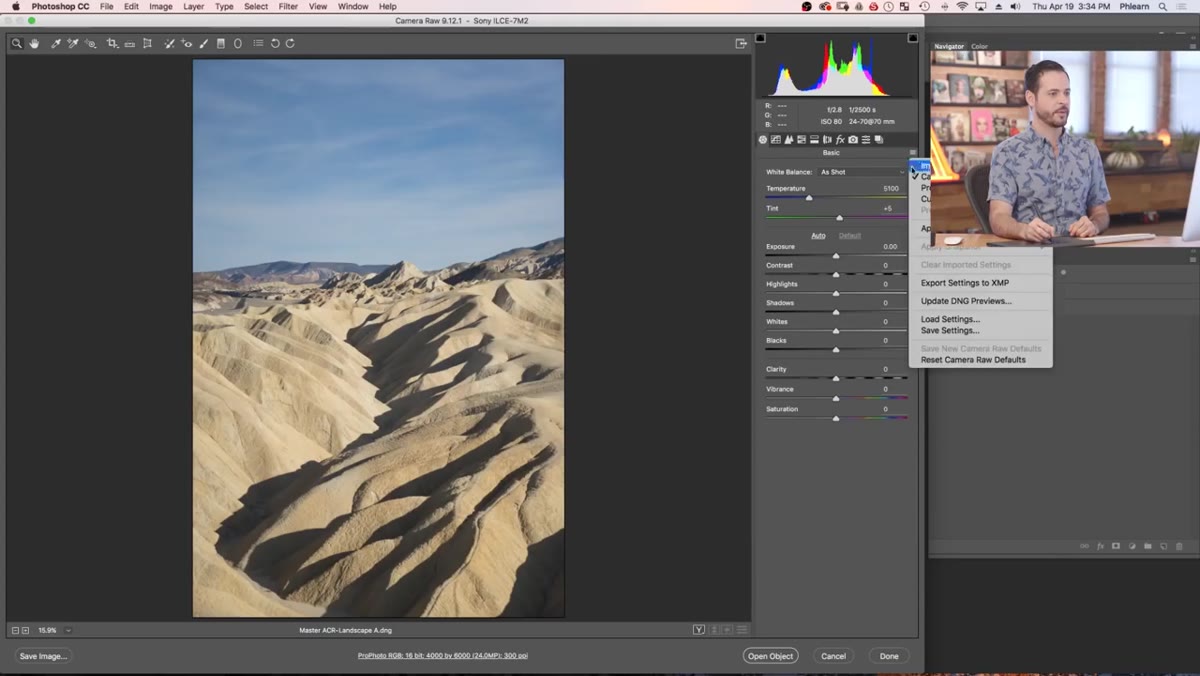 Camera Raw menu showing Reset Camera Raw Defaults selected
Before touching a single slider, Aaron resets the file to Camera Raw defaults. This matters more than it sounds. If you open a file that was previously edited, or if Camera Raw has applied its own default profile, you’re not starting from a neutral position. Resetting clears that slate. From there, the first actual correction is lens corrections, not exposure, not white balance. Enable the lens profile for your lens and camera combination, and let Camera Raw correct for vignetting and distortion before you do anything else. Trying to judge your exposure while your lens is adding its own darkness to the corners is like trying to tune an instrument that’s already out of tune.
Step 2: Identify the Problem Area and Paint an Adjustment Brush Mask
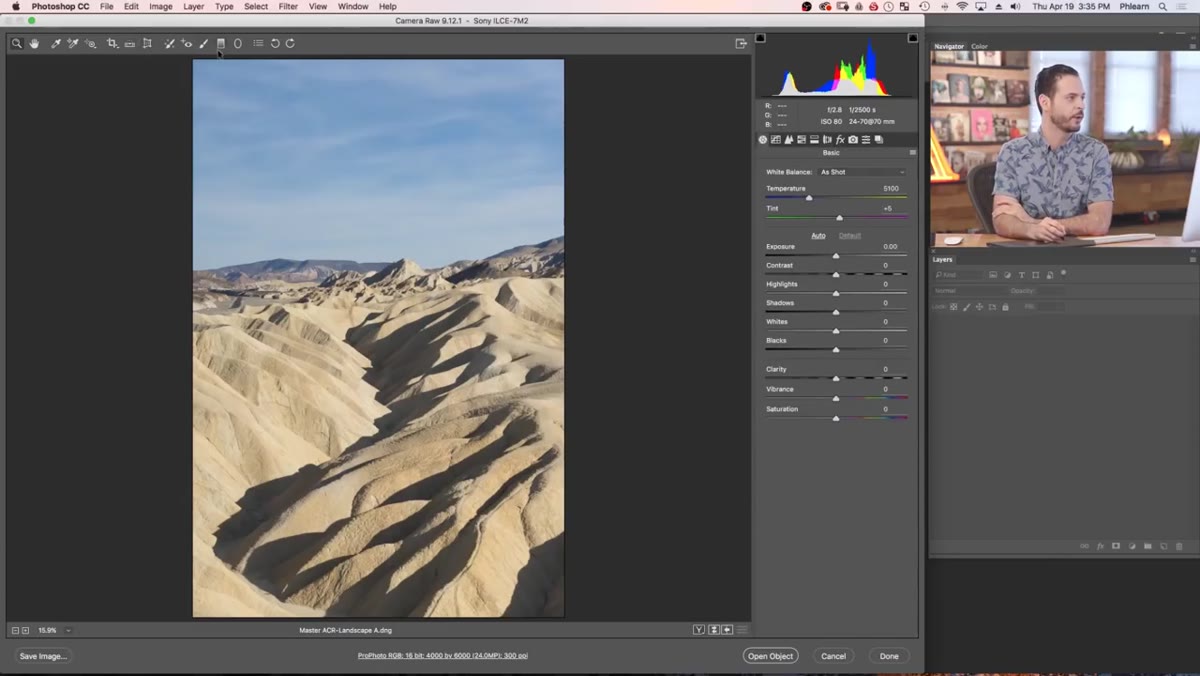 Adjustment brush tool active, mask overlay visible on sand dunes
Aaron’s eye goes straight to the foreground dunes. They’re bright, desaturated, and visually inert. Rather than lowering the exposure globally (which would darken the sky and lose what’s already working), he reaches for the Adjustment Brush to target just that region. Enable the mask overlay so you can see exactly where you’re painting. The mask isn’t precious at this stage. Paint loosely, cover the foreground dunes, and know you can refine the edges later by switching between Add and Erase modes. What matters is that you’re isolating the problem rather than applying a blunt global fix that creates new problems elsewhere.
Step 3: Bring Down Exposure and Highlights in the Masked Area
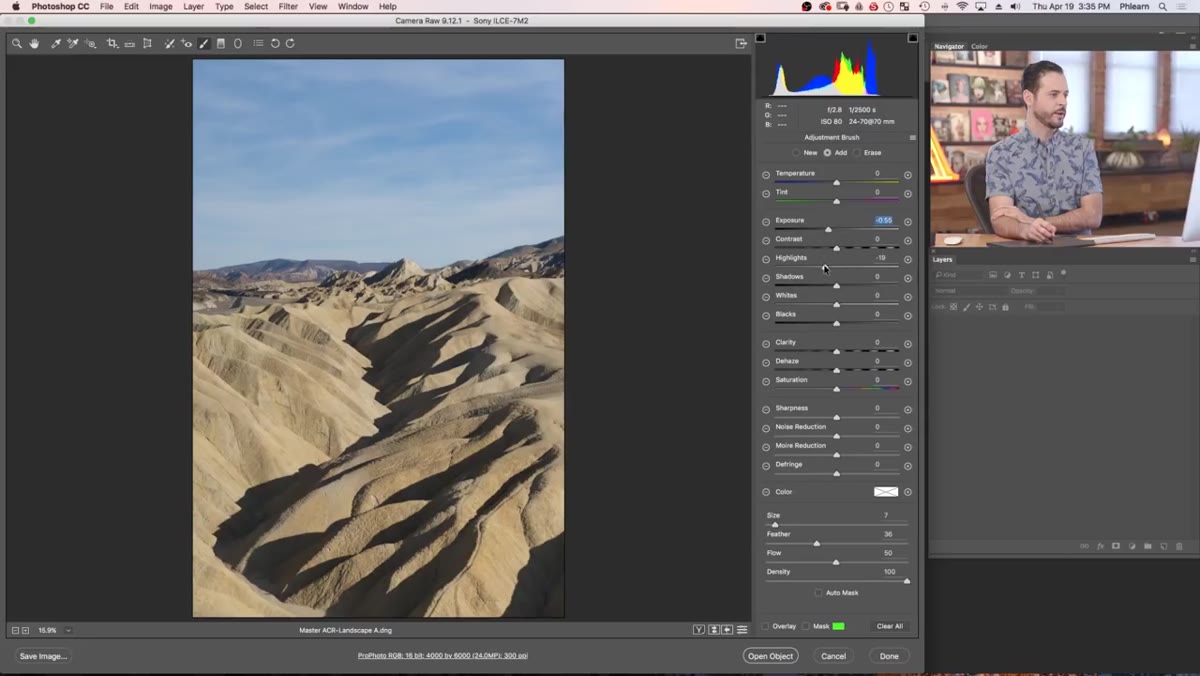 Adjustment brush panel showing Exposure and Highlights sliders moved left
With the foreground mask selected and the overlay turned off so you can judge the actual image, pull the Exposure slider down to darken the dunes. The specific value will depend on your image, but the goal is to add visual weight, to make that sand feel like it has mass. Follow that with a reduction in Highlights to recover any overexposed texture in the brightest parts of the sand. Dune ridgelines and bright sandy patches tend to blow out easily, and bringing the highlights down pulls that detail back without flattening the whole foreground.
Step 4: Raise Clarity and Lift the Shadows
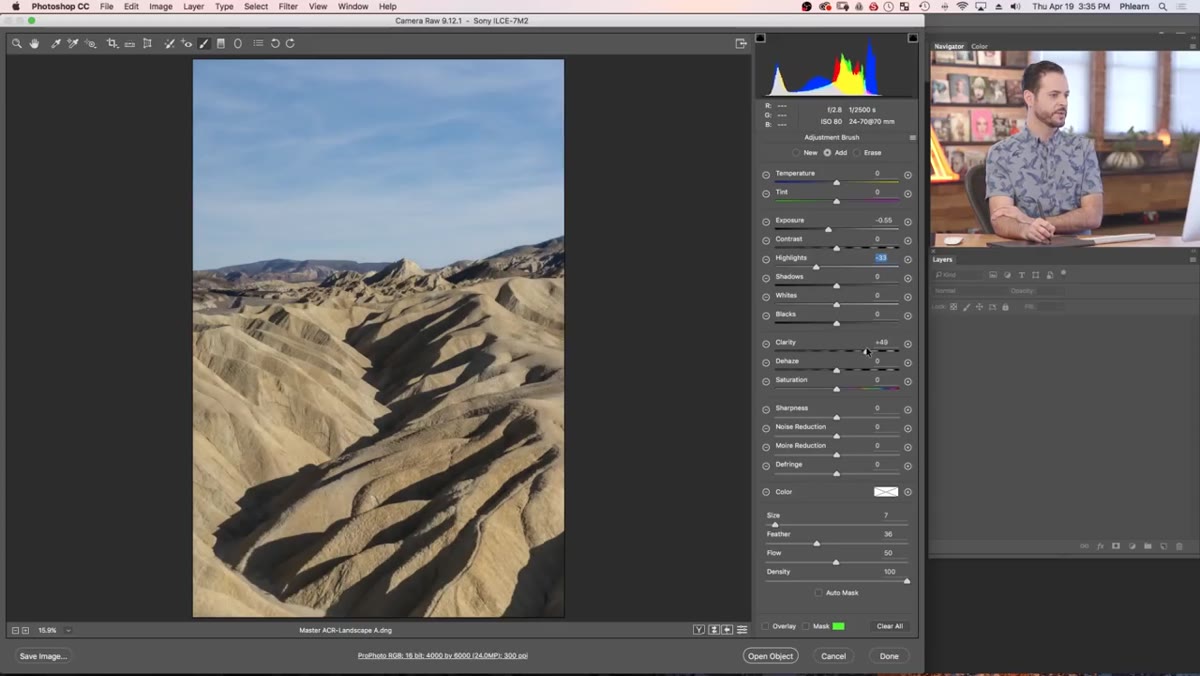 Clarity slider being increased in the adjustment brush settings
Clarity is one of those sliders I reach for constantly on location textures, rock, bark, water, sand. It increases midtone contrast, which translates to perceived sharpness and depth in textured surfaces. Inside your foreground adjustment brush, push Clarity up. It makes the individual grains and ripples in the sand feel tangible. After that, give the Shadows slider a small positive nudge. If you’ve dropped the exposure and crushed the shadows too far, the dunes can start to look muddy. A light lift on shadows keeps detail visible in the darker troughs between ridgelines without washing out the overall darkening effect you’ve worked to create.
Step 5: Shift the Hue Using Targeted Adjustment
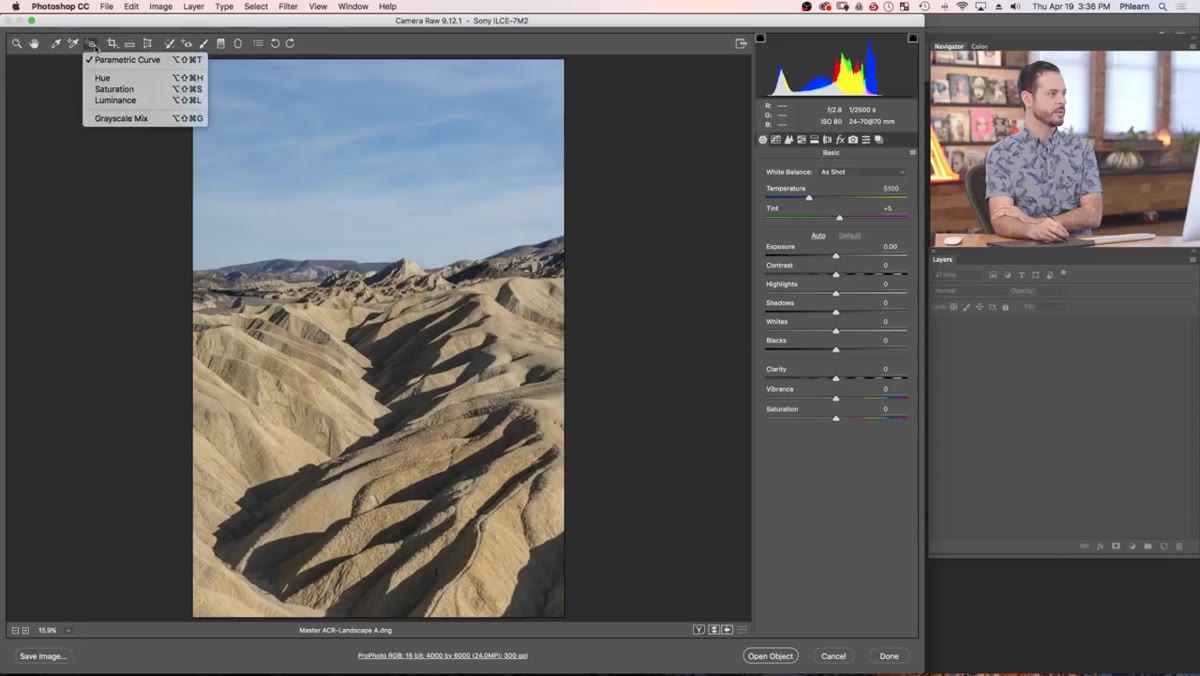 HSL panel open with Targeted Adjustment tool active on hue
This is where the color work gets precise. Inside the HSL panel, Aaron switches to the Targeted Adjustment tool and clicks directly on the sand in the image to adjust its hue by dragging up or down. This approach is more reliable than guessing which color range to adjust manually, because it samples the actual color under your cursor. For warm desert sand, a small downward drag on hue typically pushes the color toward a richer, more amber or orange tone, moving it away from the pale, almost yellow cast that shows up in flat midday light. Take it slowly. A few degrees of hue shift makes a visible difference.
Step 6: Increase Saturation and Reduce Luminance
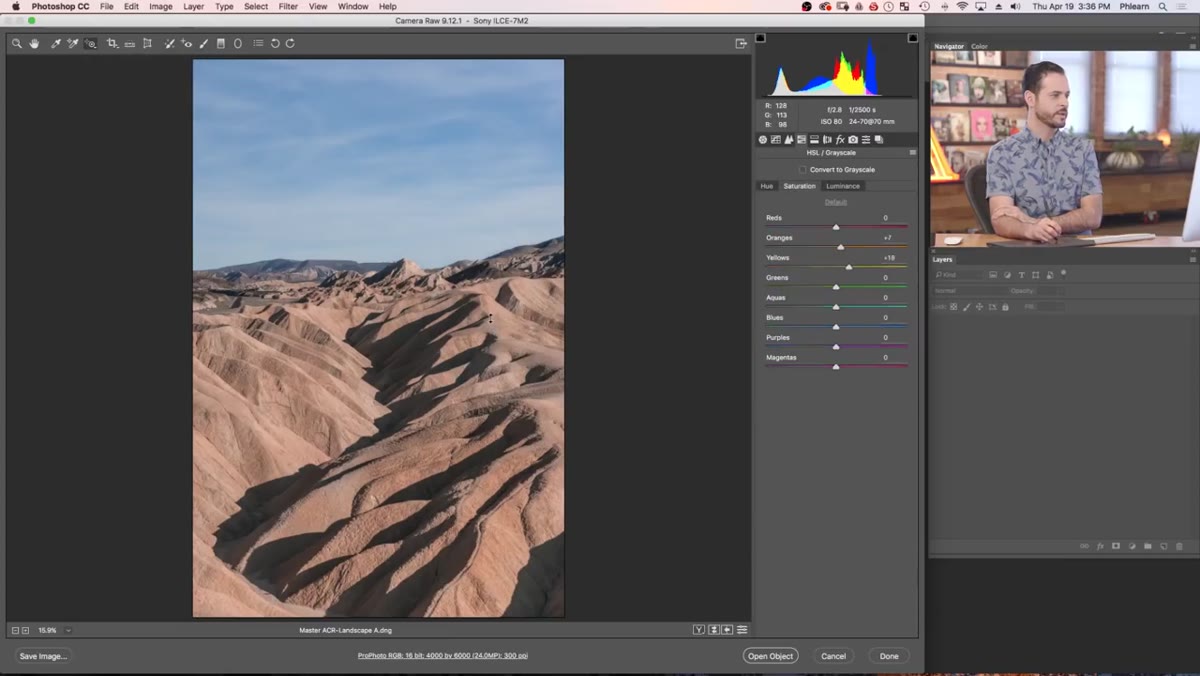 HSL panel showing Saturation and Luminance sliders adjusted
Still in the HSL panel with the Targeted Adjustment tool, move from Hue to Saturation and drag upward on the dunes to deepen the color. Sand that looked anemic starts to feel warm and present. Then switch to Luminance and bring it down slightly. Luminance controls how bright or dark a specific color range appears in the image, independent of exposure. Reducing the luminance of the warm tones in the sand adds density and separates the foreground from the sky more naturally than a gradient filter would.
Step 7: Return to the Adjustment Brush and Refine Local Contrast
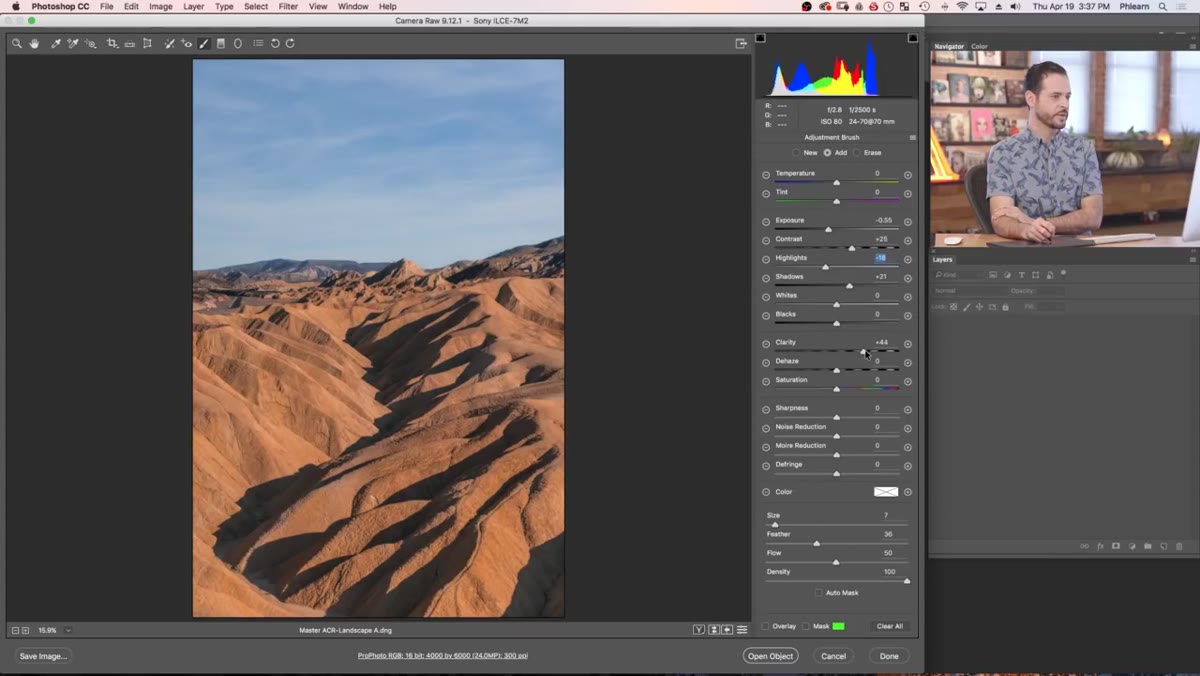 Adjustment brush active with Clarity slider being adjusted further
After the HSL work, go back to your Adjustment Brush and confirm the foreground pin is selected (look for the highlighted dot on the mask). Aaron notes the common mistake of thinking adjustments aren’t working, only to realize the wrong pin is active. Once you’ve confirmed the right mask is selected, push Clarity a bit further if the texture still feels soft, and experiment with a small Contrast increase to give the shadows and highlights within the dune more separation. These two sliders together are what transforms sand from background texture into a foreground that earns attention.
A Note From the Field
One thing I’d add from my own experience: the order of operations here matters especially when you’re shooting in variable desert light. I’ve found that doing the HSL color shift before finalizing your local exposure adjustments can mislead you, because hue and saturation changes affect the perceived brightness of a color. Aaron actually catches this in real time during the tutorial, circling back to the adjustment brush after the color work. That loop, local adjustments, then color, then back to local adjustments, is worth building into your own habit. Think of it as a conversation between the sliders rather than a linear checklist.
After twenty years of standing in sand before sunrise, often with cold coffee and a hat that’s held together mostly by habit and sentiment, I still find that the difference between a print that sells and one that doesn’t comes down to whether the foreground earns your trust. Viewers step into a landscape image through the foreground. If it’s flat, they never make the journey. This workflow, lens corrections first, targeted local adjustments, HSL color refinement, and clarity for texture, gives you the tools to make that entry point compelling.
Watch the full tutorial on YouTube to see Aaron demonstrate every slider in real time. The visual feedback of watching him work is worth the fifteen minutes, even if you’ve been using Camera Raw for years.
Comments
Leave a Comment