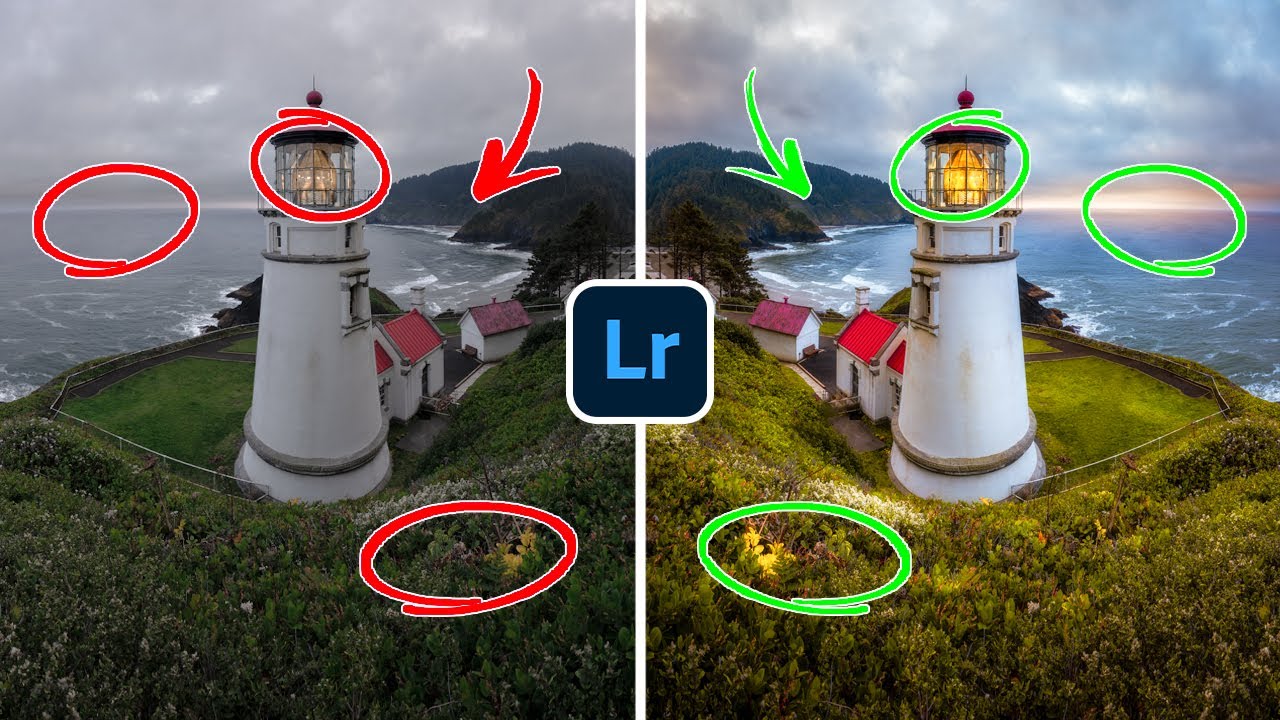
There’s a version of me from about fifteen years ago who spent an hour on global sliders and called it done. Exposure up, contrast in, clarity pushed until the rocks looked like they were carved from steel. The images looked processed, not finished, and I couldn’t figure out why. It took a long time, and a lot of ruined files, before I understood that global adjustments set the stage. Local adjustments are where the actual editing happens. That distinction sounds simple, but it fundamentally changes how you approach a file.
Watch the full tutorial on YouTube
In this Mark Denney tutorial, he walks through six editing skills he considers non-negotiable for landscape photography post-processing, using a vertical panorama of a lighthouse as his working image. What I appreciate about Denney’s approach is that he’s honest about the file. He admits he made a compositional mistake on location, rushing when the light started to move, and ended up with the lighthouse merging into the coastline behind it. He didn’t throw the image away. He worked with it. That’s a useful mindset to bring into any editing session.
The tutorial divides into three sections. This walkthrough focuses on the first: what Denney calls “getting localized,” meaning the strategic use of local adjustments to shape light, dimension, and mood in ways that global tools simply cannot reach.
Step 1: Start With Global Adjustments Already in Place
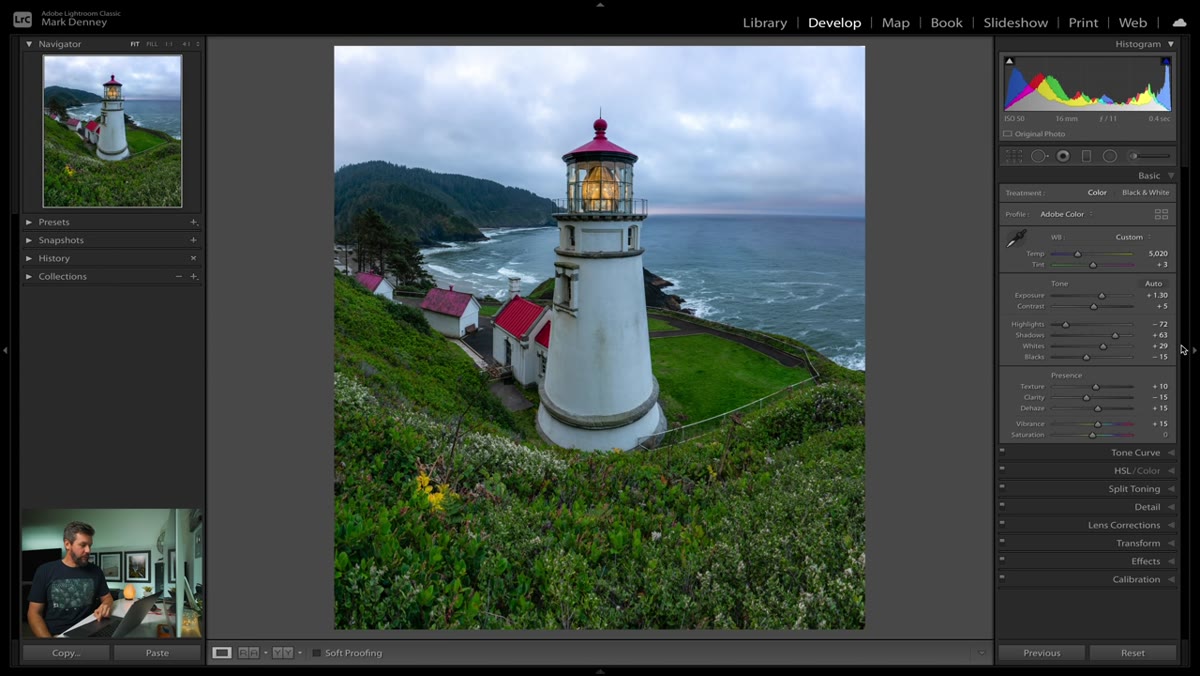 Raw file open in Lightroom with global adjustments already applied
Before touching any local adjustment tool, Denney has already worked through the global panel. Exposure, white balance, tone curve, the foundational corrections are handled. He moves into local adjustments only after the global edit gives him a stable base to build on. If you start placing radial filters or gradient masks on a file that hasn’t been globally corrected, you’re stacking adjustments on a shaky foundation and you’ll chase your tail adjusting locals to compensate for problems that should have been fixed globally first.
Raw file open in Lightroom with global adjustments already applied
Before touching any local adjustment tool, Denney has already worked through the global panel. Exposure, white balance, tone curve, the foundational corrections are handled. He moves into local adjustments only after the global edit gives him a stable base to build on. If you start placing radial filters or gradient masks on a file that hasn’t been globally corrected, you’re stacking adjustments on a shaky foundation and you’ll chase your tail adjusting locals to compensate for problems that should have been fixed globally first.
In practice, this means finishing your basic panel, setting your white balance, and getting your histogram into a workable range before you open a single local adjustment tool. Think of global edits as leveling the floor. Local adjustments are what you put on top of it.
Step 2: Open the Radial Filter and Position It Over Your Subject
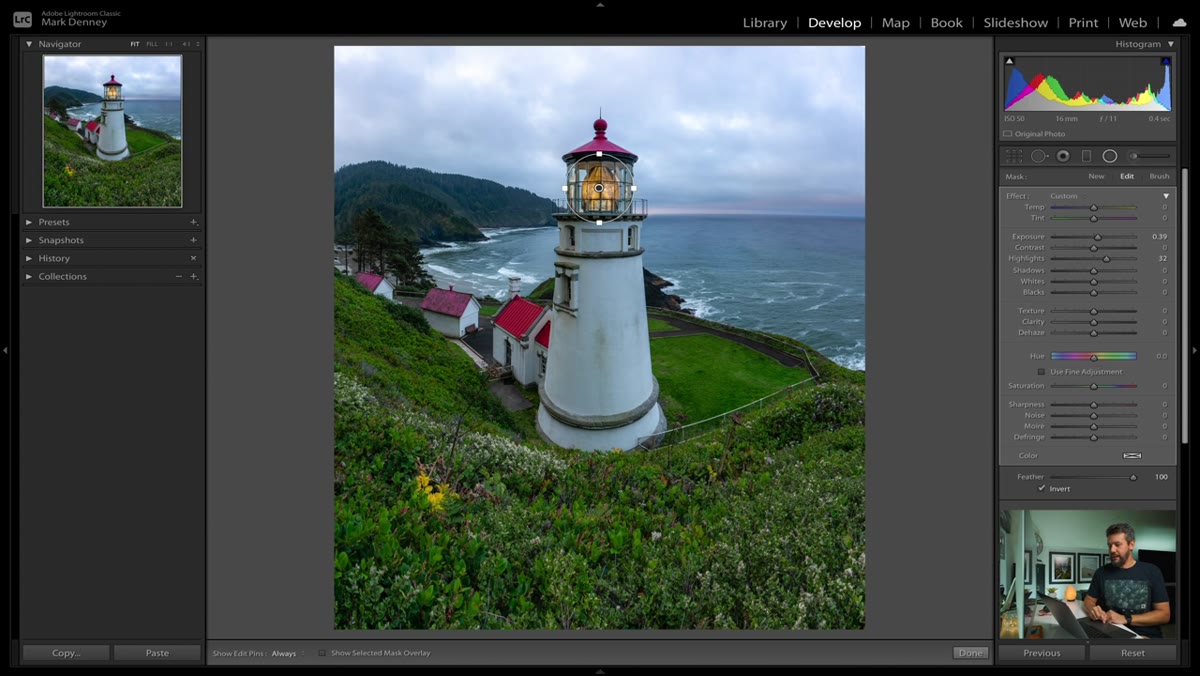
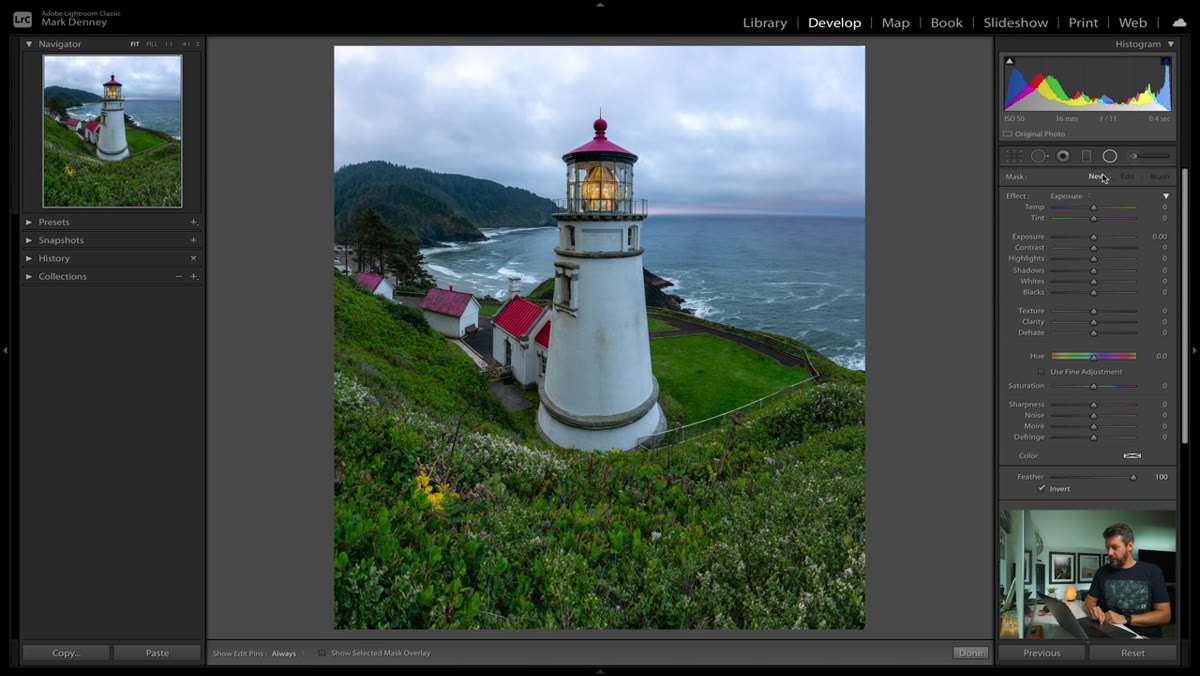 Radial filter dragged over the lighthouse bulb in Lightroom
Denney reaches for the radial filter, and his reasons are worth paying attention to. He rarely uses the adjustment brush because it gives him too much freedom, and freedom in the wrong hands, including his own when he’s tired or impatient, produces adjustments that look unnatural. The radial filter forces a defined shape with a feathered edge, which tends to blend more convincingly into the surrounding image.
Radial filter dragged over the lighthouse bulb in Lightroom
Denney reaches for the radial filter, and his reasons are worth paying attention to. He rarely uses the adjustment brush because it gives him too much freedom, and freedom in the wrong hands, including his own when he’s tired or impatient, produces adjustments that look unnatural. The radial filter forces a defined shape with a feathered edge, which tends to blend more convincingly into the surrounding image.
To follow along: open the radial filter panel, click “New,” and drag an ellipse directly over the primary subject of your image. In his case, that’s the circular bulb of the lighthouse. The feather should be set to 100, which gives you a gradual transition rather than a hard edge. A hard edge on a radial filter almost always looks like a mistake.
Step 3: Brighten the Subject and Lift the Highlights
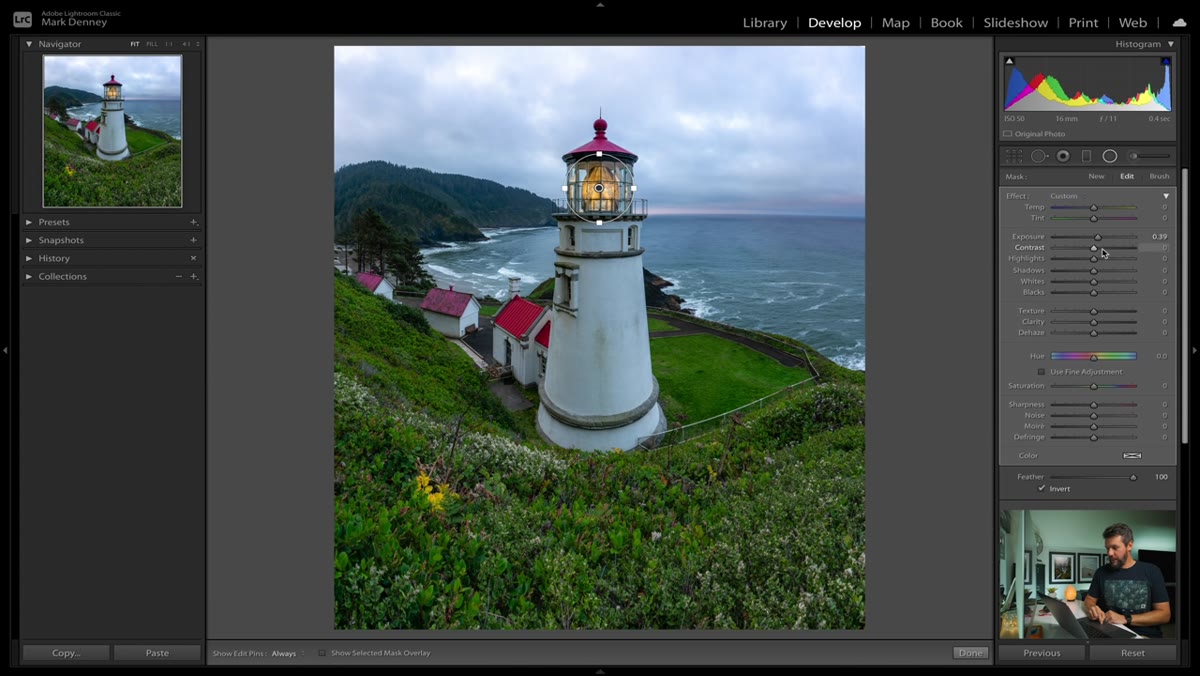 Exposure and highlights increased inside radial filter on lighthouse
Once the radial filter is positioned, Denney pulls up the exposure and lifts the highlights inside the filter. The goal is not dramatic brightening. It’s enough separation from the surrounding areas that the eye is guided toward the subject without being told it’s being guided. Subtle is the right word. He toggles the adjustment on and off several times while dialing it in, which is a habit worth copying. Your eyes adjust to changes quickly, and toggling forces you to see the adjustment fresh each time.
Exposure and highlights increased inside radial filter on lighthouse
Once the radial filter is positioned, Denney pulls up the exposure and lifts the highlights inside the filter. The goal is not dramatic brightening. It’s enough separation from the surrounding areas that the eye is guided toward the subject without being told it’s being guided. Subtle is the right word. He toggles the adjustment on and off several times while dialing it in, which is a habit worth copying. Your eyes adjust to changes quickly, and toggling forces you to see the adjustment fresh each time.
Start with an exposure increase of around a third to half a stop. Add a small highlight boost. Toggle off and on. If you can see the edge of the radial filter in the before-and-after toggle, back off. If the subject looks convincingly lit rather than artificially brightened, you’re in the right range.
Step 4: Use the Radial Filter to Create Dimensional Form on Circular Structures
 Before and after showing lighthouse gaining three-dimensional appearance
This is the step that moves the technique from basic to genuinely useful. Denney points out that the lighthouse looks flat because the visible face of it receives similar tonal treatment across its entire surface. A circular structure in real life catches light on one side and falls into shadow on the other. When a photograph compresses that into a flat JPEG or even a processed raw file, the roundness disappears.
Before and after showing lighthouse gaining three-dimensional appearance
This is the step that moves the technique from basic to genuinely useful. Denney points out that the lighthouse looks flat because the visible face of it receives similar tonal treatment across its entire surface. A circular structure in real life catches light on one side and falls into shadow on the other. When a photograph compresses that into a flat JPEG or even a processed raw file, the roundness disappears.
By placing a radial filter that mimics the shape of the lighthouse and brightening the interior, you’re reintroducing the tonal gradient that makes a cylinder look like a cylinder. The filter’s feathered falloff does the heavy lifting. It creates the impression that light is wrapping around the structure rather than hitting it uniformly. Denney calls this creating a three-dimensional feel, and once you see it work on a lighthouse, you’ll start applying it to boulders, tree trunks, and any other rounded form in your images.
Step 5: Toggle Before and After Repeatedly to Calibrate Your Eye
 Toggle switch being used to compare before and after radial adjustment
Denney toggles the adjustment on and off more than once during this section, and it’s not just for the benefit of viewers at home. It’s calibration. Your visual system adapts to what’s in front of it within seconds. If you spend five minutes nudging a slider, you lose your reference point. Toggling resets it.
Toggle switch being used to compare before and after radial adjustment
Denney toggles the adjustment on and off more than once during this section, and it’s not just for the benefit of viewers at home. It’s calibration. Your visual system adapts to what’s in front of it within seconds. If you spend five minutes nudging a slider, you lose your reference point. Toggling resets it.
Get in the habit of toggling every local adjustment before you move on to the next one. Do it three times minimum. If the adjustment still looks right after three passes, commit and move on. If something feels slightly off on the third toggle, trust that feeling and dial back.
A Note From My Own Experience With Local Adjustments
I’ve been using radial filters for dodging and burning for years, but Denney’s application to circular structures specifically made me revisit some older files. I found a series of images from a sea stack shoot along the Oregon coast where I’d done solid global work and then just stopped. The rocks were flat. They’re round. I went back and placed radial filters on three of them, brightened the faces catching the light, and the images went from competent to something I’d actually print. Twenty minutes of work on files I’d considered finished.
The deeper principle is this: every object in your image has a form, and that form exists in three dimensions even if your sensor captures only two. Local adjustments, used with intention, are how you give that form back.
The single most important takeaway from this tutorial is the distinction Denney draws early on: the move from global-only editing to a workflow that integrates local adjustments is a sign of genuine progression, not just added complexity. Global adjustments are necessary. They’re not sufficient. If your current workflow stops at the basic panel, this tutorial is a direct invitation to go further.
Watch the full tutorial on YouTube and see all six techniques demonstrated on a real image, including the sections Denney covers beyond local adjustments. It’s worth the full watch.
Comments
Leave a Comment