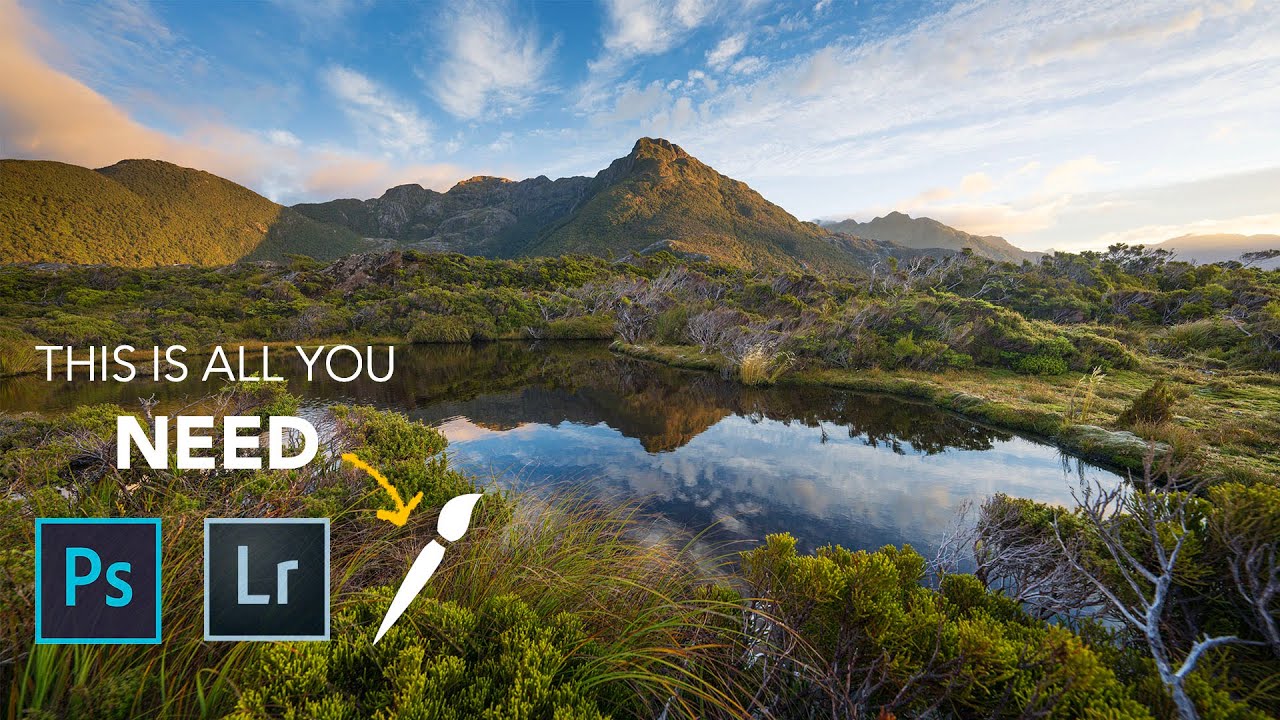
There’s a moment every photographer hits, usually sometime in the second year, where the gear starts feeling comfortable and then the bottom drops out. You’ve got good RAW files sitting on your hard drive and no real idea what to do with them. I remember that feeling clearly, even after two decades of doing this professionally. The technical side of post-processing has a way of looking far more complicated than it actually is. Most of what moves the needle in a landscape edit comes down to one deceptively simple idea: the eye follows light. Everything else is details.
I came across this tutorial from William Patino recently, and what struck me was how cleanly he strips the process down to that core principle. Watch the full tutorial on YouTube before or after reading this breakdown. He works in Adobe Camera Raw, but if you’re a Lightroom shooter, the panel layout is nearly identical, so everything here translates directly.
The central argument Patino makes is one I’ve been telling workshop students for years: your composition directs the eye in the field, and your processing continues that same job at the desk. You’re not decorating the image. You’re finishing the work of leading a viewer somewhere specific. With that framing in place, here’s how the workflow unfolds.
Step 1: Apply a Camera Profile Before Touching Anything Else
 Landscape profile applied in Camera Raw profile panel
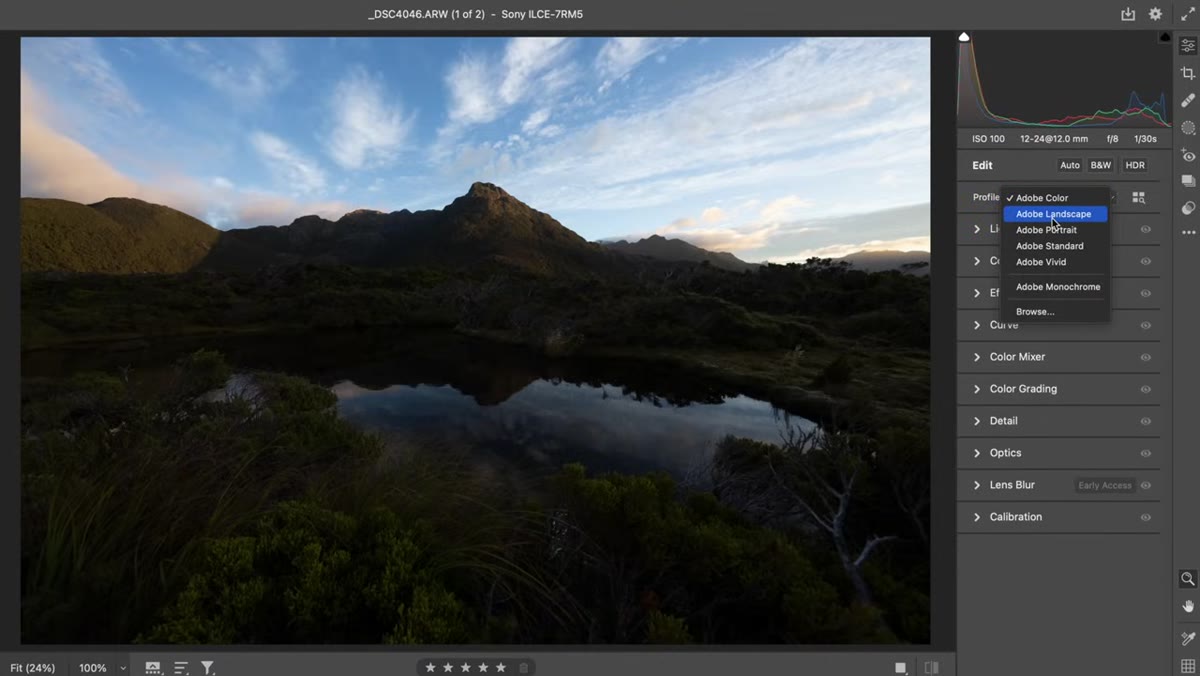
Before adjusting a single slider, Patino applies the Landscape camera profile to the RAW file. In Camera Raw, you find this under the Camera Calibration panel or the Profile section at the top of the Basic panel, depending on your version. In Lightroom, it’s in the same spot under Profile. Selecting “Landscape” gives the image an immediate boost in color punch and makes a minor exposure nudge automatically. Think of it as calibrating your starting point rather than working from a flat, neutral base. It doesn’t do your editing for you, but it removes some of the visual mud that makes early adjustments harder to judge.
Landscape profile applied in Camera Raw profile panel
Before adjusting a single slider, Patino applies the Landscape camera profile to the RAW file. In Camera Raw, you find this under the Camera Calibration panel or the Profile section at the top of the Basic panel, depending on your version. In Lightroom, it’s in the same spot under Profile. Selecting “Landscape” gives the image an immediate boost in color punch and makes a minor exposure nudge automatically. Think of it as calibrating your starting point rather than working from a flat, neutral base. It doesn’t do your editing for you, but it removes some of the visual mud that makes early adjustments harder to judge.
Step 2: Raise Overall Exposure to Reveal Tonal Range
 Exposure slider being raised in the Basic panel
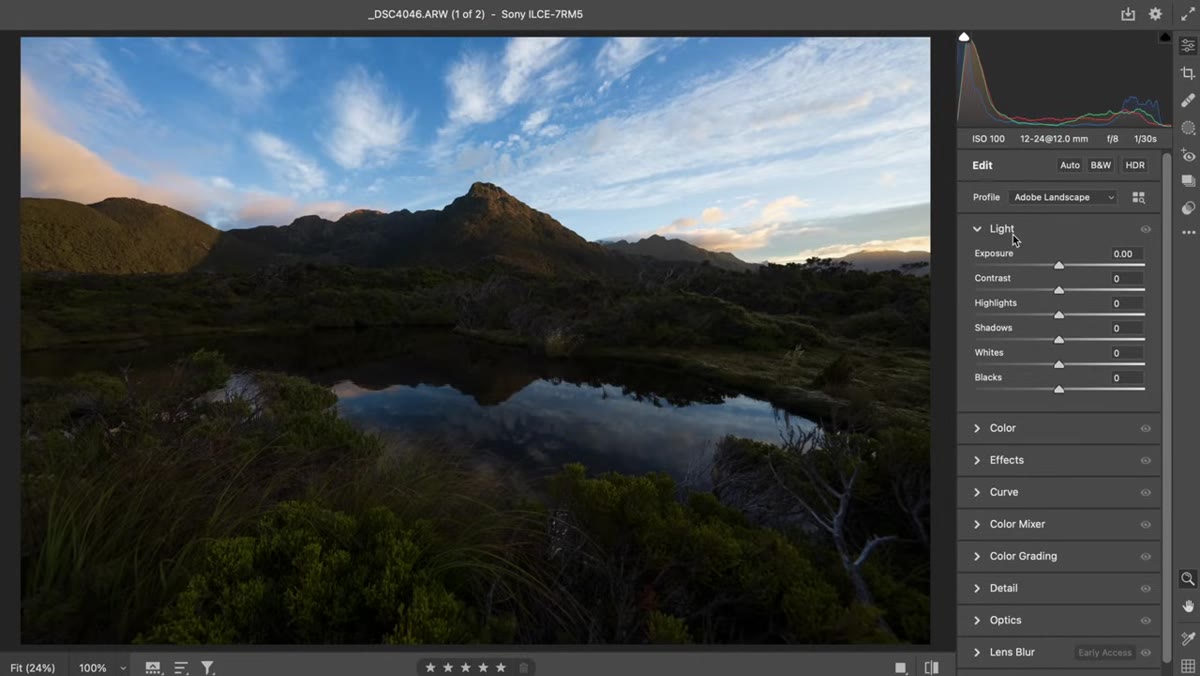
Once the profile is set, Patino lifts the global Exposure slider. The reasoning matters here. He intentionally shot to protect the highlights in the field, keeping the sky from clipping, which means the shadows and midtones came out darker than the final image needs to be. Raising exposure brings every tone up together, which preserves the natural tonal relationships across the frame and looks more realistic than trying to lift only the dark areas. The goal at this stage isn’t a finished image. It’s a properly illuminated starting canvas. Raise exposure until the midtones look healthy, even if the sky starts to feel a touch bright.
Exposure slider being raised in the Basic panel
Once the profile is set, Patino lifts the global Exposure slider. The reasoning matters here. He intentionally shot to protect the highlights in the field, keeping the sky from clipping, which means the shadows and midtones came out darker than the final image needs to be. Raising exposure brings every tone up together, which preserves the natural tonal relationships across the frame and looks more realistic than trying to lift only the dark areas. The goal at this stage isn’t a finished image. It’s a properly illuminated starting canvas. Raise exposure until the midtones look healthy, even if the sky starts to feel a touch bright.
Step 3: Pull Highlights Down, But Not Too Far
 Highlights slider being pulled down in Basic panel
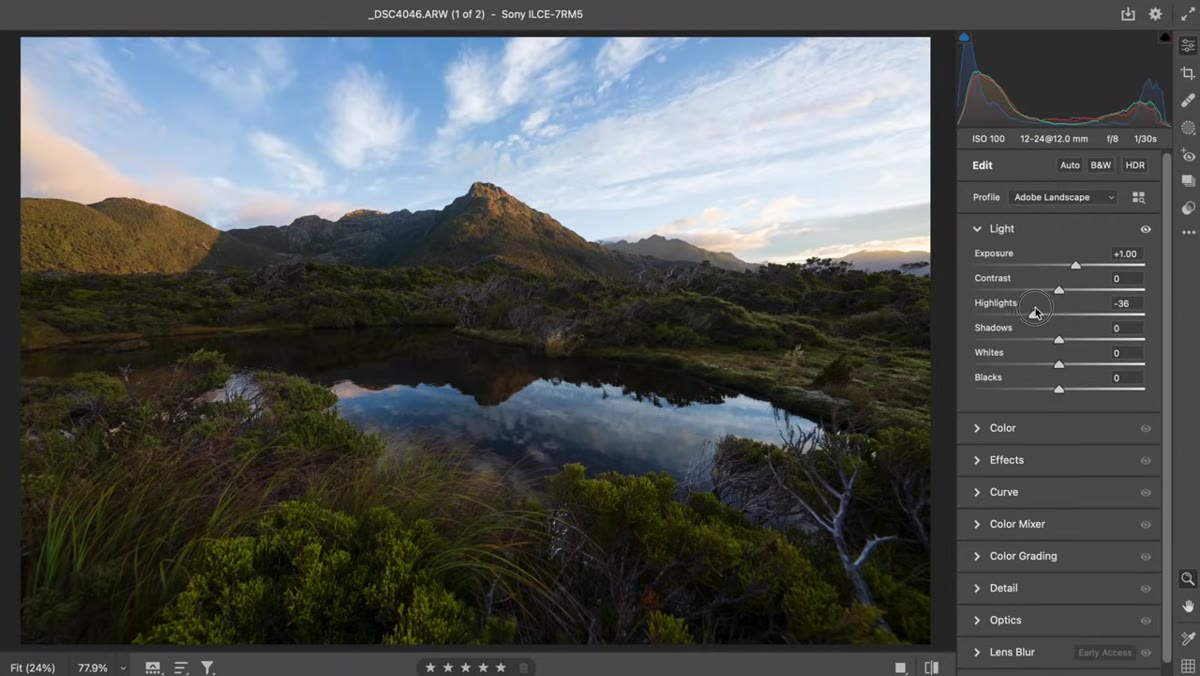
With exposure raised, the sky may push into uncomfortable brightness. Dropping the Highlights slider reins that in. The important caveat Patino raises here is one I’ve watched people ignore repeatedly: the Highlights slider affects the entire image globally, not just the sky. Reflections, bright water, sunlit rock faces, anything with luminance in the upper range will be affected equally. If you drag highlights down hard, you flatten out foreground detail and kill the sense of depth. Bring it down enough to recover sky structure, then stop. Subtle tonal separation in the foreground is part of what makes a landscape feel three-dimensional.
Highlights slider being pulled down in Basic panel
With exposure raised, the sky may push into uncomfortable brightness. Dropping the Highlights slider reins that in. The important caveat Patino raises here is one I’ve watched people ignore repeatedly: the Highlights slider affects the entire image globally, not just the sky. Reflections, bright water, sunlit rock faces, anything with luminance in the upper range will be affected equally. If you drag highlights down hard, you flatten out foreground detail and kill the sense of depth. Bring it down enough to recover sky structure, then stop. Subtle tonal separation in the foreground is part of what makes a landscape feel three-dimensional.
Step 4: Lift Shadows Gently to Open the Foreground
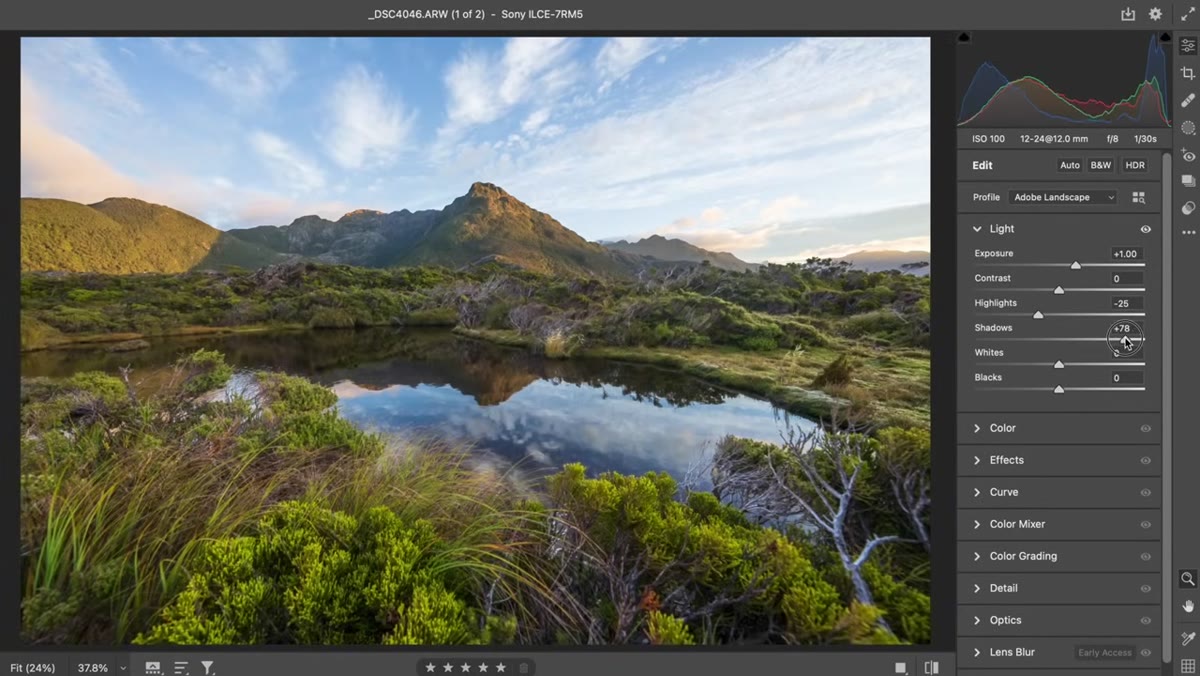 Shadows slider raised slightly in Basic panel
Raising shadows is tempting to overdo, especially when you’re working on a dark foreground and you can see detail hiding in there. Patino’s guidance is to go easy, and the reason connects directly back to the eye-leading principle. If your foreground becomes too bright, the viewer’s attention parks there and never travels deeper into the frame toward your intended subject. Darkness functions like a visual ramp. A foreground that remains slightly cooler and darker than the background creates a natural gradient the eye follows inward. Lift shadows enough to show texture and prevent pure black crushing, then back off before it starts competing with your main subject.
Shadows slider raised slightly in Basic panel
Raising shadows is tempting to overdo, especially when you’re working on a dark foreground and you can see detail hiding in there. Patino’s guidance is to go easy, and the reason connects directly back to the eye-leading principle. If your foreground becomes too bright, the viewer’s attention parks there and never travels deeper into the frame toward your intended subject. Darkness functions like a visual ramp. A foreground that remains slightly cooler and darker than the background creates a natural gradient the eye follows inward. Lift shadows enough to show texture and prevent pure black crushing, then back off before it starts competing with your main subject.
Step 5: Use the Adjustment Brush to Darken the Sky Locally
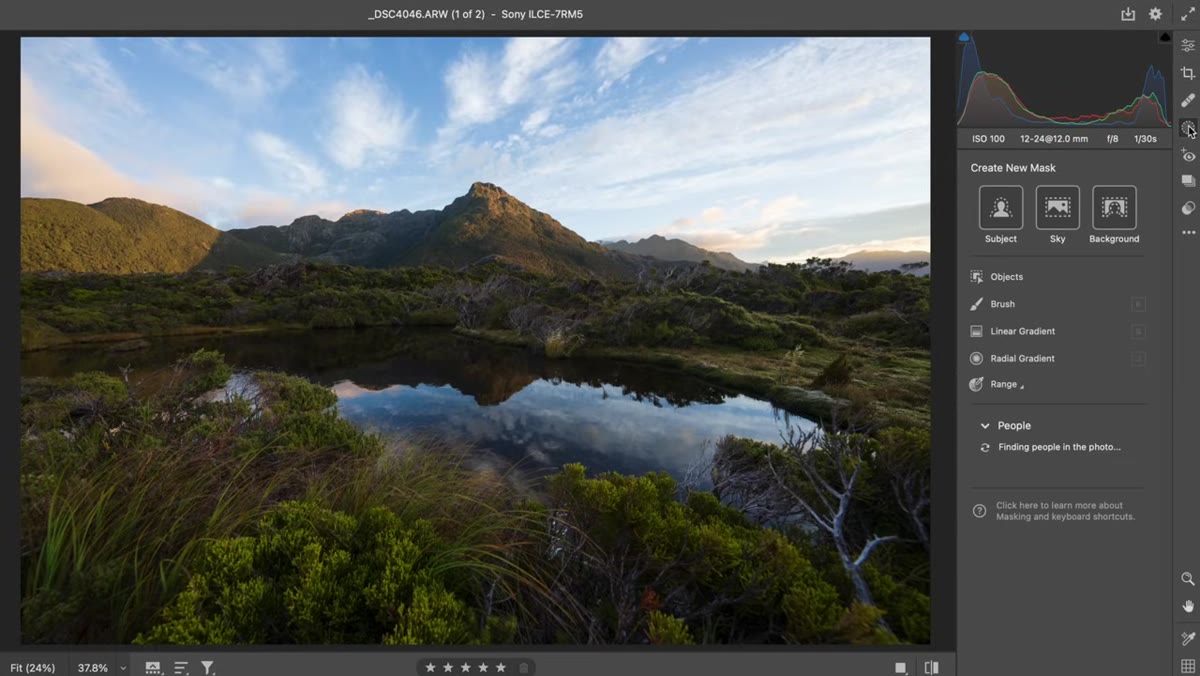 Adjustment brush selected in masking panel, sky being painted
This is where the editing shifts from global corrections to intentional sculpting. Patino opens the Masking panel, selects the Brush tool (keyboard shortcut K), and sets feather, flow, and density all to 100. That combination produces a brush that’s soft at the edges but applies its full effect immediately on each stroke. He paints across the upper sky and pulls down the exposure in that zone specifically. The purpose is directional. A darker upper frame acts like a frame within the frame, pushing the viewer’s attention downward and inward toward the brighter center of the image where the mountain lives. This is dodging and burning in its most practical form. You’re not retouching. You’re redirecting.
Adjustment brush selected in masking panel, sky being painted
This is where the editing shifts from global corrections to intentional sculpting. Patino opens the Masking panel, selects the Brush tool (keyboard shortcut K), and sets feather, flow, and density all to 100. That combination produces a brush that’s soft at the edges but applies its full effect immediately on each stroke. He paints across the upper sky and pulls down the exposure in that zone specifically. The purpose is directional. A darker upper frame acts like a frame within the frame, pushing the viewer’s attention downward and inward toward the brighter center of the image where the mountain lives. This is dodging and burning in its most practical form. You’re not retouching. You’re redirecting.
A Note from My Own Practice: Protect the Journey, Not Just the Destination
Patino’s framework is built around a single subject destination, and that’s exactly right for the images he’s demonstrating. Where I’d add a layer of consideration, particularly for wide valley or coastal compositions with a long foreground lead, is thinking about the visual journey as much as the endpoint.
I spent a long time obsessing over making my main subjects pop and neglected the middle ground. My mentor, a photographer I worked with in my early thirties who had been shooting the Cascades since before I owned a camera, once told me that the viewer needs somewhere to walk before they can arrive. I’ve thought about that on every edit since. When you’re working your adjustment brush, consider painting subtle brightness increases not just at the destination, but along the natural path the eye travels to get there. The result is an image that feels like it has distance, like the viewer moved through it rather than just landed at the subject.
The single idea worth taking from this entire workflow is that editing is not about making an image look good in some general sense. It’s about controlling where a viewer’s eye goes, in the same way your composition did when you were standing in the field. Brightness draws attention. Darkness redirects it. Every slider, every brush stroke, is either working toward that goal or undermining it.
Watch the full tutorial on YouTube to see Patino work through both RAW files in real time. Watching someone make deliberate, purposeful adjustments rather than chasing sliders is itself a lesson in how to approach the process.
Comments
Leave a Comment