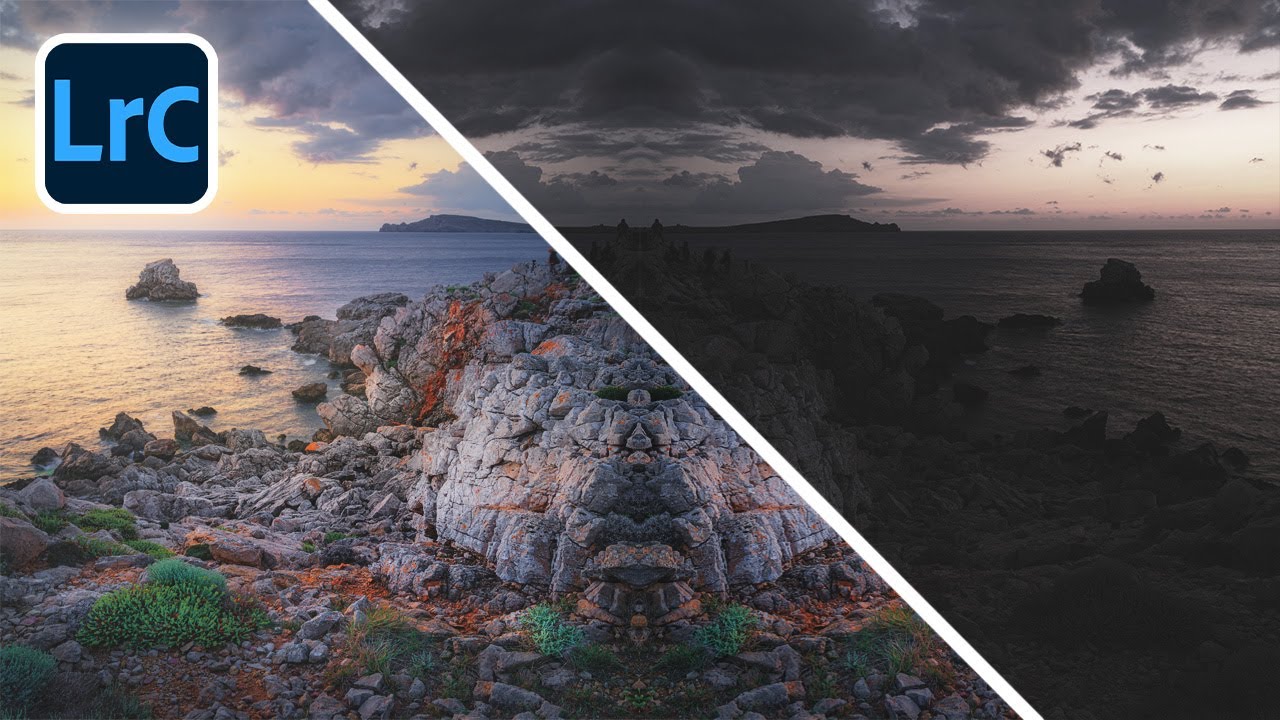
There’s a particular kind of frustration that comes with getting everything right in the field — the composition, the timing, the angle of first light skimming across the rocks — and then sitting down at your desk and watching the edit fall flat. The light that moved you when you were standing there just doesn’t translate. I’ve stood in enough pre-dawn darkness to know that the camera almost never captures directional light the way your eye reads it. The physics of how a sensor records a scene and how human vision interprets that same scene are just different. That gap is where editing lives, and it’s where most outdoor photographers leave enormous potential untapped.
I’ve been experimenting with radial filters in Lightroom for years, but it wasn’t until I watched this tutorial by Mark Denney, filmed during a workshop in Menorca, Spain, that I understood how to use them systematically rather than intuitively. Watch the full tutorial on YouTube before or after reading this. The photograph he works through is a blue hour coastal scene, sun still below the horizon, soft directional light catching rocks and low scrubby plants. It looks, in the before state, like a competent but flat image. What he does to it is a clinic in how light behaves and how to make a digital file reflect that behavior.
The core idea he’s working from is one I now consider a guiding principle: photograph the light, not the location. Build your composition around where the interesting light is actually falling, rather than planting yourself at a scenic spot and hoping the light arrives. It sounds simple. It changes everything about how you move through a location.
Step 1: Set the Global Tone with Clarity, Texture, and Dehaze
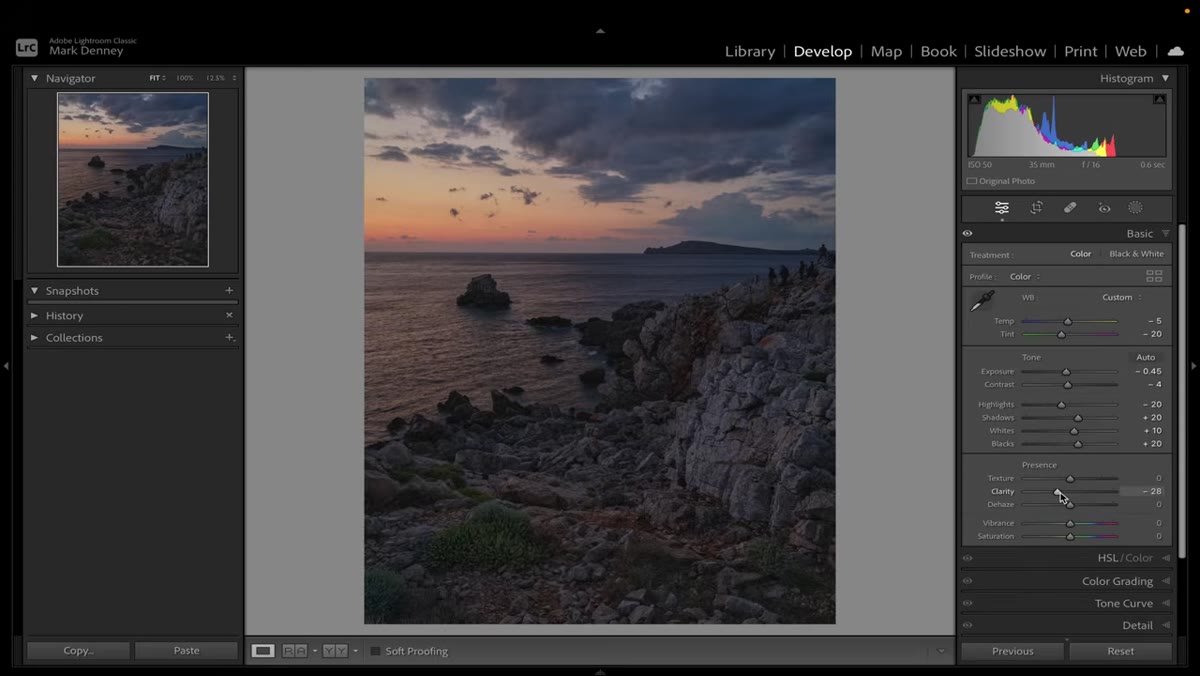 Clarity, Texture, and Dehaze sliders being adjusted in the Basics panel
Before touching any local adjustments, Denney dials in a specific look at the global level that sets up everything else. He pulls Clarity down slightly to soften the coarser details in the scene, which reduces the over-sharpened, HDR-adjacent quality that too much clarity can introduce. At the same time, he nudges Texture upward, which works on finer detail structure without the aggressive edge contrast of clarity. Then he reduces Dehaze slightly below zero, which adds a gentle atmospheric haze back into the scene rather than stripping it away.
Clarity, Texture, and Dehaze sliders being adjusted in the Basics panel
Before touching any local adjustments, Denney dials in a specific look at the global level that sets up everything else. He pulls Clarity down slightly to soften the coarser details in the scene, which reduces the over-sharpened, HDR-adjacent quality that too much clarity can introduce. At the same time, he nudges Texture upward, which works on finer detail structure without the aggressive edge contrast of clarity. Then he reduces Dehaze slightly below zero, which adds a gentle atmospheric haze back into the scene rather than stripping it away.
The result is an image with more glow and softness, something closer to how early morning light actually feels to the eye. It’s counterintuitive if you’ve been trained to push clarity and dehaze upward, but try it on your next blue hour or golden hour file. The difference is real.
Step 2: Start Your Radial Filters at the Light Source
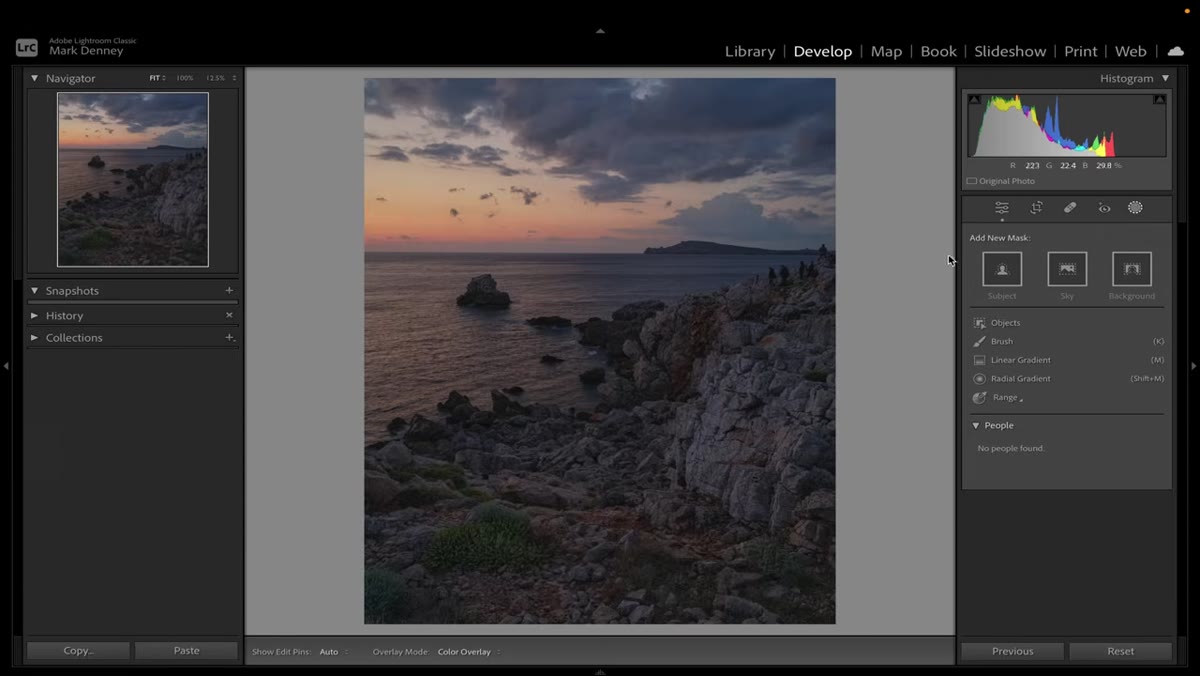 Large radial filter being drawn across the image from the direction of the rising sun
Denney’s organizing principle for radial filters is to begin where the most light originates and work outward from there. In this image, that’s the area of the sky where the sun is cresting the horizon. He creates a large radial gradient, drawing it across a wide portion of the image, not just a tight oval around a single element. Think of it less like a spotlight and more like replicating the broad sweep of early light across a coastal landscape.
Large radial filter being drawn across the image from the direction of the rising sun
Denney’s organizing principle for radial filters is to begin where the most light originates and work outward from there. In this image, that’s the area of the sky where the sun is cresting the horizon. He creates a large radial gradient, drawing it across a wide portion of the image, not just a tight oval around a single element. Think of it less like a spotlight and more like replicating the broad sweep of early light across a coastal landscape.
He also angles the ellipse to match the direction light was actually traveling through the scene. This is the detail most people miss. A perfectly horizontal or vertical radial filter looks artificial. Rotate it to follow the logic of the light and it disappears into the image as a natural quality rather than sitting on top of it like a layer.
Step 3: Increase Exposure Inside the Filter, Then Pull Highlights
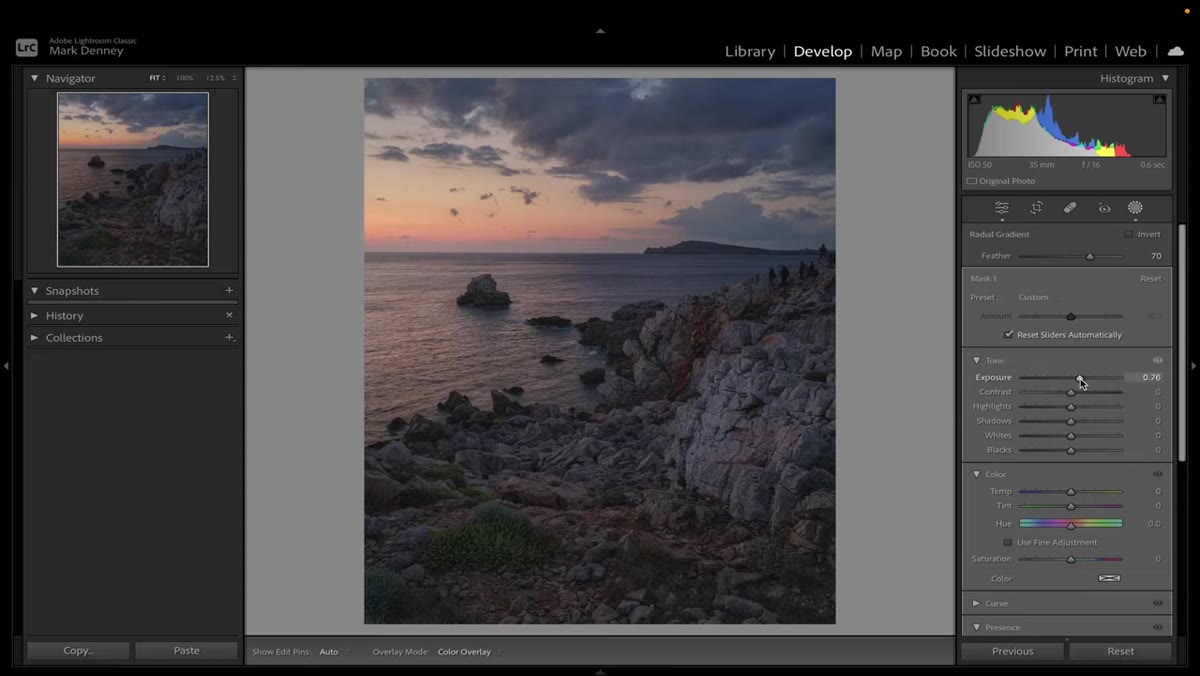 Exposure slider raised inside radial filter, Highlights being reduced to preserve detail
Once the radial filter is in position, Denney raises the exposure meaningfully inside that zone. This is where the image starts to breathe. The area the sun was illuminating becomes brighter, more present, more alive. But he immediately follows that exposure lift by pulling the highlights back down to preserve detail in the brighter areas of the rock and sky within that zone.
Exposure slider raised inside radial filter, Highlights being reduced to preserve detail
Once the radial filter is in position, Denney raises the exposure meaningfully inside that zone. This is where the image starts to breathe. The area the sun was illuminating becomes brighter, more present, more alive. But he immediately follows that exposure lift by pulling the highlights back down to preserve detail in the brighter areas of the rock and sky within that zone.
This pairing is worth memorizing: raise exposure for presence, lower highlights for detail retention. Used together, they create luminosity without blowout. On my own edits, I often add a slight warmth shift inside the radial filter as well, because early light carries that quality and the sensor rarely captures enough of it.
Step 4: Build Additional Radial Filters for Secondary Light Areas
 A second smaller radial filter being placed over foreground rocks catching directional light
The technique scales. Once the primary radial filter handles the dominant light source, Denney creates additional smaller filters targeting secondary areas where light was touching the scene. In this image, that includes the foreground rocks and the low vegetation catching sidelight. Each gets its own radial gradient, sized and positioned to match what the light was actually doing.
A second smaller radial filter being placed over foreground rocks catching directional light
The technique scales. Once the primary radial filter handles the dominant light source, Denney creates additional smaller filters targeting secondary areas where light was touching the scene. In this image, that includes the foreground rocks and the low vegetation catching sidelight. Each gets its own radial gradient, sized and positioned to match what the light was actually doing.
This is where editing becomes more like painting and less like processing. You’re not applying global corrections. You’re working across the frame the way a lighting director works a set, thinking about which surfaces were lit, at what intensity, and from which angle. Keep each additional filter subtle. The goal is cumulative, not dramatic.
Step 5: Work From Large to Small, Not Random to Random
 Multiple radial filters visible in the right panel, organized from largest to smallest coverage
One procedural point Denney makes that I think is easy to overlook: he deliberately works from the largest, broadest light areas down to the smallest and most specific. This keeps the edit coherent. If you jump around the frame placing radial filters without that organizing logic, you can end up with competing light sources that feel contradictory, like the image was lit from three different directions at once.
Multiple radial filters visible in the right panel, organized from largest to smallest coverage
One procedural point Denney makes that I think is easy to overlook: he deliberately works from the largest, broadest light areas down to the smallest and most specific. This keeps the edit coherent. If you jump around the frame placing radial filters without that organizing logic, you can end up with competing light sources that feel contradictory, like the image was lit from three different directions at once.
Establishing the broad light environment first, then refining toward specifics, mirrors how light actually works in the natural world. The sun illuminates the whole scene before it catches any single rock face. Edit in that order and the result tends to hold together.
A Field Note on Planning the Edit Before You Shoot
One habit Denney mentions that I want to reinforce from my own two decades of doing this: he was already thinking about the radial filter approach while he was standing at that coastal location, watching that blue hour light. He knew the light was softer than ideal in the moment and that he could reinforce it in post. That kind of pre-visualization changes how you shoot.
I try to ask myself, while I’m still behind the camera: where is the light coming from, what is it touching, and how would I describe that to someone who wasn’t there? If I can answer those three questions, I know enough to reconstruct that light in Lightroom later. If I can’t answer them, I slow down and look harder before I press the shutter. The edit starts in the field, not at the desk.
The single most transferable idea from this tutorial is that directional light can be rebuilt in post, but only if you understand where it was coming from and have the patience to work across the frame systematically. Radial filters aren’t a shortcut to a good image. They’re a tool for honoring the light that was actually there. Use them with that intention and the results will show it.
Watch the full tutorial on YouTube to see Denney work through the complete edit on this Menorca image. Watching the sliders move in real time adds context that words can only approximate.
Comments (3)
Solid advice. Especially the part about taking your time with it.
Shared this with my photography group. Everyone loved it.
Couldn't agree more. I've seen this make a huge difference in workflows work specifically.
Leave a Comment