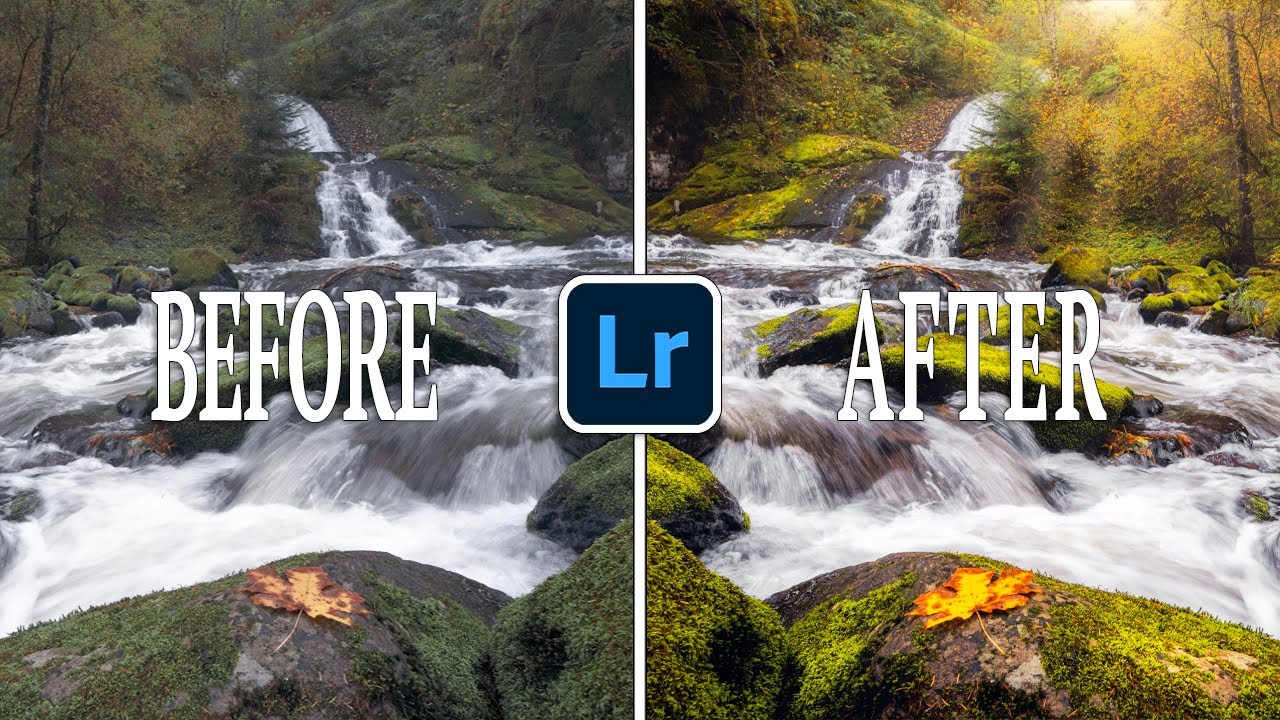
There’s a particular kind of quiet frustration that comes from driving to a location before sunrise, setting up in the dark, waiting through the cold, and then watching the light just… not show up. The sky goes flat. The sun stays buried. You shoot anyway, because you’re already there and the composition is good, and you tell yourself something in post. After twenty years of doing this for a living, I’ve made peace with the fact that maybe half my shoots end that way. The question is what you do with the files you bring home.
That’s exactly what drew me to this tutorial from Mark Denney. Watch the full tutorial on YouTube – it’s worth your time before or after reading this breakdown. Mark walks through five specific Lightroom techniques using a real RAW file that, frankly, looks like what most of my flat-light shots look like straight out of the camera. His final version is striking. The gap between the two is the point of the whole video, and each technique he uses to close that gap is something you can apply to your own work today.
What I appreciate most about his approach is that he isn’t fabricating a scene that was never there. He’s reconstructing what was almost there – the light that was hinting at the edge of the frame, the warmth that was real for thirty seconds before the cloud moved. That distinction matters to me. I’m not interested in making a photograph look like a painting. I am interested in making it look like what I actually saw standing in that field.
Step 1: Do a Clean Base Edit First
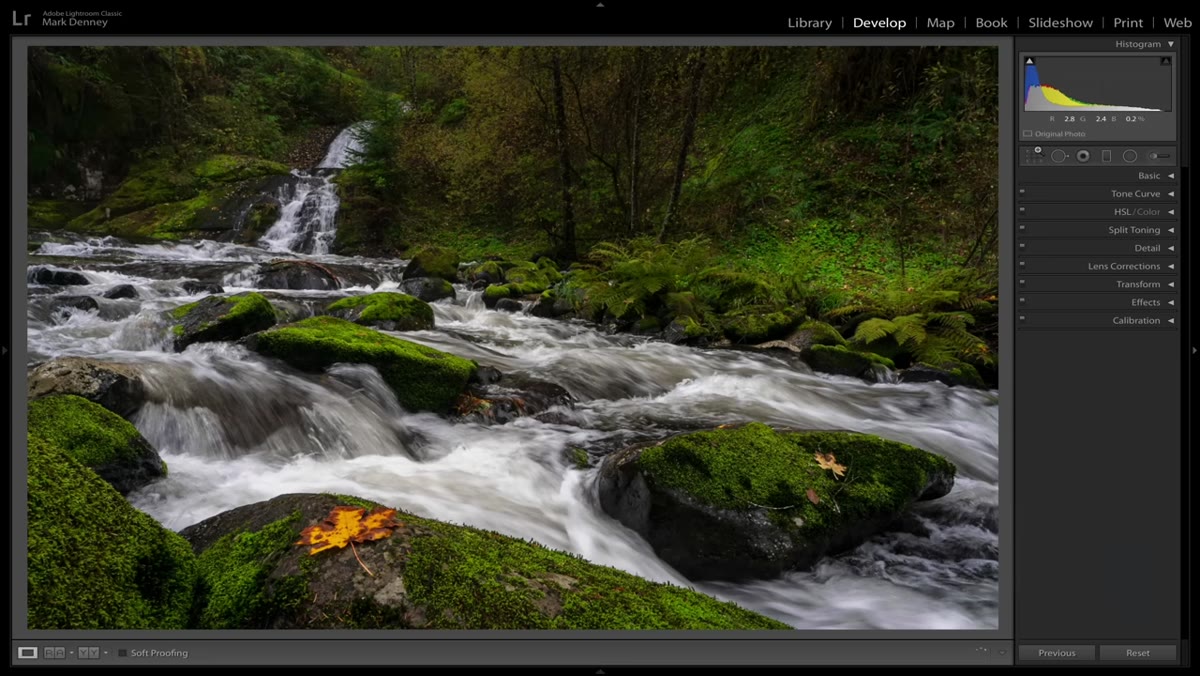 RAW file open in Lightroom base panel with sliders adjusted
Before reaching for any of the creative tools, Mark does a solid foundational edit in the Basic panel – exposure, contrast, highlights, shadows, whites, blacks. He moves through it quickly in the video, but don’t mistake speed for unimportance. This baseline edit is the substrate everything else gets built on. If your exposure is still wrong or your shadows are muddy when you start adding local adjustments, those problems compound rather than disappear. I always tell workshop students: get the global edit as close as you can first, then use local tools to push the image the rest of the way.
Step 2: Create a Light Source with a Radial Filter
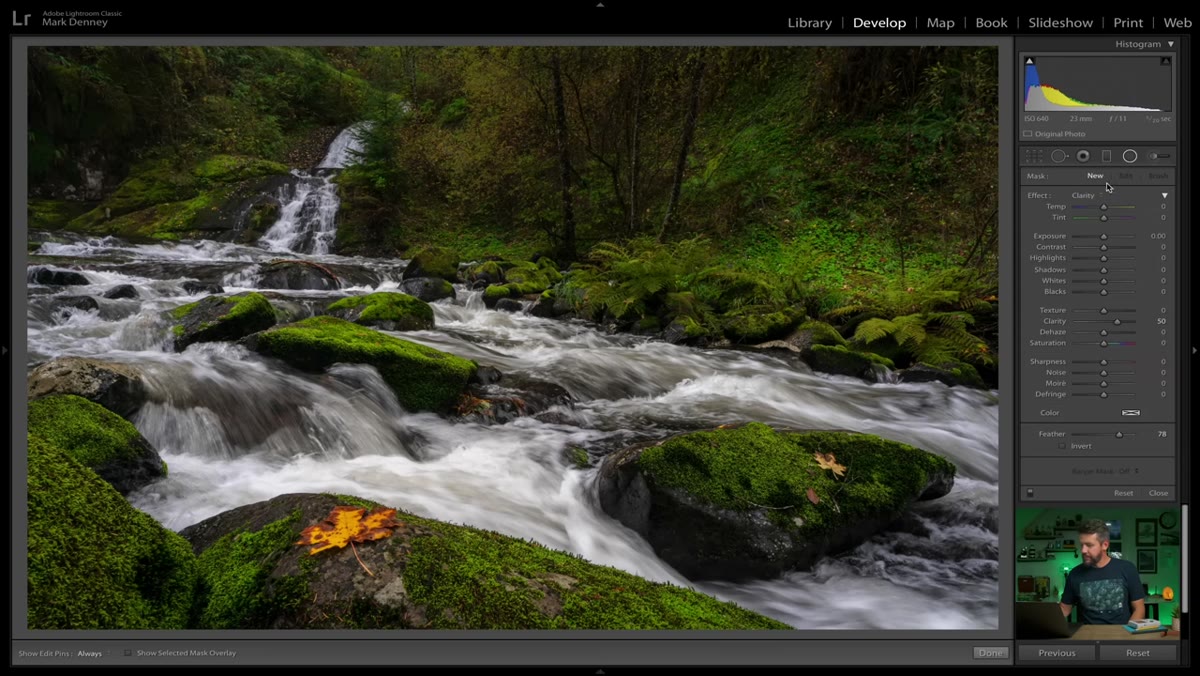 Radial filter drawn over bright area of the sky
This is the technique I found most immediately useful. Mark places a Radial Filter over the area of the frame where the actual sun was positioned during the shoot – the real light source, even if it wasn’t visible in the final capture. He inverts the mask so the effect applies inside the circle rather than outside, then raises the exposure modestly within that region. The key move is keeping the feathering high so the transition is gradual and natural. A hard-edged circle of brightness looks like a mistake. A soft, wide radial that bleeds gently into the surrounding sky looks like light.
He also brings the clarity down slightly inside the filter and adds a touch of negative dehaze. That combination softens the area, introducing just enough diffusion to suggest light scattering through atmosphere. Then he nudges the temperature warmer. Sunlight is warm. If your radial filter produces a bright but neutral-toned glow, it won’t read as sun – it’ll read as a blown highlight. The warmth is what sells it. Toggle the filter on and off a few times as you work. Your eye adjusts fast, and the before-and-after comparison keeps you honest about how far you’re pushing it.
Step 3: Use Dehaze to Build Atmosphere Selectively
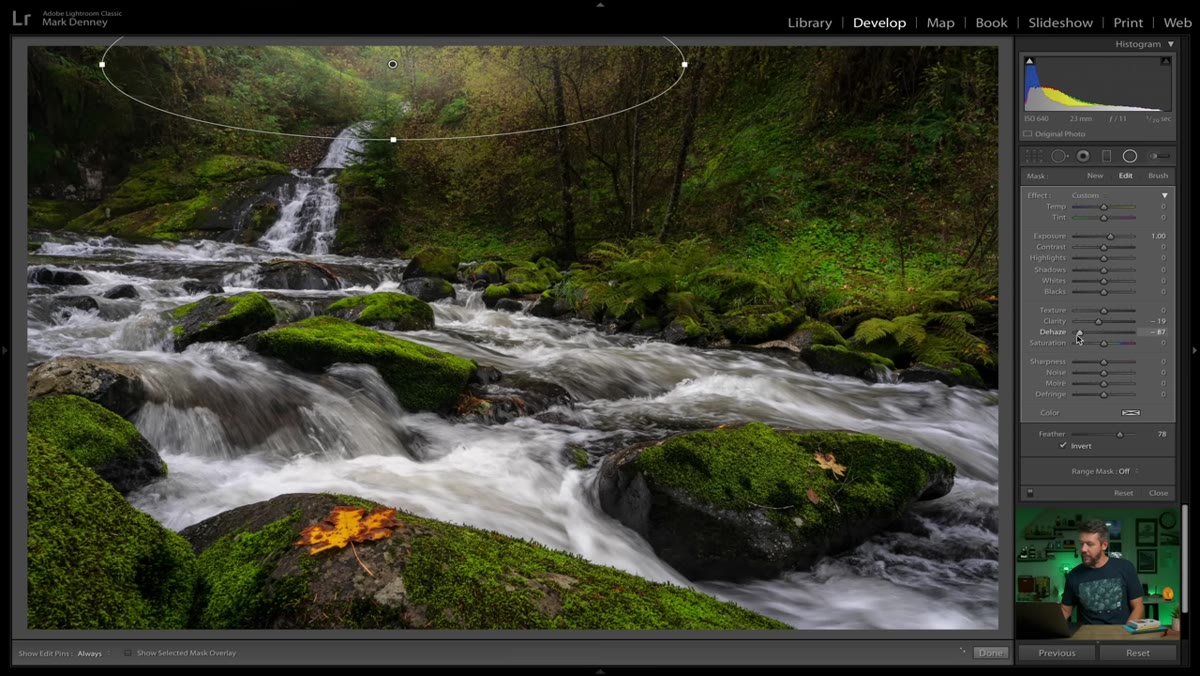 Radial filter settings panel showing negative dehaze value
Mark uses negative dehaze – not the positive direction most people reach for – as a targeted tool inside local adjustments. Positive dehaze cuts through haze and increases contrast and saturation aggressively. Negative dehaze does the opposite: it softens, adds a slight veiling effect, and reduces the micro-contrast in a region. Combined with reduced clarity, it mimics the way real light diffuses when it passes through moisture or particles in the air. The effect is subtle when used at low values, which is exactly where it should stay. I’ve seen photographers overdo this and end up with something that looks fogged rather than luminous. Start around -20 and judge from there.
Step 4: Adjust Color Temperature Within Local Masks
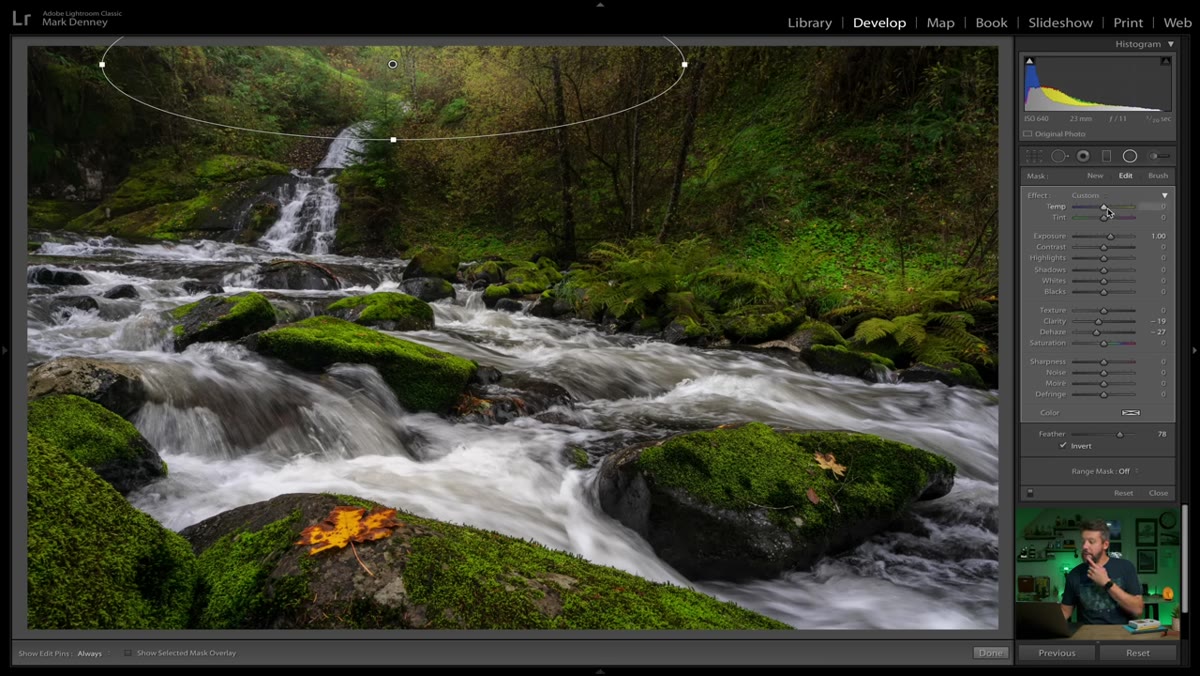 Temperature slider being raised inside radial filter adjustment
The temperature slider inside a local adjustment mask is something a lot of photographers forget exists. Most people adjust white balance globally in the Basic panel and leave it there. But light isn’t uniform across a scene. The area catching direct sun is warmer than the shadowed foreground. By using the temperature control inside your Radial Filter or other local masks, you can build that variation back into the image. Mark warms the area around his light source while leaving the rest of the image at a cooler, more neutral temperature. The result feels dimensionally real – warm light hitting one part of the frame, cooler tone everywhere else. That contrast is part of what makes golden hour light feel so compelling in the first place.
Step 5: Evaluate with Before-and-After Toggles Throughout
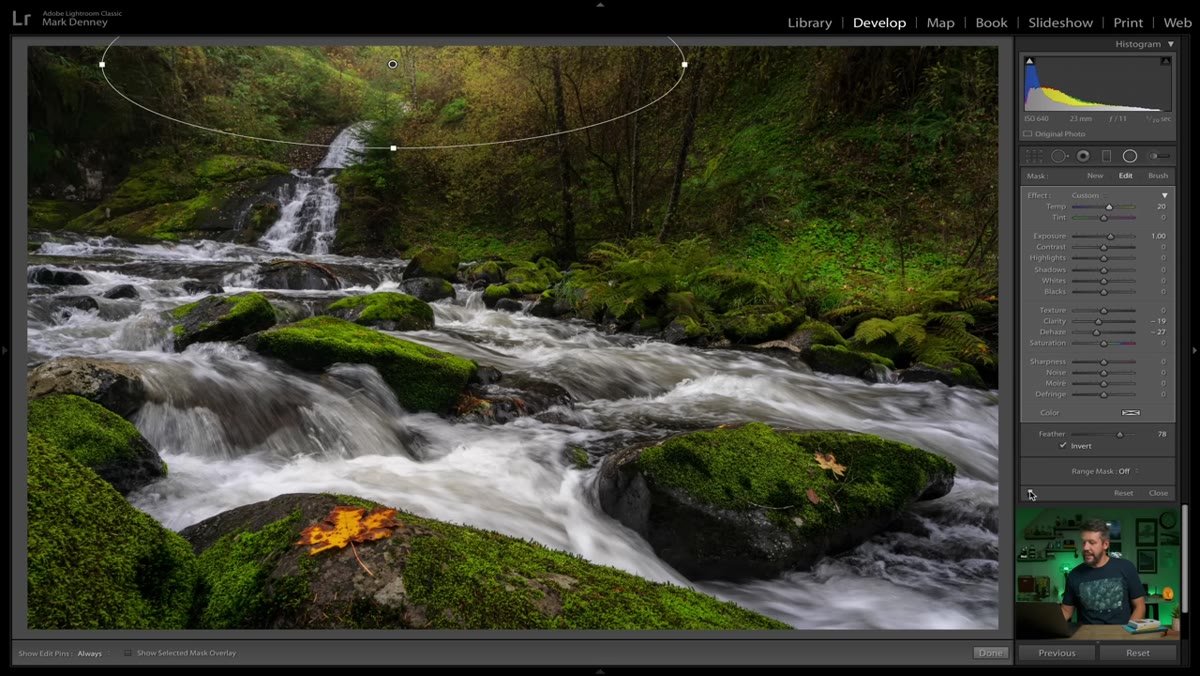 Before and after view toggle showing effect of light source technique
Mark consistently toggles each adjustment on and off as he builds the edit. This isn’t a finishing step – it’s a habit woven into the whole process. I do the same thing, and I’d argue it’s as important as any slider setting. When you stare at an adjusted image long enough, your eye normalizes it and you lose the ability to judge whether you’ve gone too far. Flipping back to the unedited state resets your perception. If the before looks clearly worse and the after looks clearly better, you’re on the right track. If the after just looks different rather than better, something needs reconsidering.
A Note on Restraint from the Field
The temptation with any set of techniques this effective is to apply all five to every image. I’d push back on that. Some photographs just need a clean global edit and nothing else. The light was there, the exposure is right, the job is done. These tools are for the shots where something real was happening that the camera failed to capture – not for manufacturing drama in scenes that were genuinely quiet. I keep a folder of reference images, shots where I was physically present and remember exactly what the light felt like, specifically so I can sanity-check my edits against actual memory. That memory is the guardrail. The techniques are just the tools.
The single most important idea in this tutorial is that post-processing can be an act of documentation rather than fabrication – recovering what was true about a scene rather than inventing what wasn’t. Mark Denney demonstrates that clearly, and the before-and-after on his example image proves the point better than any explanation could.
Watch the full tutorial on YouTube to see all five techniques applied to the same image from start to finish.
Comments
Leave a Comment