
Most of my working life, I point the camera at mountains and rivers. But landscape photography teaches you to read light and location fast, and those same instincts translate directly into portraits the moment you step outside with a person instead of a peak. The problem I kept running into when I started collaborating with other photographers on composite projects and workshop shoots was this: I could find a beautiful location, but I didn’t have a systematic approach to moving a human subject through it efficiently and intentionally.
That changed when I spent an afternoon working through this Jessica Kobeissi tutorial on outdoor portraits. Watch the full tutorial on YouTube. Kobeissi is a fashion and portrait photographer with a sharp eye for simplicity, and watching her work through a real session in real heat, with a real cat wandering into her frames, was more useful than a dozen polished how-to videos filmed in controlled conditions.
What struck me most was how much of her process mirrors what I do before I ever raise the camera in a canyon or along a ridge. She scouts, she reads the light, she moves. She doesn’t wait for perfect. Below is my breakdown of her approach, translated into steps you can take into your next outdoor shoot.
Step 1: Choose a Background That Serves the Subject, Not the Other Way Around
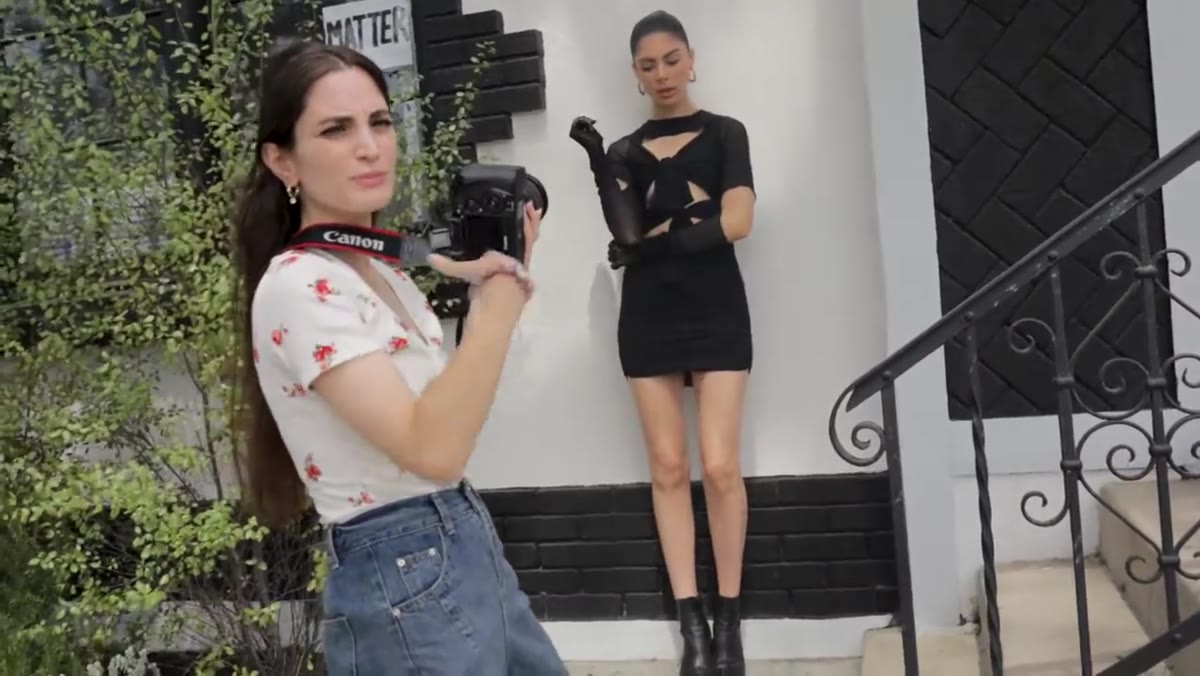 Photographer gestures toward clean white exterior wall
Kobeissi opens the session by drawing attention to a plain white exterior wall as her chosen backdrop. Her reasoning is direct: the background should complement the subject’s wardrobe and makeup without competing with it. A neutral surface gives the eye nowhere else to go. For portrait work, this is the equivalent of what I do when I find a clean sky or a simple treeline to silhouette a subject against. The background is negative space that amplifies the foreground.
Photographer gestures toward clean white exterior wall
Kobeissi opens the session by drawing attention to a plain white exterior wall as her chosen backdrop. Her reasoning is direct: the background should complement the subject’s wardrobe and makeup without competing with it. A neutral surface gives the eye nowhere else to go. For portrait work, this is the equivalent of what I do when I find a clean sky or a simple treeline to silhouette a subject against. The background is negative space that amplifies the foreground.
When you’re scouting, train yourself to look for walls, fences, structures, or natural elements that have one dominant tone or texture. Busy backgrounds split the viewer’s attention. A muted, consistent surface keeps the focus exactly where it belongs.
Step 2: Find the Light Before You Find the Pose
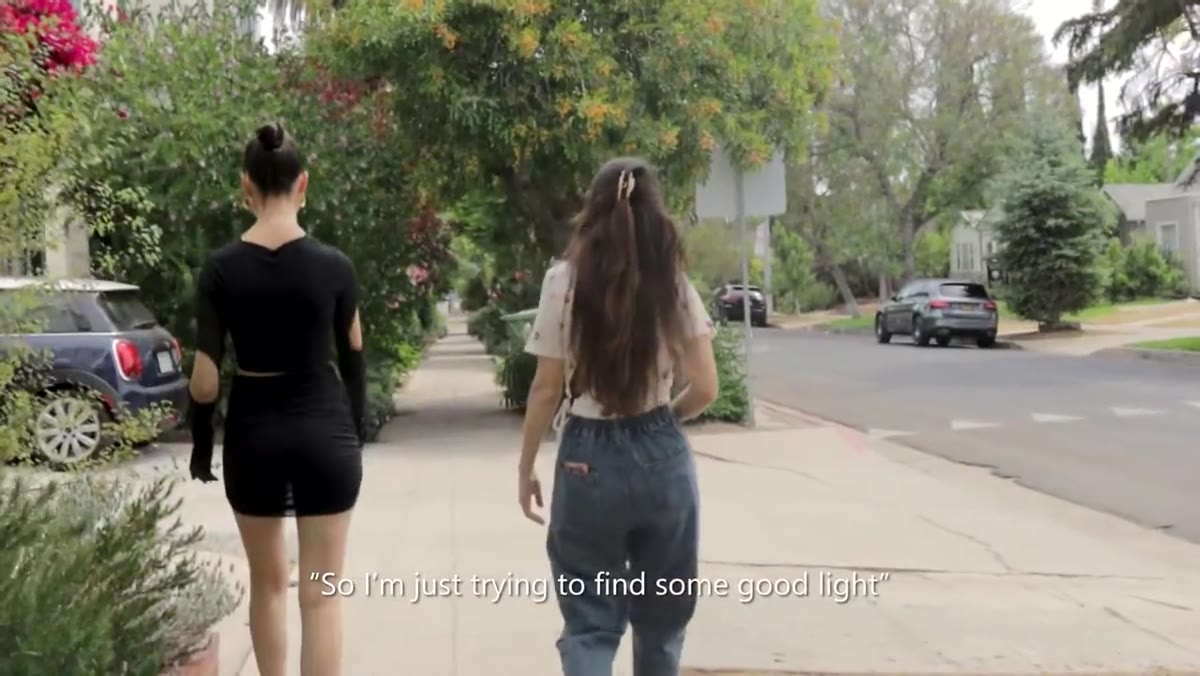 Photographer moves through outdoor space searching for light quality
Before locking into a position, Kobeissi walks the space looking for where the light is good. Not good enough. Good. There’s a real difference, and it’s the difference between a shot that works technically and one that actually sings. She’s not squinting at a meter or checking her phone. She’s physically moving through the environment and reading what the light does to her subject’s face.
Photographer moves through outdoor space searching for light quality
Before locking into a position, Kobeissi walks the space looking for where the light is good. Not good enough. Good. There’s a real difference, and it’s the difference between a shot that works technically and one that actually sings. She’s not squinting at a meter or checking her phone. She’s physically moving through the environment and reading what the light does to her subject’s face.
I do this instinctively for landscapes, working the golden hour and moving until the light falls across a rock face or water surface the way I want it. The same discipline applies to people. Soft, diffused light is your friend outdoors, especially when you’re trying to show detail in skin tone or makeup. Direct midday sun creates harsh shadows under the eyes and nose. Move your subject, or move yourself, until those shadows disappear.
Step 3: Use Close-Ups Intentionally, and Watch Your Lens Choice
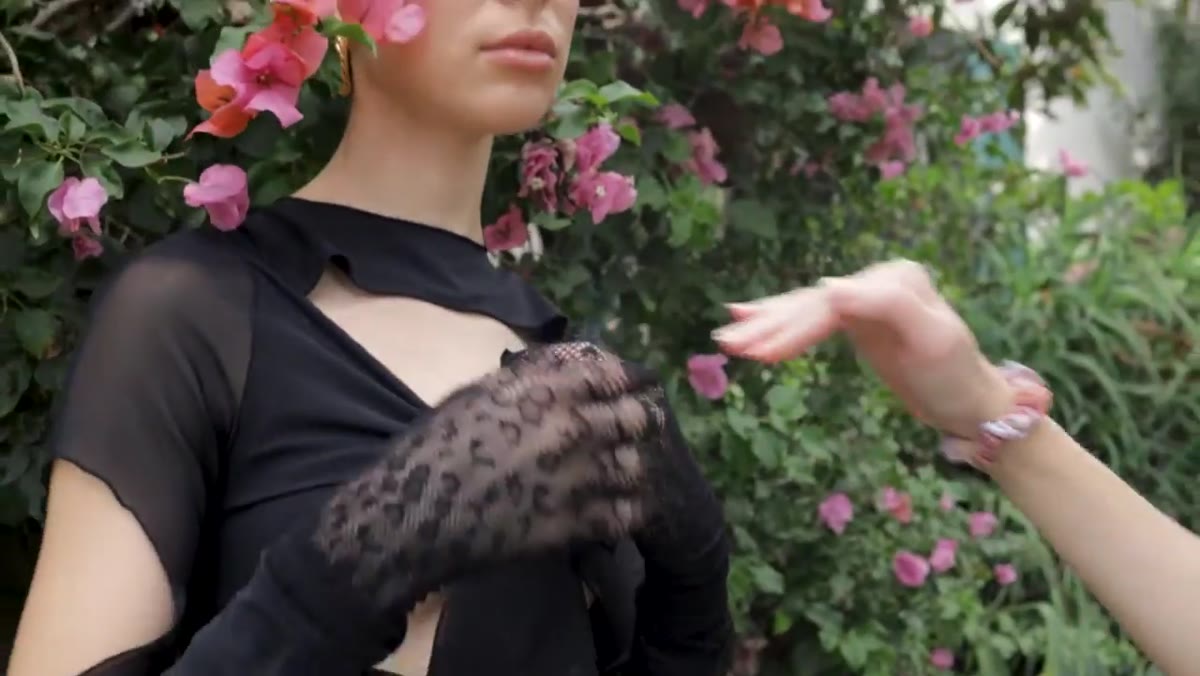 Photographer frames tight close-up portrait near flowering plants
Kobeissi notices a cluster of flowers near the wall and immediately sees an opportunity for close-up detail shots. She moves in tight, incorporating the texture of the flowers as a foreground element while keeping the subject’s face sharp. This kind of compositional thinking, using natural elements at the edges of the frame to add depth, is something I use constantly in landscape work. A wildflower in the foreground of a mountain shot does exactly what those blooms do for a portrait: they add scale, texture, and a sense of place.
Photographer frames tight close-up portrait near flowering plants
Kobeissi notices a cluster of flowers near the wall and immediately sees an opportunity for close-up detail shots. She moves in tight, incorporating the texture of the flowers as a foreground element while keeping the subject’s face sharp. This kind of compositional thinking, using natural elements at the edges of the frame to add depth, is something I use constantly in landscape work. A wildflower in the foreground of a mountain shot does exactly what those blooms do for a portrait: they add scale, texture, and a sense of place.
She also flags something worth paying close attention to: wide-angle lenses cause distortion at close range. When you move in tight with anything shorter than about 50mm, faces elongate and features stretch near the edges of the frame. A short telephoto in the 85mm to 135mm range flatters facial features and lets you maintain a working distance that keeps the subject comfortable. If you must shoot close with a wider lens, center the face and be aware of where the frame edges fall.
Step 4: Direct the Hands and the Chin with Specific Cues
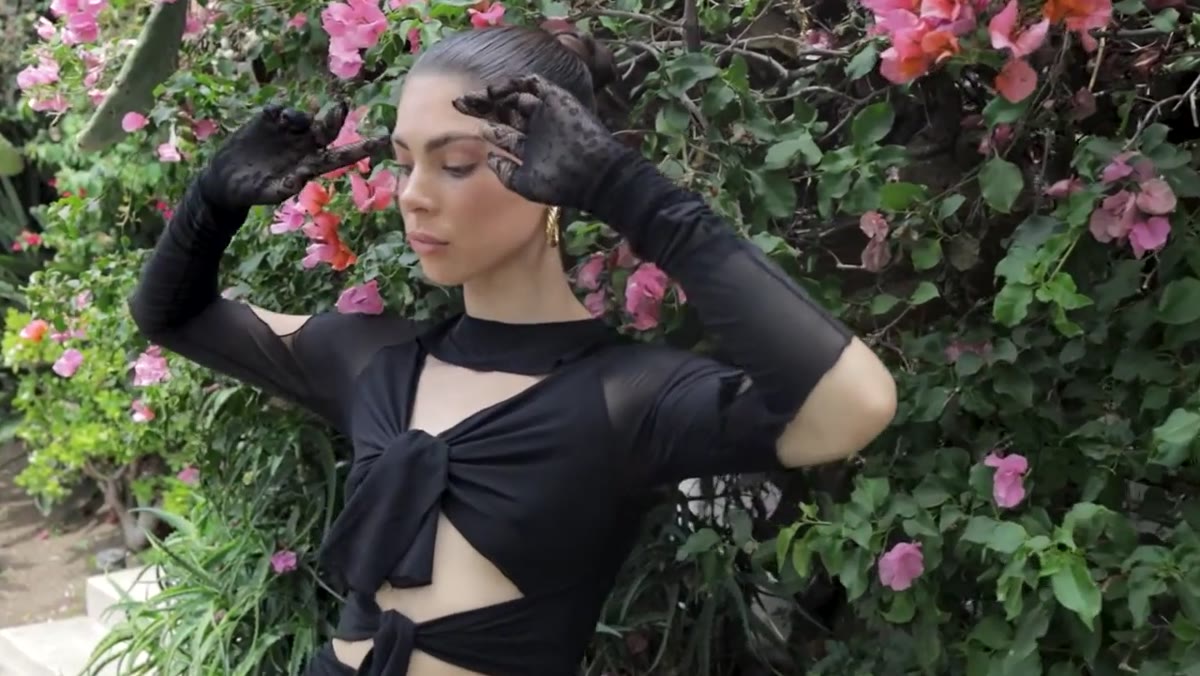 Subject raises hands and adjusts chin angle on photographer’s direction
One of the most immediately useful parts of Kobeissi’s tutorial is watching how she gives direction. She doesn’t say “look natural.” She says raise your chin a little, put both hands up, drop one arm. These are specific, physical, repeatable instructions. Vague direction produces vague results. Specific adjustments produce frames you can actually use.
Subject raises hands and adjusts chin angle on photographer’s direction
One of the most immediately useful parts of Kobeissi’s tutorial is watching how she gives direction. She doesn’t say “look natural.” She says raise your chin a little, put both hands up, drop one arm. These are specific, physical, repeatable instructions. Vague direction produces vague results. Specific adjustments produce frames you can actually use.
Hands are one of the hardest things to photograph well. They read awkwardly when they hang idle at the sides. Giving your subject something to do with their hands, whether that’s lifting them toward their face, resting them in their lap, or framing their collar, immediately reduces that stiffness. Chin height is the other quick fix most beginners miss. A chin angled too low creates shadow under the jaw and shortens the neck. Even half an inch of lift changes the entire quality of the shot.
Step 5: Work the Sitting Position as a Reset
 Subject transitions to sitting on low surface near white wall
When the session needed a change of energy, Kobeissi moved her subject to a seated position on a low ledge near the wall. This is a smart structural reset. Standing shots, especially walking shots, require everything to be working at once: posture, movement, timing, expression. A seated position gives both photographer and subject a moment to breathe and reconnect, and it often produces some of the most relaxed, natural frames of a session.
Subject transitions to sitting on low surface near white wall
When the session needed a change of energy, Kobeissi moved her subject to a seated position on a low ledge near the wall. This is a smart structural reset. Standing shots, especially walking shots, require everything to be working at once: posture, movement, timing, expression. A seated position gives both photographer and subject a moment to breathe and reconnect, and it often produces some of the most relaxed, natural frames of a session.
From a composition standpoint, shooting down slightly onto a seated subject also changes your framing geometry in a useful way. You can isolate the face and upper body more easily, and the seated position naturally creates angles in the arms and legs that break up the rigidity of a full standing pose.
Step 6: Master the Walking Shot Through Repetition
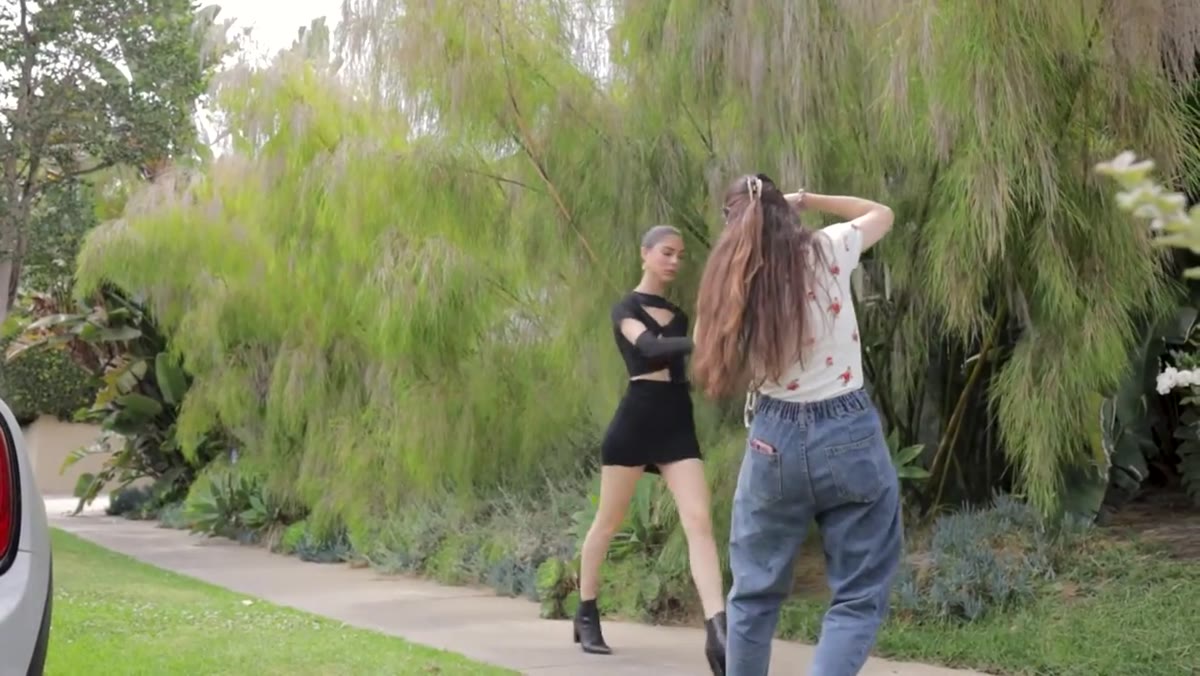 Subject walks toward camera while photographer shoots and adjusts timing
Kobeissi is honest about this one: the walking shot is the hardest shot in the outdoor portrait toolkit. Every element has to land simultaneously. The stride has to be mid-step at the right moment. The arms need to swing naturally. The expression has to be present. And you have to nail the focus while the subject is moving toward or across the frame.
Subject walks toward camera while photographer shoots and adjusts timing
Kobeissi is honest about this one: the walking shot is the hardest shot in the outdoor portrait toolkit. Every element has to land simultaneously. The stride has to be mid-step at the right moment. The arms need to swing naturally. The expression has to be present. And you have to nail the focus while the subject is moving toward or across the frame.
Her approach is to run it multiple times, calling out what needs to change between passes. She also shoots walking-away frames, which are often easier to capture cleanly and give you a different, more editorial feel. If you’re new to directing movement, start with the walk-away version to build your timing, then work toward the walk-toward frame as your eye and your shutter finger sync up.
What I’d Add from 20 Years Working Outdoors
The light in this tutorial is good, but it got hot fast. One thing I’d reinforce from years of shooting in the high desert around Bend is to plan your outdoor sessions for the hour after sunrise or the ninety minutes before sunset. Kobeissi found soft, diffused light late in the session under what she described as a willow-type tree. That canopy was doing the same job the atmosphere does at golden hour, scattering direct light into something even and flattering. If you don’t have a tree, a large reflector used as a scrim, held between the subject and the sun, recreates that quality of light almost anywhere.
The single biggest takeaway from Kobeissi’s tutorial is one I’d apply to any kind of photography: simplicity at the location level gives you freedom at the creative level. A plain wall, a patch of open shade, a simple sitting surface. When the background is resolved, you can put all your attention on the person in front of you.
Watch the full tutorial on YouTube and pay attention to how Kobeissi moves through the space. The posing and the directing are worth studying, but the real lesson is in the scouting instincts that shape every frame before the shutter fires.
Comments (4)
I keep coming back to this article. It's that useful.
Printing this out and pinning it next to my monitor. That good.
Great breakdown. The step-by-step approach really helps.
I've been looking for exactly this kind of tutorial. Perfect timing.
Leave a Comment