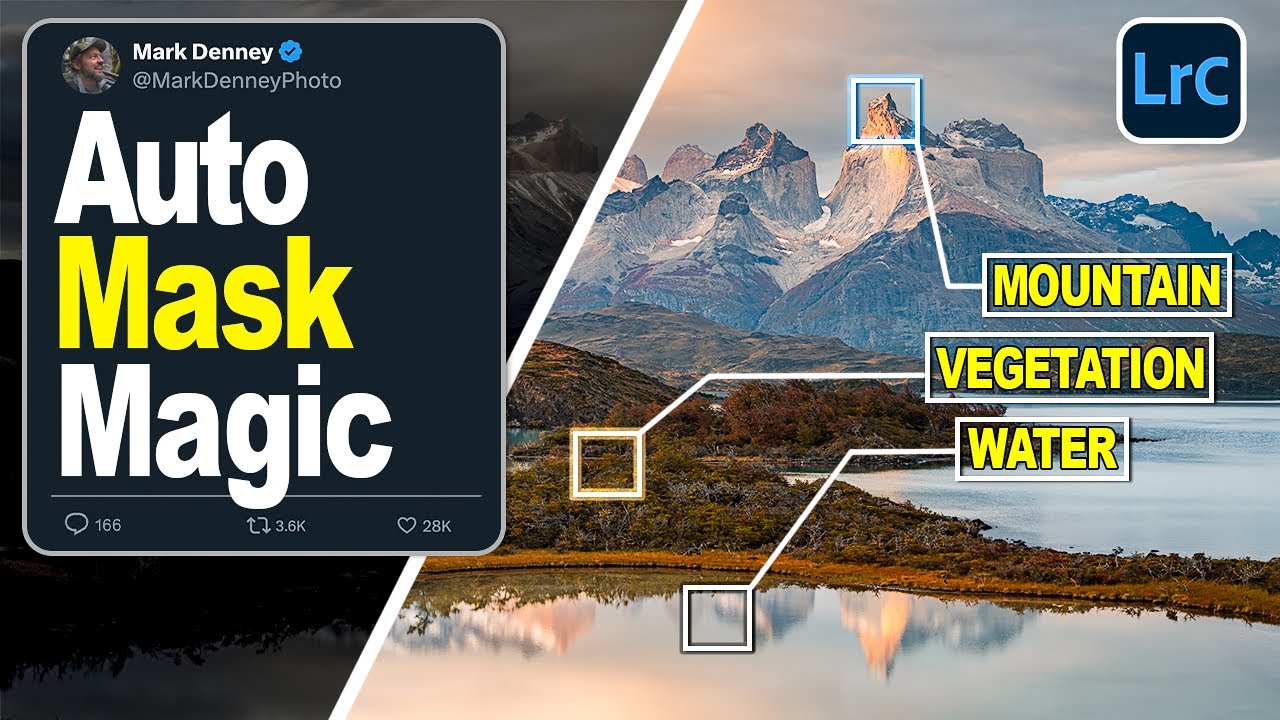
I have spent twenty years building masks by hand. Sky selections, foreground separations, water isolations, rock faces pulled out with luminosity ranges stacked on top of each other like geological layers. Some of my most-used Lightroom sessions have more masks than most photographers apply in a month. That is not a brag. It is a confession. Local adjustments are the engine of a finished landscape photograph, but the time they demand is real, and after two decades I have learned to budget for it the way I budget for golden hour. You build the workflow into the trip.
So when I watched this Mark Denney tutorial covering the new Landscape masking feature in Lightroom version 14.3, I sat with it for a minute before getting excited. I have seen “revolutionary” Lightroom features come and go. Some stick, some quietly disappear. But what Denney walks through here is genuinely different, because it targets the specific part of landscape editing that has always eaten the most time: identifying and separating the distinct regions of an outdoor scene without running through a cascade of workarounds.
The short version is this. Lightroom can now look at a landscape photograph and intelligently break it into its component parts, sky, mountains, water, ground, whatever the scene contains, and offer each one as a ready-to-edit mask with a single click. Here is how it works in practice.
Step 1: Open the Mask Panel and Find the New Landscape Option
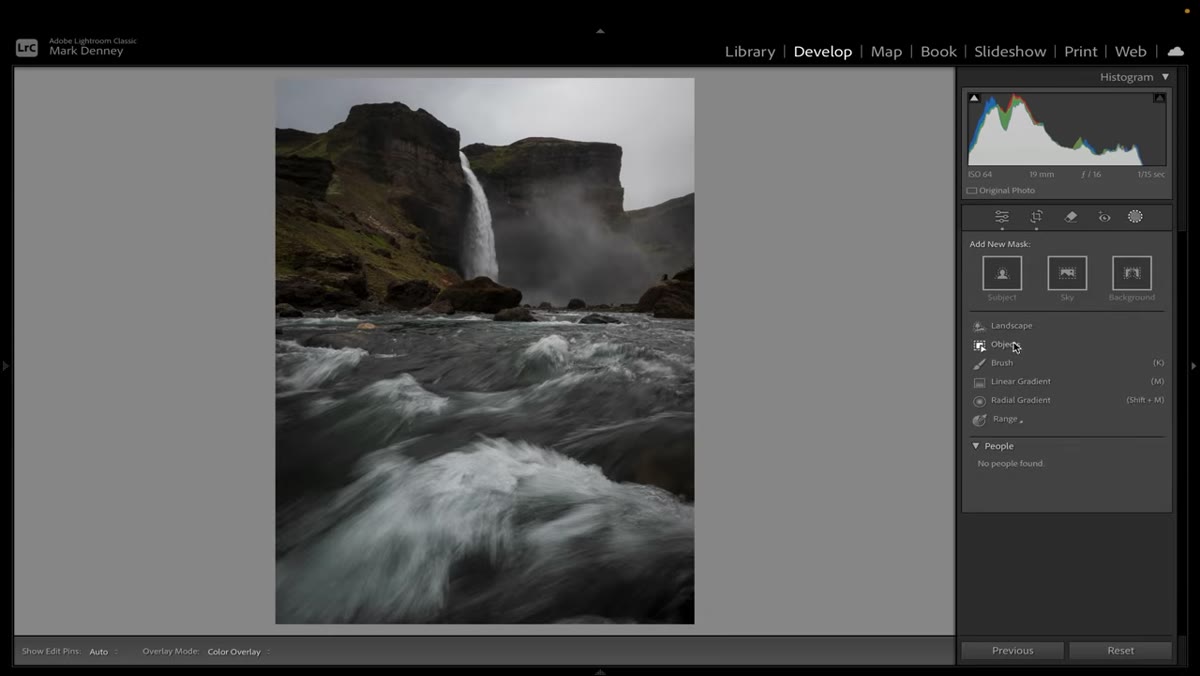 Mask panel open showing new Landscape button at top
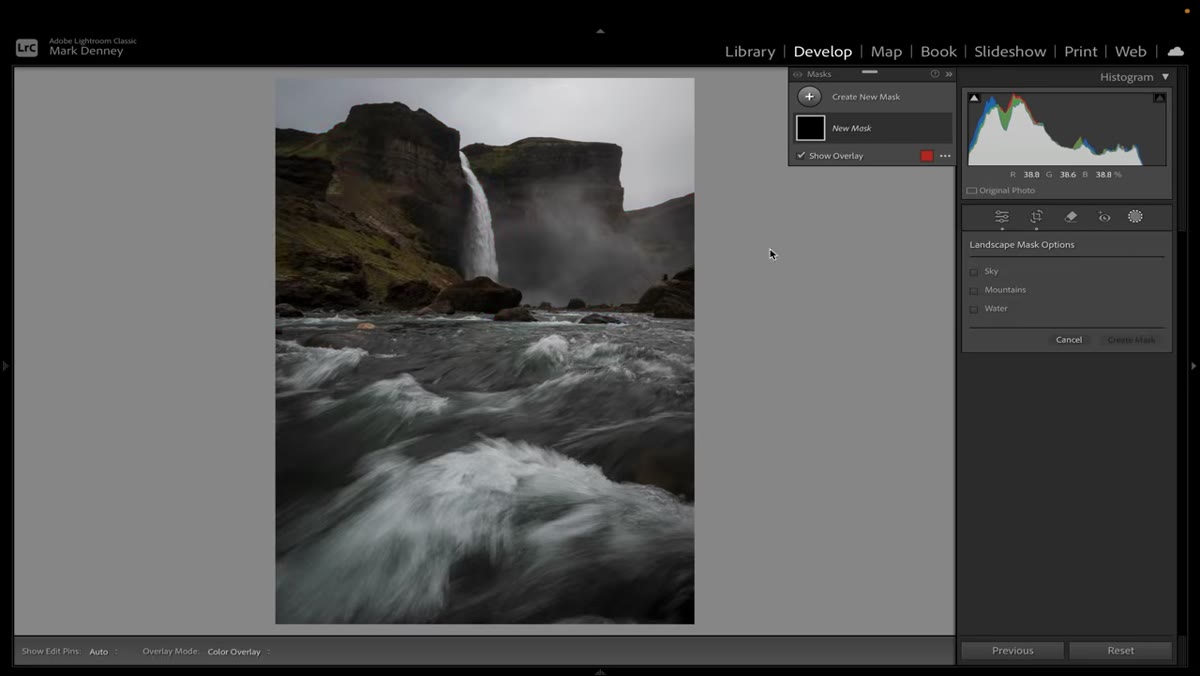
Open your image in the Develop module and click the masking icon, the circle with a dotted edge, near the top of the right panel. This pulls up the mask creation options. You will see the familiar choices: Sky, Background, Subject. In version 14.3, there is now a fourth option sitting alongside those called Landscape. If you do not see it, check that your Lightroom is updated to 14.3 or later. The option will not appear in earlier versions.
Mask panel open showing new Landscape button at top
Open your image in the Develop module and click the masking icon, the circle with a dotted edge, near the top of the right panel. This pulls up the mask creation options. You will see the familiar choices: Sky, Background, Subject. In version 14.3, there is now a fourth option sitting alongside those called Landscape. If you do not see it, check that your Lightroom is updated to 14.3 or later. The option will not appear in earlier versions.
Step 2: Apply the Landscape Detection
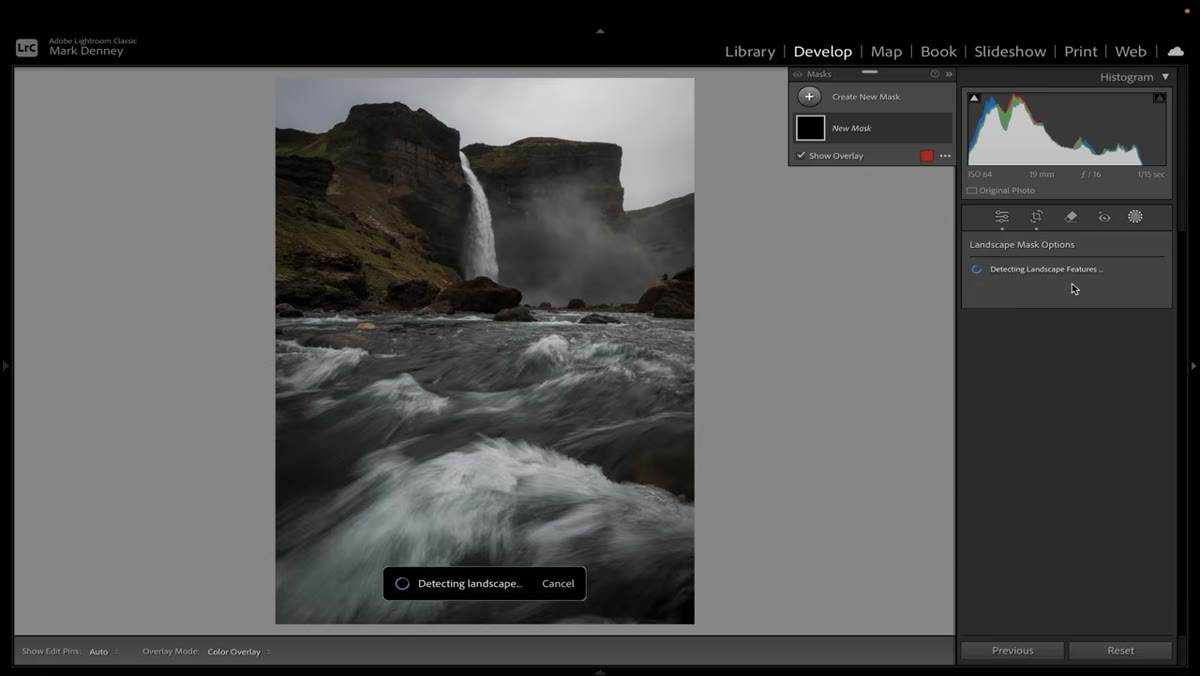 Lightroom analyzing image with processing indicator visible
Click Landscape. Lightroom will take a few seconds to analyze the photograph. You will see a processing indicator while it works. This is not instant the way a basic brush stroke is, but it is substantially faster than building individual masks by hand. Let it finish before clicking anything else. Interrupting the analysis can produce incomplete or inaccurate mask results.
Lightroom analyzing image with processing indicator visible
Click Landscape. Lightroom will take a few seconds to analyze the photograph. You will see a processing indicator while it works. This is not instant the way a basic brush stroke is, but it is substantially faster than building individual masks by hand. Let it finish before clicking anything else. Interrupting the analysis can produce incomplete or inaccurate mask results.
Step 3: Review the Scene-Specific Mask Options It Returns
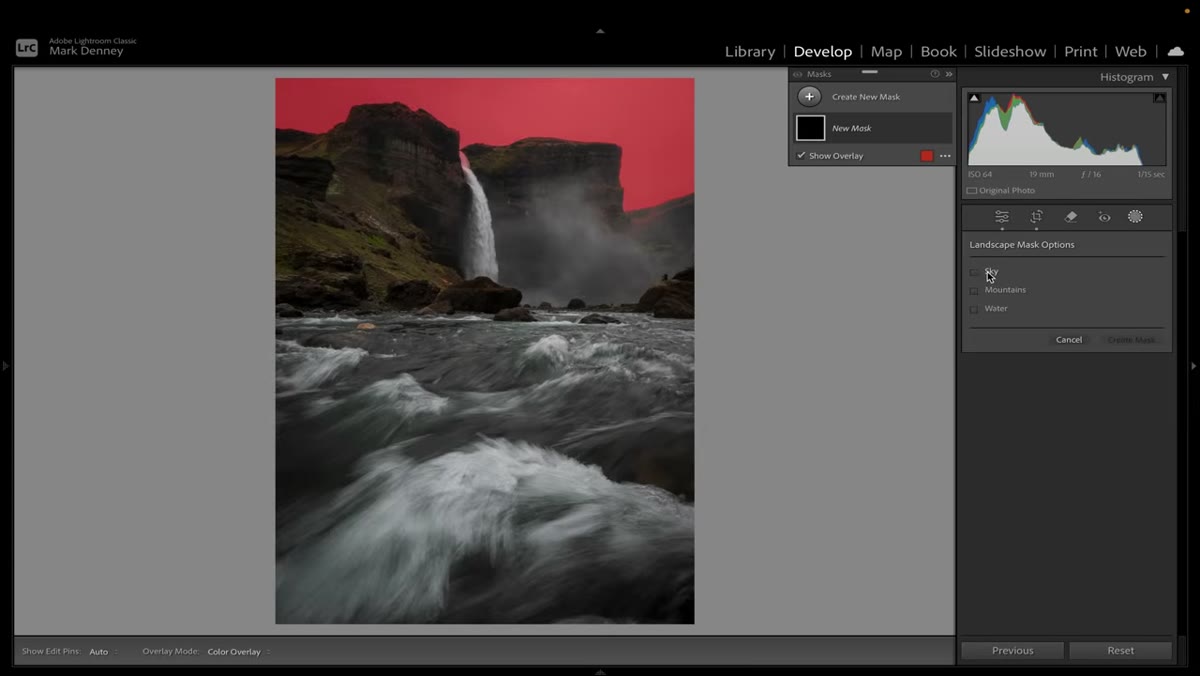 Multiple landscape mask options displayed: sky, mountains, water
Once Lightroom finishes its analysis, it presents a set of mask options tailored to what it found in your specific image. This is the part that sets the feature apart. It is not a generic template. If your photograph has a mountain range, you get a mountain mask. If it has a body of water, you get a water mask. If it is a desert scene with no water at all, you will not be offered one. Hover over each option before selecting it to see a preview of what Lightroom has detected. Confirm the boundaries look accurate before you commit.
Multiple landscape mask options displayed: sky, mountains, water
Once Lightroom finishes its analysis, it presents a set of mask options tailored to what it found in your specific image. This is the part that sets the feature apart. It is not a generic template. If your photograph has a mountain range, you get a mountain mask. If it has a body of water, you get a water mask. If it is a desert scene with no water at all, you will not be offered one. Hover over each option before selecting it to see a preview of what Lightroom has detected. Confirm the boundaries look accurate before you commit.
Step 4: Select the Sky Mask and Make Your Sky Adjustments
 Sky mask selected and highlighted in red overlay
Click the Sky option first. Lightroom activates that mask and you can begin making tonal adjustments immediately, highlights, whites, clarity, color temperature, whatever your sky needs. Toggle the mask overlay on and off using the keyboard shortcut Shift + O to verify the selection edge quality, especially around complex tree lines or ridgelines. In my experience the sky detection in the Landscape feature is comparable to the standalone Select Sky tool, which has been solid for a while now.
Sky mask selected and highlighted in red overlay
Click the Sky option first. Lightroom activates that mask and you can begin making tonal adjustments immediately, highlights, whites, clarity, color temperature, whatever your sky needs. Toggle the mask overlay on and off using the keyboard shortcut Shift + O to verify the selection edge quality, especially around complex tree lines or ridgelines. In my experience the sky detection in the Landscape feature is comparable to the standalone Select Sky tool, which has been solid for a while now.
Step 5: Add a New Mask for the Ground or Foreground
 Duplicate and invert mask option shown in three-dot menu
Before this feature existed, isolating the foreground meant duplicating the sky mask and inverting it through the three-dot menu, a workaround that worked but added steps and occasionally produced edge artifacts. Now you simply click the foreground or ground option directly from the Landscape results panel. Apply your foreground adjustments separately: shadows, contrast, local color corrections. Keeping the sky and ground on independent masks gives you full control over each without one affecting the other.
Duplicate and invert mask option shown in three-dot menu
Before this feature existed, isolating the foreground meant duplicating the sky mask and inverting it through the three-dot menu, a workaround that worked but added steps and occasionally produced edge artifacts. Now you simply click the foreground or ground option directly from the Landscape results panel. Apply your foreground adjustments separately: shadows, contrast, local color corrections. Keeping the sky and ground on independent masks gives you full control over each without one affecting the other.
Step 6: Isolate Specific Elements Like Water or Rocks
 Water mask selected showing precise water detection across scene
If your scene contains water, select the water mask from the Landscape options and examine how precisely Lightroom has traced it. In Denney’s Iceland example, the detection holds up well across a wide reflective water area. Apply targeted adjustments here: dropping highlights to recover texture, pulling blue saturation, lifting shadows slightly if the reflection reads too dark. The same approach applies to rock faces, snow fields, or any other distinct region the feature has identified. Each one becomes its own editable layer without any manual painting.
Water mask selected showing precise water detection across scene
If your scene contains water, select the water mask from the Landscape options and examine how precisely Lightroom has traced it. In Denney’s Iceland example, the detection holds up well across a wide reflective water area. Apply targeted adjustments here: dropping highlights to recover texture, pulling blue saturation, lifting shadows slightly if the reflection reads too dark. The same approach applies to rock faces, snow fields, or any other distinct region the feature has identified. Each one becomes its own editable layer without any manual painting.
A Note From the Field: What This Does and Does Not Replace
I want to be straightforward about where the new Landscape feature earns its place and where I still reach for manual tools. For broad tonal separation across major scene regions, it is excellent and genuinely fast. For precision work, say isolating a sliver of warm light landing on a single rock face at the base of a waterfall, you are still going to need to paint a brush mask or draw a radial filter. The AI has to make judgment calls about what constitutes a distinct region, and those calls are based on broad visual categories, not the specific light quality your eye is actually drawn to.
I still shoot film occasionally, partly because it forces me to slow down and commit to a decision before I press the shutter. The Landscape mask feature is the opposite philosophy, move fast on the broad structure and then refine. Both approaches are valid. The key is knowing which tool is doing what and not letting automation make decisions you should be making yourself. Use the Landscape mask to get your separations built quickly, then spend your saved time on the fine-grain adjustments that are genuinely hard to automate: local contrast, directional light, the thing that makes your version of this scene different from the ten other photographers who stood in the same spot.
The biggest shift Lightroom 14.3 introduces is not a technical one. It is a workflow one. The time you used to spend on setup is now available for the part that matters more, deciding what the image should actually feel like.
Watch the full tutorial on YouTube to see Mark Denney walk through the complete workflow with real Iceland landscape images from start to finish.
Comments
Leave a Comment