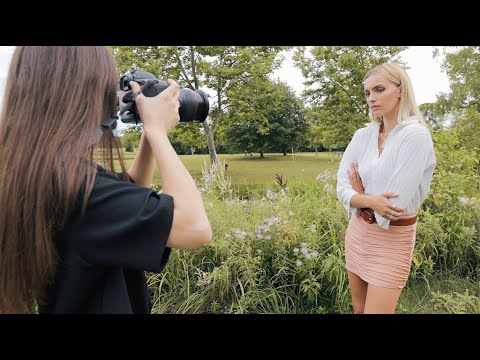
Most of my working life is spent without a person in the frame. The mountain, the river, the pre-dawn sky — that’s my subject, and I’ve spent twenty years learning how to read those things. But landscapes with a human figure are some of my best-selling prints, and workshops I run in central Oregon almost always include a session where participants photograph each other in the field. That’s where I started noticing a consistent problem: photographers who can perfectly compose a ridgeline have no idea what to do the moment a person walks into the shot.
The tendency is to treat the figure like a rock or a tree. Point, frame, shoot. The result is a stiff, flat image that undermines an otherwise strong environmental photograph. I came across Watch the full tutorial on YouTube from portrait photographer Jessica Kobeissi recently, and I found myself watching it twice. She’s working in a pure portrait context, but every correction she makes translates directly to the kind of environmental portraiture we do in landscape and nature photography. Here’s what she covers, broken down into steps you can bring into the field.
Step 1: Recognize the Default Posing Mistake
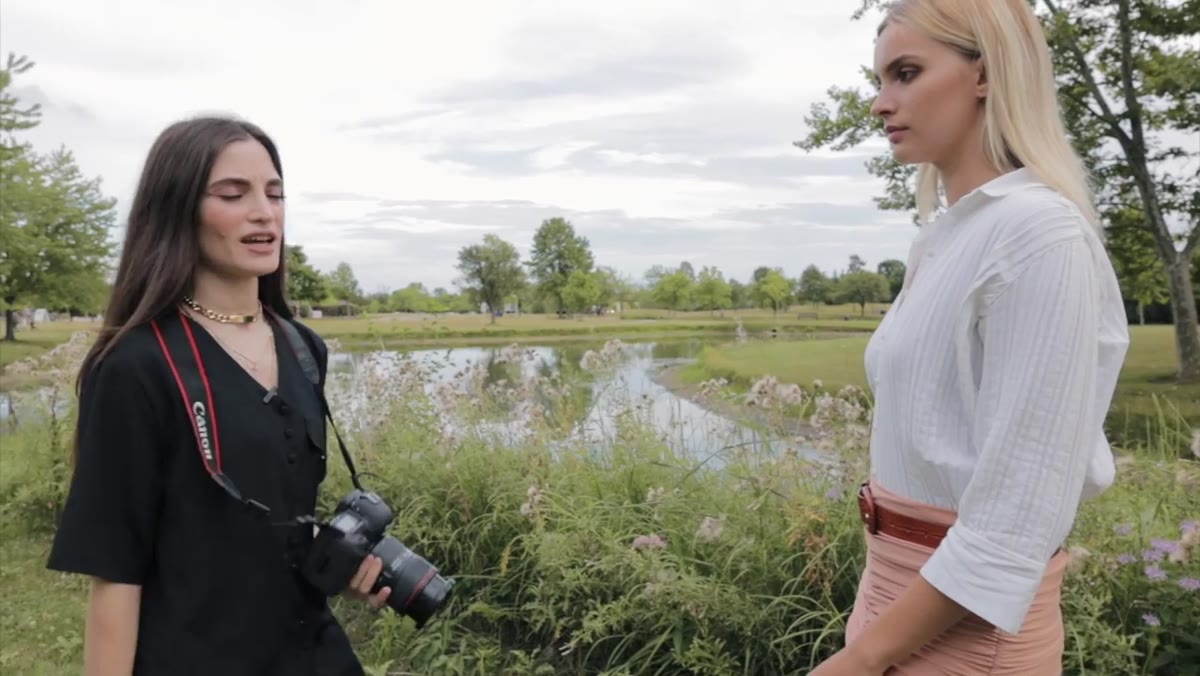 Model standing stiff and square-on to the camera
The first thing Kobeissi demonstrates is what a typical untrained pose actually looks like. She has her subject stand naturally, square to the camera, arms at her sides. It reads as flat and a little uncomfortable, even though the subject is doing nothing technically wrong. The problem is symmetry. When a body faces the lens directly, it reads as a mug shot rather than a photograph. The camera is a single eye, and a body squared straight at it gives that eye nothing interesting to trace.
Model standing stiff and square-on to the camera
The first thing Kobeissi demonstrates is what a typical untrained pose actually looks like. She has her subject stand naturally, square to the camera, arms at her sides. It reads as flat and a little uncomfortable, even though the subject is doing nothing technically wrong. The problem is symmetry. When a body faces the lens directly, it reads as a mug shot rather than a photograph. The camera is a single eye, and a body squared straight at it gives that eye nothing interesting to trace.
For landscape photographers, this shows up constantly when we include a person for scale. We tell someone to “stand over there by the boulder” and snap the frame. The boulder looks great. The person looks like they’re waiting for a bus. Noticing this default is the first correction.
Step 2: Rotate the Shoulders to Change Everything
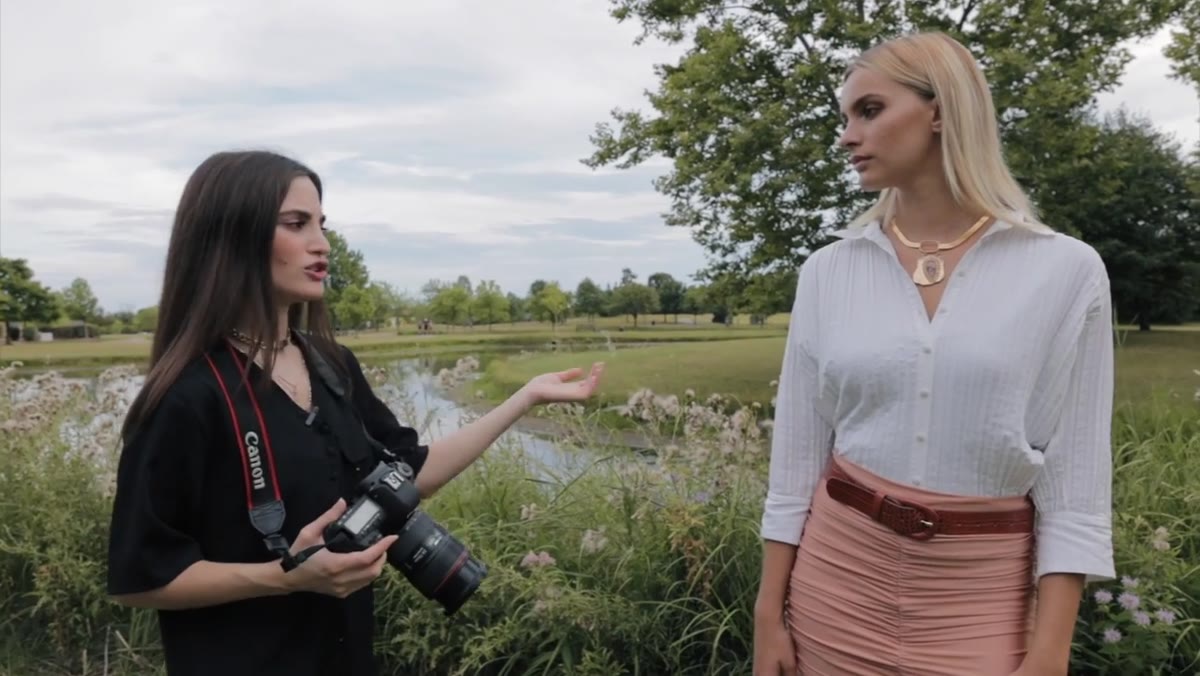 Subject shifting shoulder angle toward camera
The fix Kobeissi applies is surprisingly small. She doesn’t move her subject to a new location, change the light, or adjust any camera setting. She simply asks the subject to angle their shoulders, bringing one forward and letting the other fall back. The body barely shifts. The result is a portrait that immediately has dimension and flow.
Subject shifting shoulder angle toward camera
The fix Kobeissi applies is surprisingly small. She doesn’t move her subject to a new location, change the light, or adjust any camera setting. She simply asks the subject to angle their shoulders, bringing one forward and letting the other fall back. The body barely shifts. The result is a portrait that immediately has dimension and flow.
This works because angling the shoulders creates a diagonal line through the frame, and diagonal lines carry energy in a way that horizontal or vertical ones don’t. In the field, I now make this the first thing I ask of anyone I’m photographing. Before I even think about focal length or where the sun is sitting, I check the shoulder angle. It costs nothing and changes the photograph more than almost any other single adjustment.
Step 3: Use the Head and Neck to Extend the Line
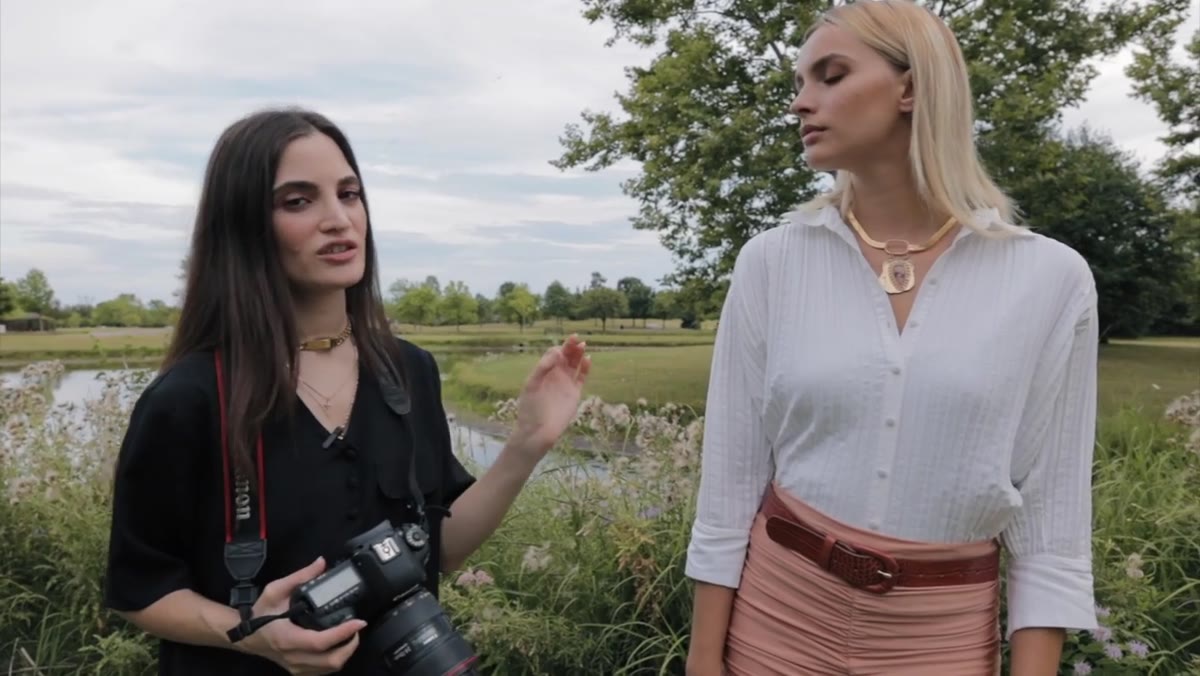 Subject tilting head and extending neck slightly
Once the shoulders are angled, Kobeissi adds a second layer: she asks her subject to tilt their head slightly and bring the neck forward just a touch. This sounds like a small detail, but it extends the diagonal line that the shoulder rotation started. A tucked chin shortens the neck and creates a compressed, closed-off look. Extending it just slightly opens the frame and gives the face a cleaner presentation.
Subject tilting head and extending neck slightly
Once the shoulders are angled, Kobeissi adds a second layer: she asks her subject to tilt their head slightly and bring the neck forward just a touch. This sounds like a small detail, but it extends the diagonal line that the shoulder rotation started. A tucked chin shortens the neck and creates a compressed, closed-off look. Extending it just slightly opens the frame and gives the face a cleaner presentation.
In outdoor photography, where you’re often shooting at wider focal lengths to include the environment, this matters more than you’d think. A compressed neck reads as compressed even when the subject is small in the frame. Coaching someone through a small head tilt takes ten seconds and improves the image noticeably.
Step 4: Account for Every Arm and Hand Placement
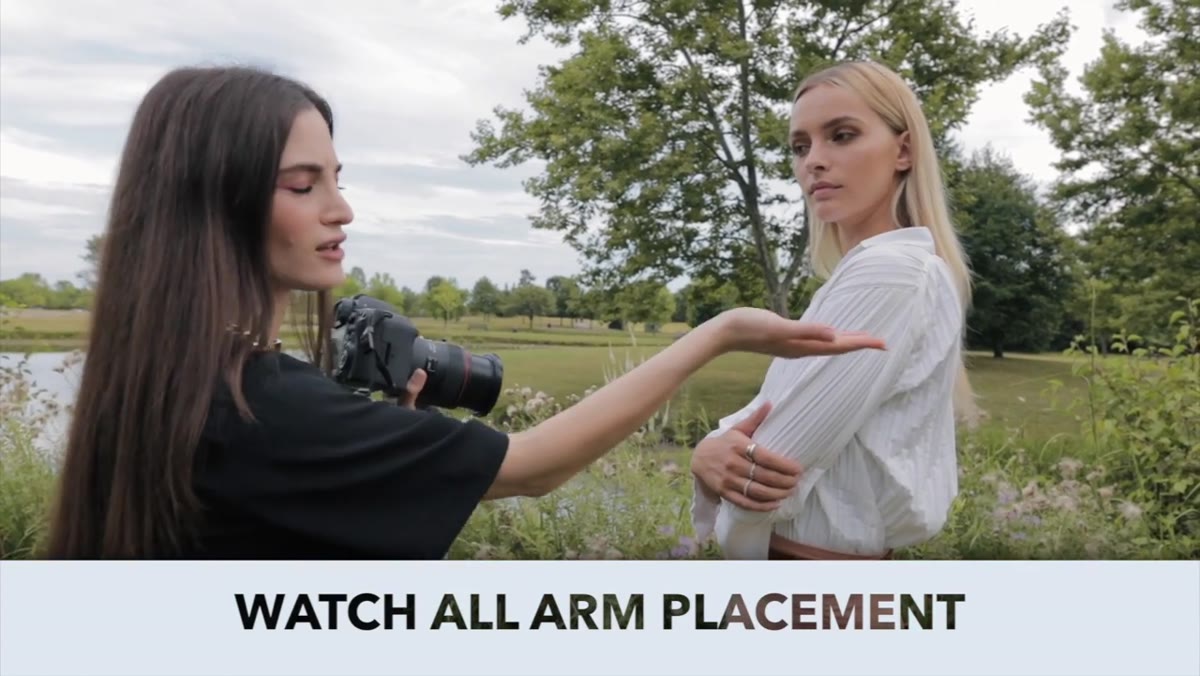 Photographer adjusting subject’s arm position while standing
Kobeissi makes a point that I’ve started repeating in my own workshops: just because you’re making a portrait doesn’t mean the body below the face stops mattering. She walks through how arm placement shapes the silhouette of the subject and affects the overall composition. An arm hanging flat against a side body creates a merged, shapeless edge. An arm with a slight bend or deliberate angle creates visual separation and structure.
Photographer adjusting subject’s arm position while standing
Kobeissi makes a point that I’ve started repeating in my own workshops: just because you’re making a portrait doesn’t mean the body below the face stops mattering. She walks through how arm placement shapes the silhouette of the subject and affects the overall composition. An arm hanging flat against a side body creates a merged, shapeless edge. An arm with a slight bend or deliberate angle creates visual separation and structure.
For environmental portraits, where the subject is often set against a textured or busy background, that silhouette edge matters enormously. A shapeless arm blends into a treeline. A bent elbow creates a clear boundary between subject and environment. Think of the body as its own compositional element, the same way you’d think about foreground versus background in a pure landscape.
Step 5: Bring the Subject to the Ground and Use the Surface
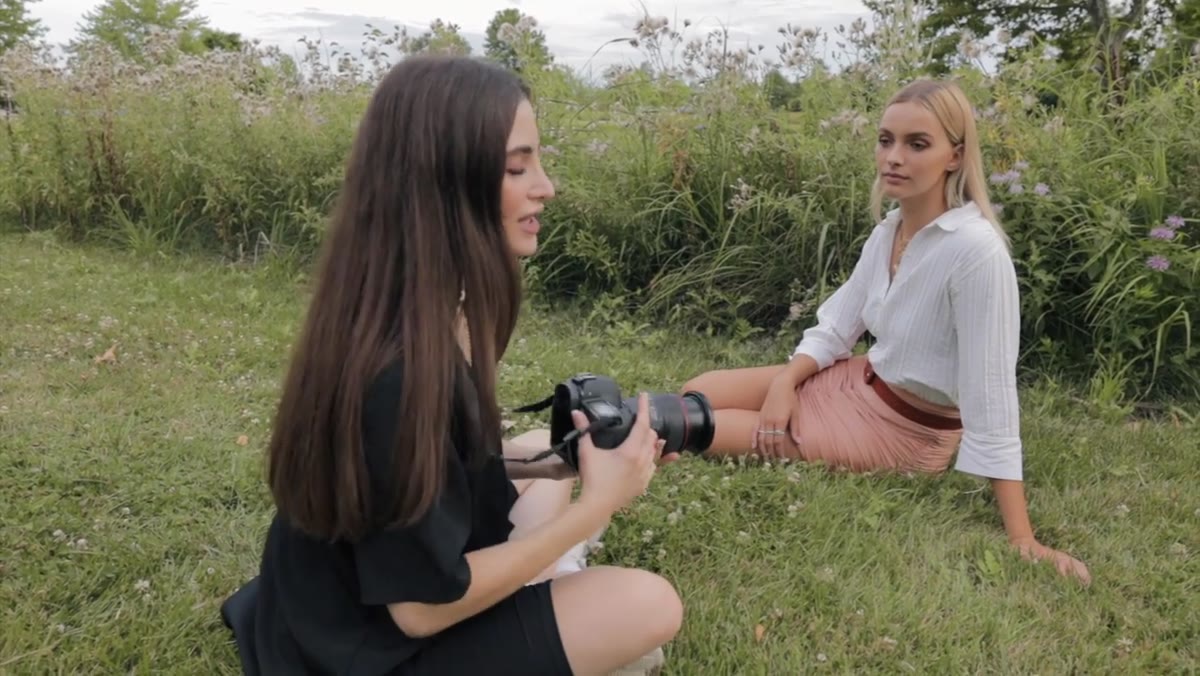 Subject seated, hand resting naturally on surface nearby
The second half of the tutorial shifts to seated portraits, and here Kobeissi makes an observation that I think is genuinely useful for anyone working outdoors. Sitting gives the subject a place for their hands. That single fact changes everything about how relaxed and natural a pose looks, because hands are where most non-models completely fall apart. Standing, the hands hang and look uncertain. Seated on a rock or a log or at the base of a tree, the hands find a surface, and the whole body settles.
Subject seated, hand resting naturally on surface nearby
The second half of the tutorial shifts to seated portraits, and here Kobeissi makes an observation that I think is genuinely useful for anyone working outdoors. Sitting gives the subject a place for their hands. That single fact changes everything about how relaxed and natural a pose looks, because hands are where most non-models completely fall apart. Standing, the hands hang and look uncertain. Seated on a rock or a log or at the base of a tree, the hands find a surface, and the whole body settles.
Practically, when I’m photographing someone in the field for a workshop exercise or a print I want to include a figure in, I now specifically look for natural seats: a low rock shelf, a fallen log, the edge of a riverbank. These aren’t just compositional choices. They give the subject something to physically interact with, and that changes the portrait from a performance into something that reads as real.
Step 6: Get on the Subject’s Level and Shoot from There
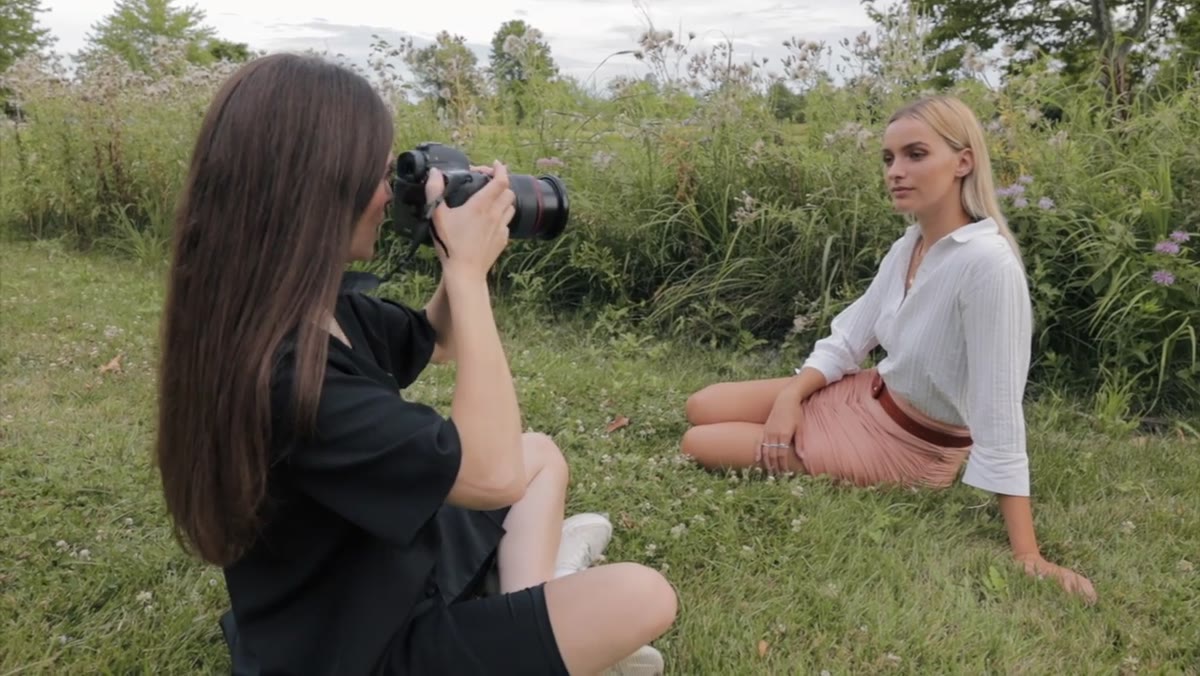 Photographer crouching to match seated subject’s eye level
Kobeissi doesn’t shoot down at her seated subject. She drops to the same level, gets low, and frames from there. This is basic portraiture but worth naming explicitly, because landscape photographers are trained to think about elevation as a compositional tool for terrain, not for people.
Photographer crouching to match seated subject’s eye level
Kobeissi doesn’t shoot down at her seated subject. She drops to the same level, gets low, and frames from there. This is basic portraiture but worth naming explicitly, because landscape photographers are trained to think about elevation as a compositional tool for terrain, not for people.
Shooting from above a seated person shortens them, flattens the background, and puts the viewer in a position of looking down on the subject. Getting level with them places the viewer inside the scene. For environmental portraits especially, this creates the sense that the person belongs in the landscape rather than being inserted into it.
A Note from My Own Practice
Working outdoors in natural light carries one variable that portrait studios never deal with: the light is moving and you cannot stop it. The posing principles Kobeissi teaches are fast to apply, which matters when you have a twelve-minute window before the sun clears the ridge or drops behind the clouds. I’ve made it a habit to coach shoulder angle and hand placement before I ever raise the camera. That way, when the light hits, I’m not burning frames on bad poses. Still shooting on manual mode always, watching the histogram as the light shifts. The pose is already done. I just have to find the moment.
The single most transferable idea in this tutorial is that small adjustments made before you shoot save large amounts of correction after. Rotating a shoulder costs zero seconds. Finding a seat for your subject costs thirty. These are not post-processing problems. They are field problems, and they are solved in the field.
Watch the full tutorial on YouTube to see Kobeissi walk through each of these corrections in real time with a live subject. Watching the before-and-after of the shoulder rotation alone is worth the twelve minutes.
Comments
Leave a Comment