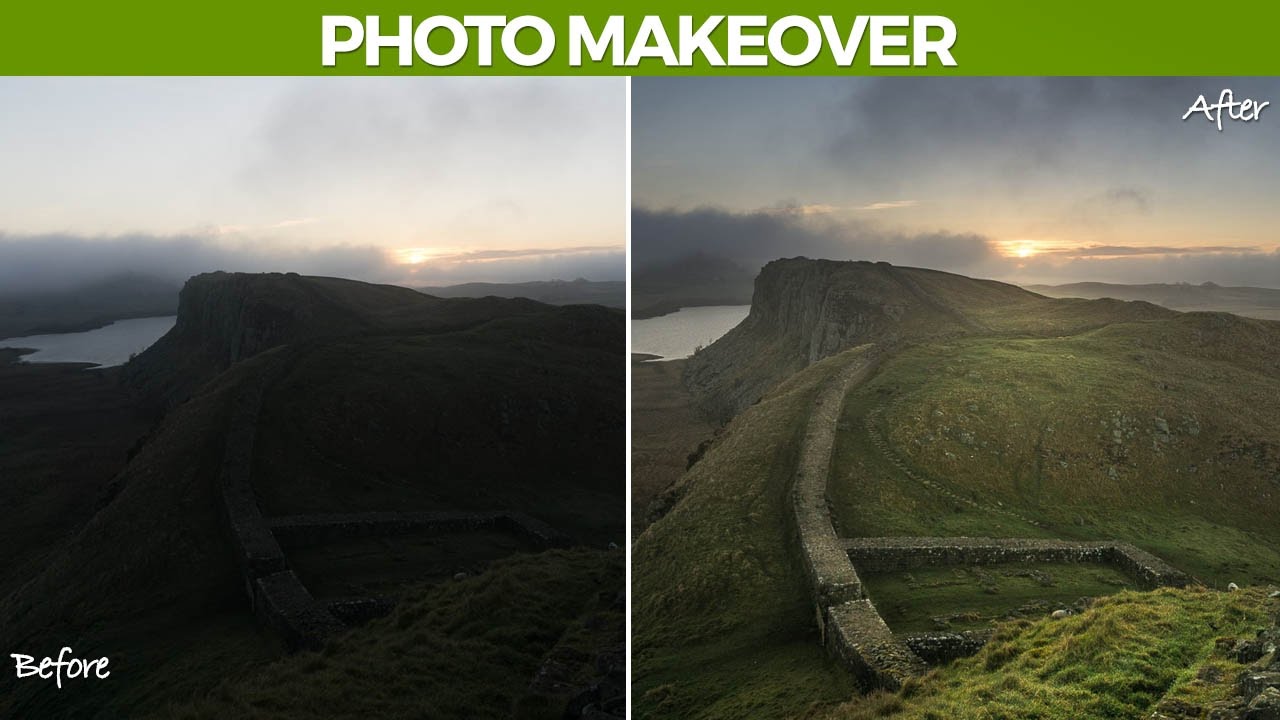
There’s a specific kind of frustration that comes from standing in front of a beautiful scene, knowing your camera can’t hold it all. The sky is blazing, the foreground is buried in shadow, and you’re forced to pick one exposure and compromise on everything else. I’ve stood in that position more times than I can count over the past two decades, and honestly, the feeling never entirely goes away. What does change is how confident you are that you’ll fix it later.
That’s exactly the situation at the center of this Matt Kloskowski tutorial, Watch the full tutorial on YouTube, part of his Photo Makeover series where he edits subscriber-submitted images as if they were his own. The photo in question - a landscape with a warm, sun-drenched sky and a shadowy, detail-rich foreground - is one of the most common scenarios in nature photography. Matt’s approach to it is methodical, transparent, and full of small decisions that are easy to miss if you’re not paying attention.
What makes this walkthrough worth studying isn’t just the end result. It’s the reasoning behind each move. Knowing why you’re reaching for the shadows slider instead of pulling back the highlights is what separates a photographer who’s guessing from one who’s in control.
Step 1: Crop and Straighten First
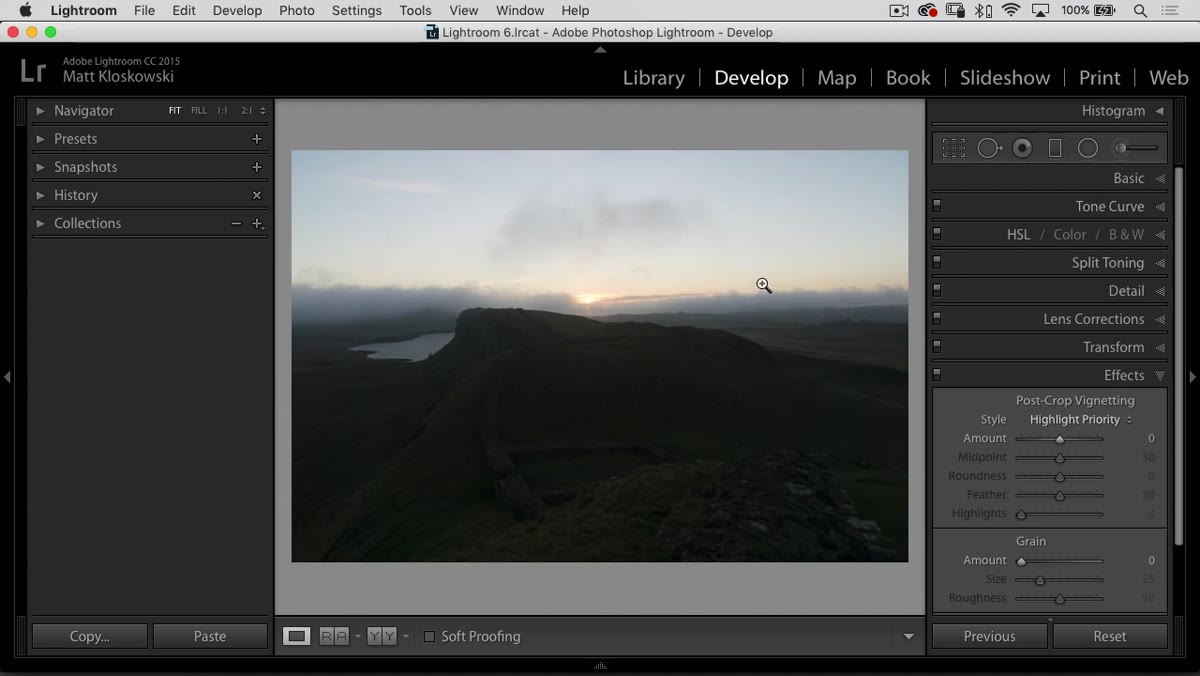 Crop tool active, horizon line being straightened
Before touching any exposure controls, Matt goes straight to the crop tool to straighten the horizon and tighten the composition. He uses a subtle reference line in the background rather than the obvious edge of the frame, dragging the straighten tool along it to correct the tilt. The compositional trim is deliberate: he pulls in on the top and left while being careful not to sever the edges of a small lake in the foreground. His reasoning is sound - when a body of water tapers into the background, cutting its edges makes the scene feel closed. Letting it breathe keeps the sense of depth intact.
Crop tool active, horizon line being straightened
Before touching any exposure controls, Matt goes straight to the crop tool to straighten the horizon and tighten the composition. He uses a subtle reference line in the background rather than the obvious edge of the frame, dragging the straighten tool along it to correct the tilt. The compositional trim is deliberate: he pulls in on the top and left while being careful not to sever the edges of a small lake in the foreground. His reasoning is sound - when a body of water tapers into the background, cutting its edges makes the scene feel closed. Letting it breathe keeps the sense of depth intact.
This step is a good reminder that cropping isn’t just about removing distractions. It’s about establishing where the eye enters the frame and what it does once it’s there.
Step 2: Open the Shadows, Don’t Fight the Sky
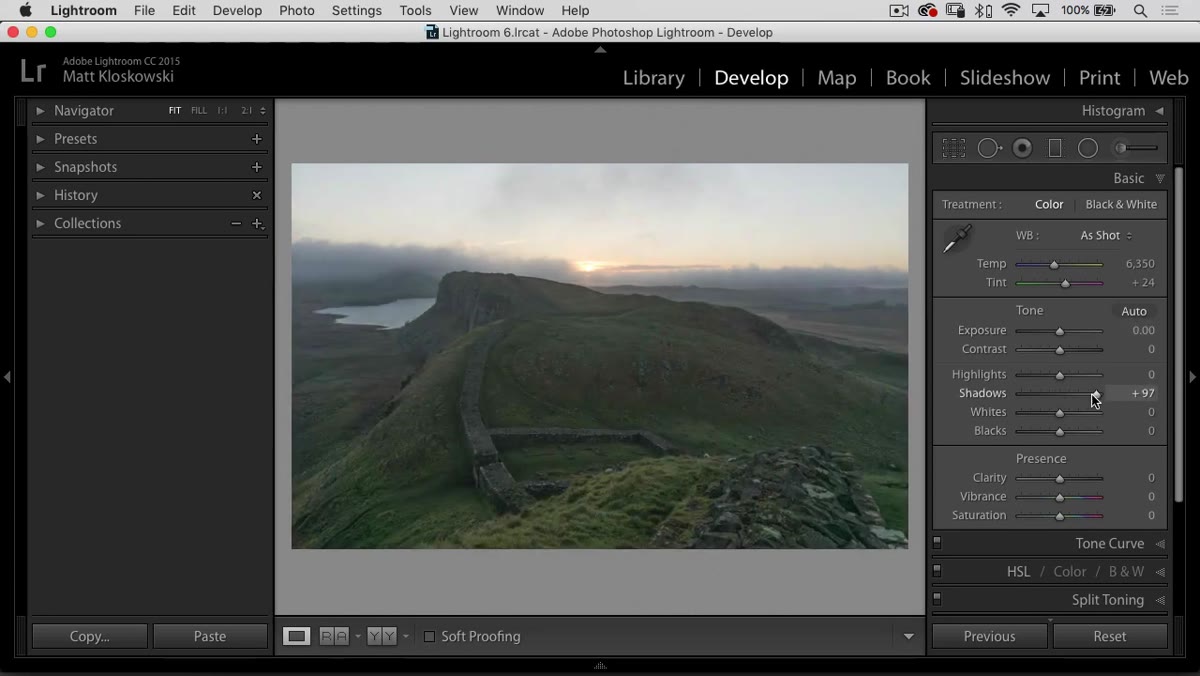 Basic panel open, shadow slider being pushed right
The instinct for most people editing a bright-sky landscape is to drag the highlights down hard. Matt pushes back on that impulse directly. The problem with recovering highlights aggressively - especially when there’s a hard edge between sky and land - is that you get halos. That bright fringe around treelines and ridges that immediately reads as processed. Instead, his first move in the Basic panel is to pull the shadows up and recover the foreground detail that the camera buried trying to hold the sky.
Basic panel open, shadow slider being pushed right
The instinct for most people editing a bright-sky landscape is to drag the highlights down hard. Matt pushes back on that impulse directly. The problem with recovering highlights aggressively - especially when there’s a hard edge between sky and land - is that you get halos. That bright fringe around treelines and ridges that immediately reads as processed. Instead, his first move in the Basic panel is to pull the shadows up and recover the foreground detail that the camera buried trying to hold the sky.
The philosophy here is one I’ve come to live by: expose to protect the sky in the field, then excavate the foreground in post. Lightroom’s shadow recovery is genuinely impressive on a well-exposed raw file, and using it this way keeps the overall tonal balance looking natural.
Step 3: Use a Graduated Filter on the Sky Instead of Hammering the Highlights
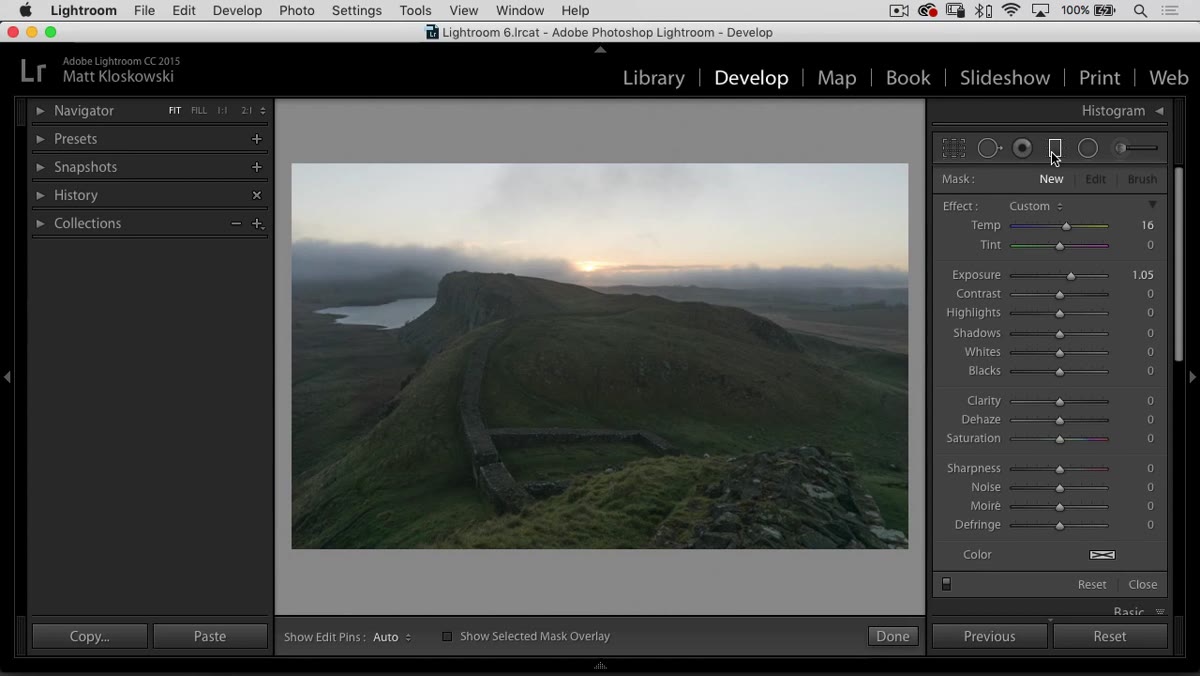 Graduated filter applied from top, exposure pulled down over sky
When the highlights do need to come down, Matt reaches for the graduated filter rather than the global highlights slider. He drags the filter down from the top of the frame, pulling the exposure down across the sky while spreading the transition wide enough that it blends smoothly into the landscape. This keeps the effect targeted - the foreground stays untouched while the sky gets the correction it needs.
Graduated filter applied from top, exposure pulled down over sky
When the highlights do need to come down, Matt reaches for the graduated filter rather than the global highlights slider. He drags the filter down from the top of the frame, pulling the exposure down across the sky while spreading the transition wide enough that it blends smoothly into the landscape. This keeps the effect targeted - the foreground stays untouched while the sky gets the correction it needs.
The key adjustment here is subtlety. He’s not trying to make the sky dramatic with this tool alone. He’s restoring what was actually there: a warm, late-day sky with real tonal detail. Once the exposure is set, he also dials back the highlights within the graduated filter itself, which gives him more control than the global slider without the halo risk.
Step 4: Add Blue Back into the Sky
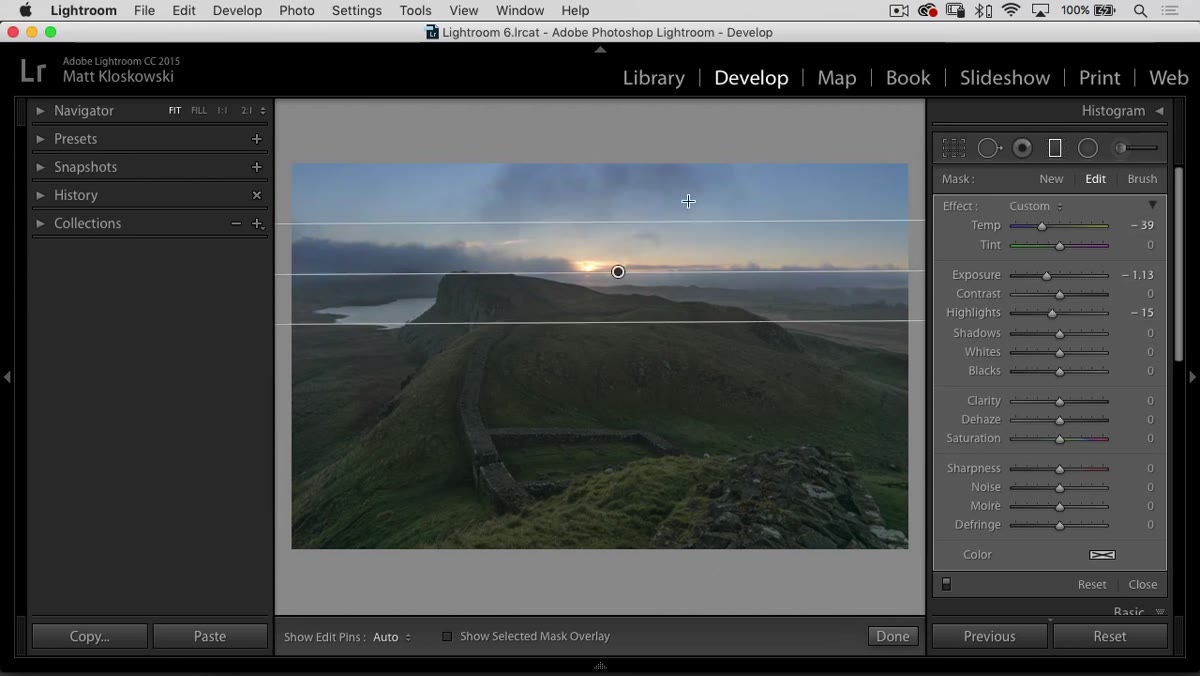 Color shift toward blue added within graduated filter
After bringing the sky exposure down, Matt adds a subtle blue shift using the color tint control inside the graduated filter. This step is easy to skip and worth paying close attention to. When you darken a warm sky, you can inadvertently flatten its color, leaving it looking muddy rather than rich. A slight nudge toward blue restores the atmospheric quality of the original scene without making it look artificially cool.
Color shift toward blue added within graduated filter
After bringing the sky exposure down, Matt adds a subtle blue shift using the color tint control inside the graduated filter. This step is easy to skip and worth paying close attention to. When you darken a warm sky, you can inadvertently flatten its color, leaving it looking muddy rather than rich. A slight nudge toward blue restores the atmospheric quality of the original scene without making it look artificially cool.
This is a two-part move - first correct the exposure, then correct the color. Doing them together inside the same graduated filter keeps everything tidy and reversible.
Step 5: Warm the Global White Balance
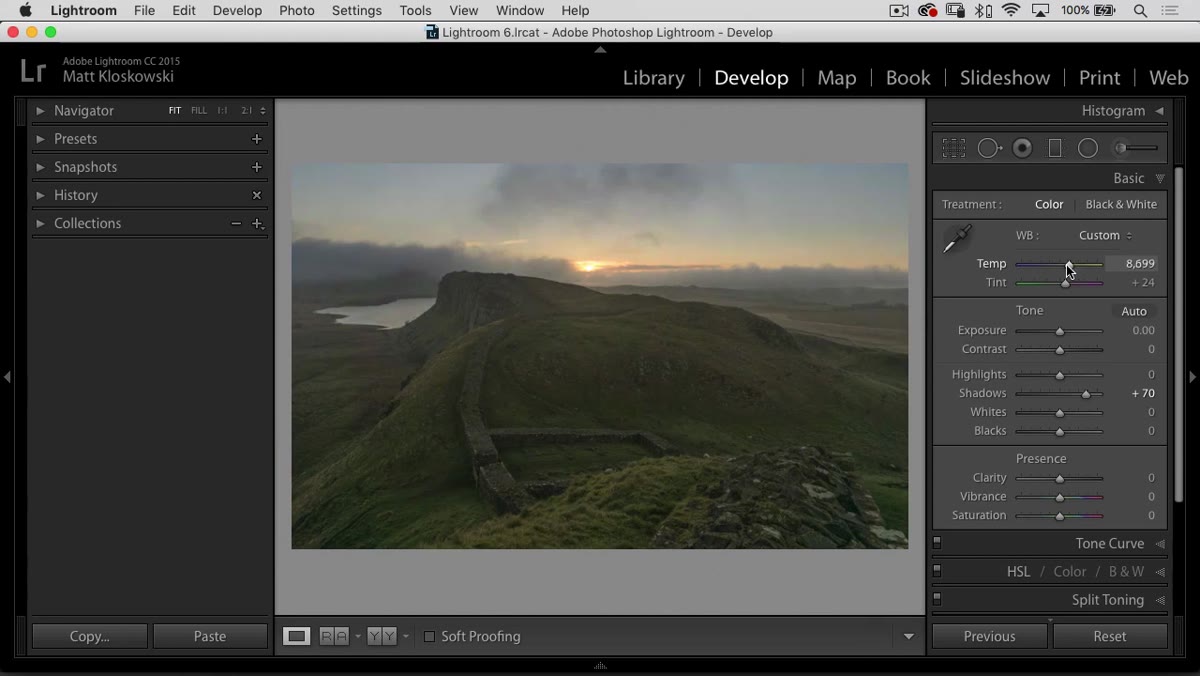 Temperature slider moved warmer across whole image
With the sky handled, Matt moves back to the Basic panel and shifts the overall white balance warmer. The reasoning is direct: the sun is in the frame, which means warm light is falling across the entire scene. A neutral or cool white balance would fight the reality of what the light was doing. Pushing it warm brings the photo into alignment with the emotional truth of standing in that landscape at that hour.
Temperature slider moved warmer across whole image
With the sky handled, Matt moves back to the Basic panel and shifts the overall white balance warmer. The reasoning is direct: the sun is in the frame, which means warm light is falling across the entire scene. A neutral or cool white balance would fight the reality of what the light was doing. Pushing it warm brings the photo into alignment with the emotional truth of standing in that landscape at that hour.
After warming the image, he revisits the graduated filter and pushes a bit more blue into the sky - because warming the global temperature pulled some of it back out. These small iterative corrections are what a real editing session looks like. It’s rarely one pass.
Step 6: Boost Clarity to Separate the Midtones
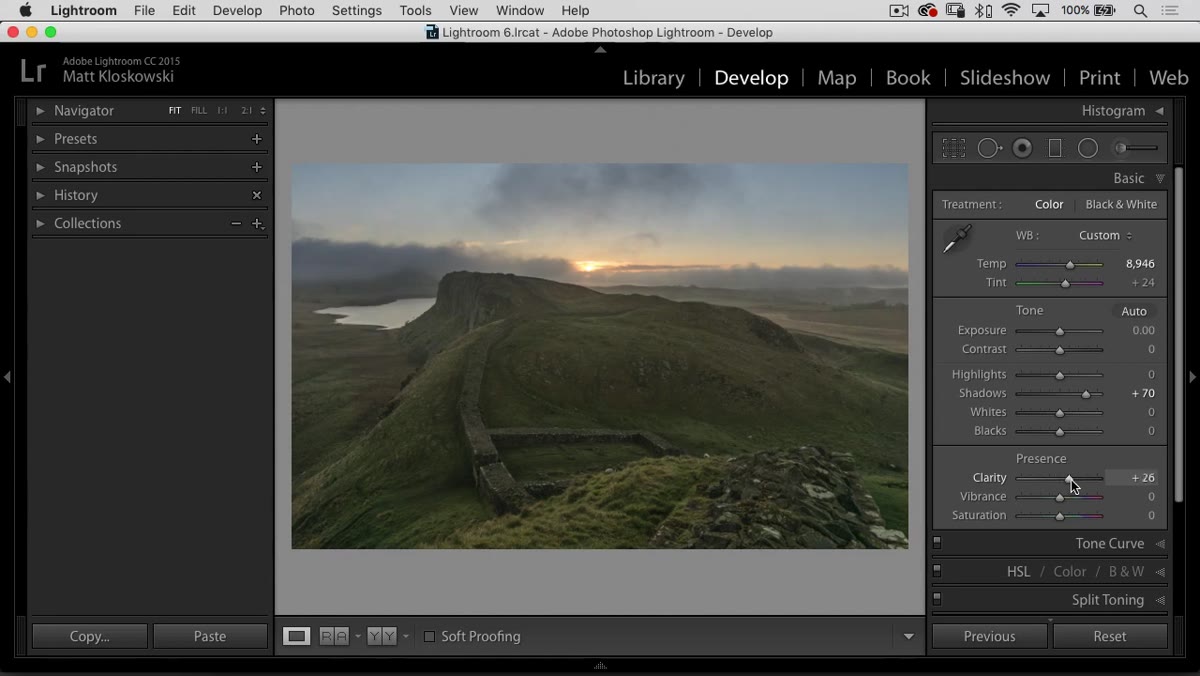 Clarity slider moved right, midtone contrast increasing
The last significant adjustment in the Basic panel is a moderate clarity boost. Matt is careful to explain the distinction here: contrast affects the entire tonal range, pushing whites brighter and blacks deeper. Clarity works on the midtones specifically, adding definition and bite to all the texture that lives in the middle of the histogram. For a scene full of foliage, rock, and moving water, that midtone contrast is where the detail lives.
Clarity slider moved right, midtone contrast increasing
The last significant adjustment in the Basic panel is a moderate clarity boost. Matt is careful to explain the distinction here: contrast affects the entire tonal range, pushing whites brighter and blacks deeper. Clarity works on the midtones specifically, adding definition and bite to all the texture that lives in the middle of the histogram. For a scene full of foliage, rock, and moving water, that midtone contrast is where the detail lives.
He doesn’t push it far. Just enough to make the scene feel present and textured. Too much clarity starts to look crunchy and artificial, which is the opposite of what a landscape with natural light should feel like.
What I’d Do Differently in the Field
The editing workflow Matt walks through here is excellent, and it mirrors what I do in my own post-processing fairly closely. But the thing I keep coming back to is what he says early on about graduated ND filters in the field - that he’s moved away from them and prefers to handle the balance in Lightroom. I understand the reasoning, and for most situations I agree. But there are scenes where the dynamic range is so extreme that even the best shadow recovery introduces noise you can’t cleanly remove. In those cases - mountain light at midday, open water at high noon - I’ll still reach for a 2-stop soft grad and stack it with Lightroom’s tools after. The two approaches aren’t mutually exclusive. They’re layers of the same problem.
The single most important thing this tutorial reinforces is a principle I learned early and still think about on every shoot: protect the sky in the camera, and let Lightroom do the heavy lifting on the shadows. When you edit from that starting point, the whole process becomes less about rescue and more about refinement.
Watch the full tutorial on YouTube to follow along with the actual before-and-after and see the Photoshop finishing steps Matt adds at the end.
Comments (6)
Been doing this wrong for years apparently. Thanks for the wake-up call.
I've been looking for exactly this kind of tutorial. Perfect timing.
Couldn't agree more. I've seen this make a huge difference in lighting work specifically.
Solid advice. Especially the part about taking your time with it.
Quality content like this is rare. Keep it up.
Well explained. I think my audience would really benefit from this — mind if I link to it?
Leave a Comment