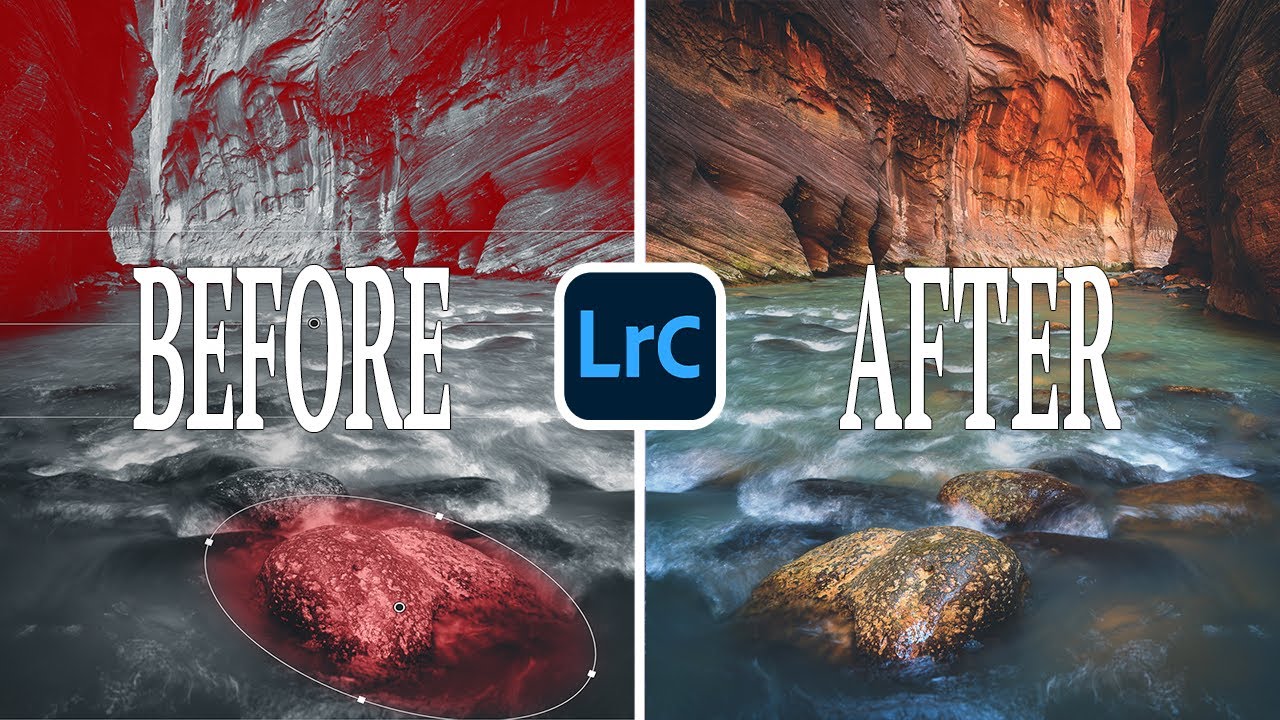
There’s a particular kind of frustration that comes from standing in the dark at 4am, earning a shot you believe in, and then watching it fall flat on the editing table. The light was right. The composition held. But somewhere between the raw file and the finished image, something gets lost. After two decades of doing this work, I still run into that wall. The difference now is that I have a deeper toolkit to reach into.
Watch the full tutorial on YouTube
In this Mark Denney tutorial, he walks through five editing techniques he calls “hacks” - and honestly, whatever you want to call them, they’re the kind of refined, specific-use moves that separate a competent edit from a considered one. I’ve been experimenting with several of these since watching it, and a couple have already become part of my regular workflow. I’m using Lightroom as the reference platform here, following Mark’s lead, but most of these translate cleanly into Capture One, Luminar, or any other serious editing environment.
Step 1: Understand Why the Standard Vignette Tool Falls Short
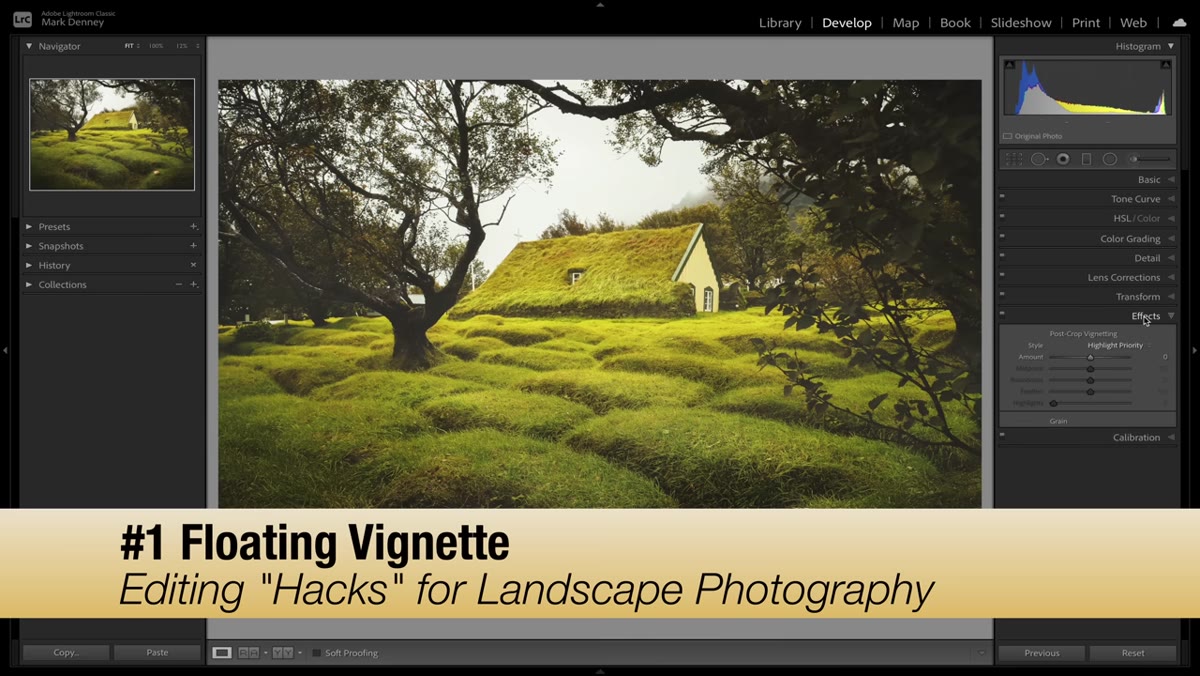 Effects panel vignette slider darkening all four corners equally
Most of us have used the Effects panel vignette in Lightroom. You drag the Amount slider left, the corners darken, done. It’s fast, and it works under exactly two conditions: your subject sits dead center in the frame, and you want all four corners darkened by the same amount. In landscape photography, neither of those things is reliably true. A foreground rock formation might sit low and left. One corner might already be in deep shadow from the sky or tree canopy. Applying a uniform circular vignette in those situations doesn’t guide the eye - it just muddies the image.
Step 2: Build a Floating Vignette with the Radial Filter
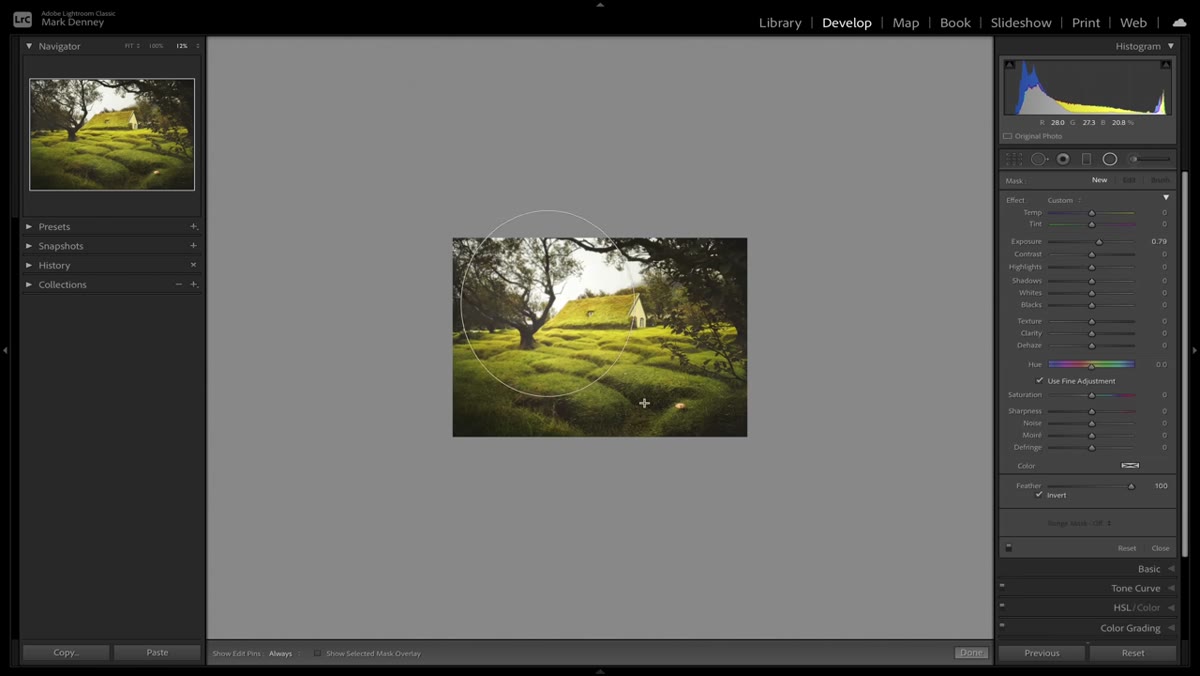 Radial Filter drawn large around the entire image canvas
Open the Radial Filter tool (keyboard shortcut: Shift + M in Lightroom) and draw a large ellipse that covers most of your image. The shape doesn’t need to be precise yet. Once it’s placed, check the Invert box. This tells Lightroom that your adjustments will apply to everything outside the ellipse, not inside it - which is exactly the behavior you want for a vignette effect. Set Feather to 100 so the transition between affected and unaffected areas is gradual and natural-looking.
Hit the keyboard shortcut O to toggle the mask overlay. The red wash that appears shows you exactly which parts of the image will receive the exposure reduction. It’s a useful reality check before you commit to anything.
Step 3: Reshape and Reposition the Ellipse Around Your Subject
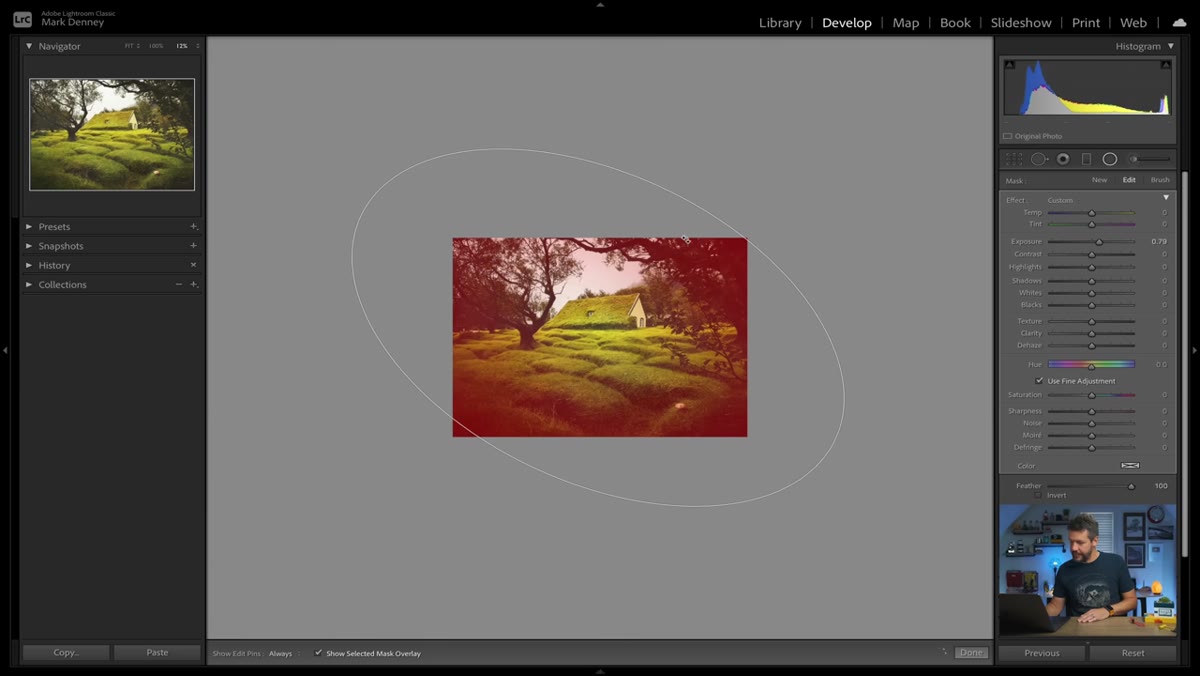 Oblong radial ellipse repositioned to protect a foreground mushroom
Here’s where the technique earns its name. Click and drag the edges of the ellipse to change its shape. If your subject sits low in the frame, make the ellipse taller on the bottom and compress it at the top. If the left side of your image already carries enough darkness, shift the ellipse right. You’re essentially sculpting a custom vignette that responds to the actual tonal geography of the photograph rather than forcing a perfect circle onto an imperfect scene.
Once you’re satisfied with the shape, grab the center handle and move the entire ellipse. Watch how the dark zone moves with it. That’s the “floating” quality Mark is describing - the vignette travels with you as you decide where the visual weight should fall. Toggle the mask overlay off with O again when you want to see a clean preview.
Step 4: Set Your Exposure Reduction and Evaluate Each Corner Independently
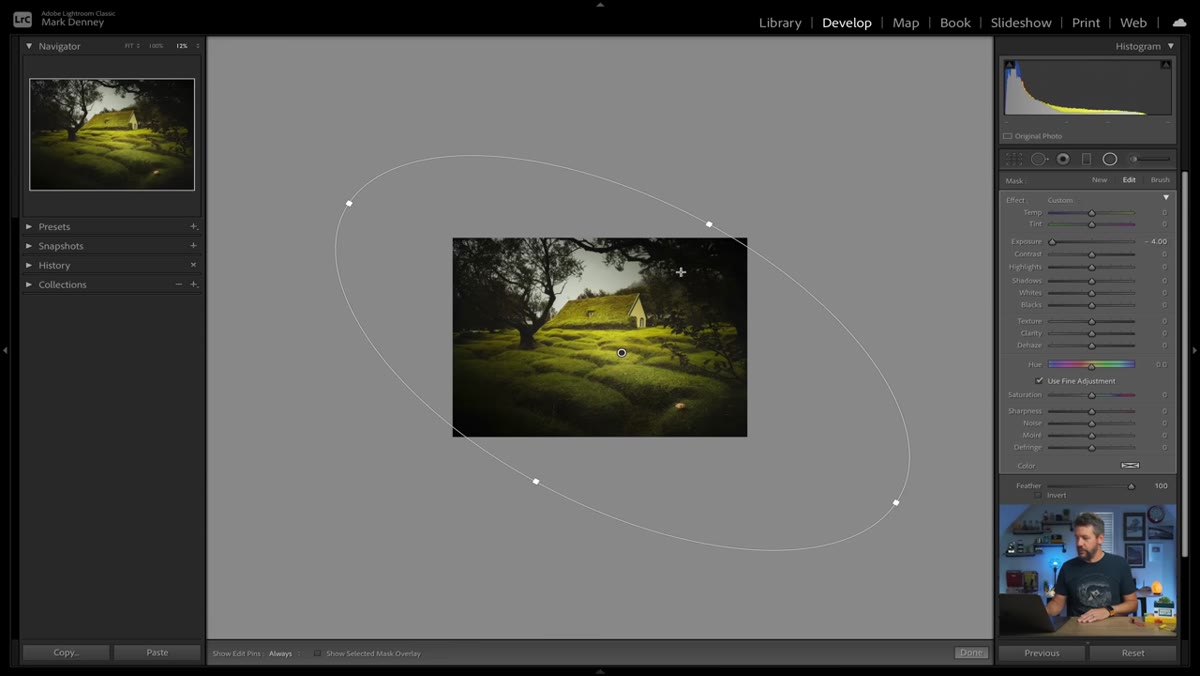 Exposure slider pulled down showing uneven corner darkening across image
Pull the Exposure slider down inside the Radial Filter settings. Mark demonstrates this at an exaggerated value like -4 just to make the effect visible during explanation, but in practice you’ll likely land somewhere between -0.3 and -1.0 depending on how bright your corners are. The key observation here is that because the ellipse is not centered, different corners receive different amounts of darkening. One corner might go quite dark while another barely shifts. That’s not a bug - it’s the whole point. Your image has its own tonal logic, and this tool respects it.
Take a moment before finalizing to look at each corner individually. Ask yourself whether the darkening is pulling the eye inward toward your intended focal point or just creating dead zones. Subtle is almost always better here.
Step 5: Use Multiple Radial Filters for Complex Scenes
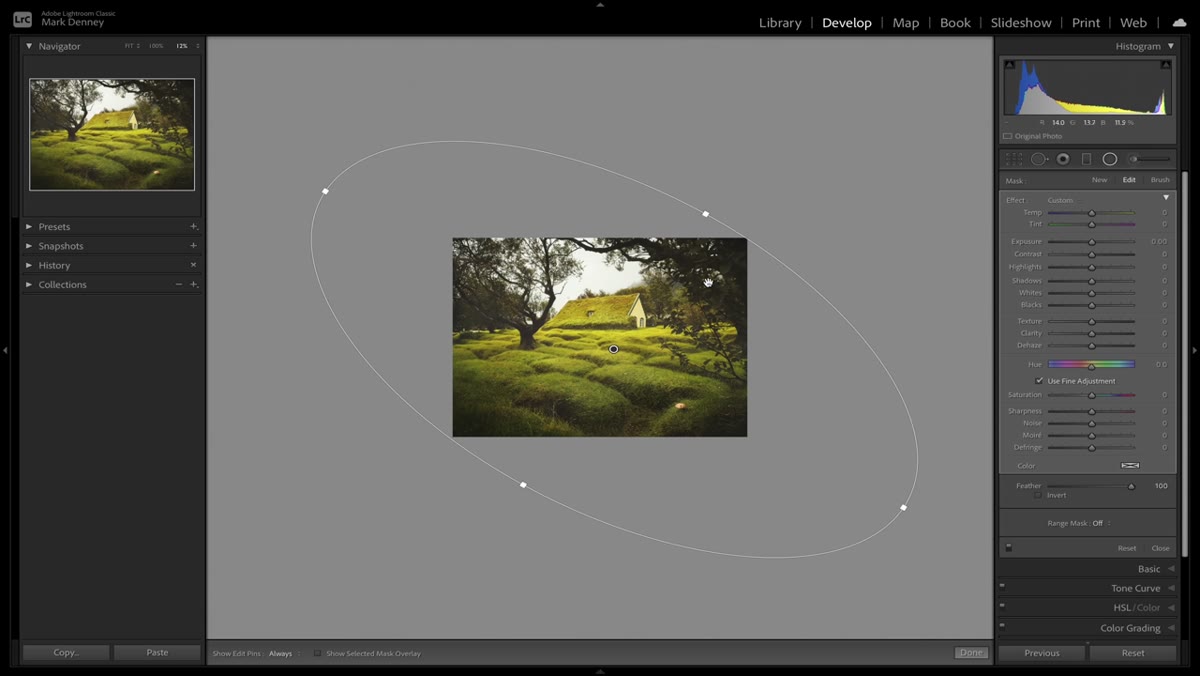 Two separate radial overlays placed on different areas of the same image
One radial filter covers a lot of ground, but complex compositions sometimes need more precise control. Mark’s technique scales naturally: add a second Radial Filter to handle a specific bright patch in one corner that the first ellipse doesn’t quite reach. Keep each one at a modest exposure reduction so they layer together gracefully rather than compounding into something heavy-handed. Think of them as separate instructions you’re giving the viewer’s eye - this way is darker, so look over there instead.
Working this way also makes future adjustments easier. If you revisit the image later and decide one corner is too aggressive, you can dial back a single filter without disturbing the rest of the edit.
A Note from My Own Experience in the Field
I want to add one caveat that the tutorial doesn’t cover, because it only becomes obvious after you’ve printed large. The floating vignette technique is powerful precisely because it’s flexible, and that flexibility can tempt you into over-darkening. On a monitor, a heavy vignette can look dramatic and intentional. On a 24x36 print hung on a wall in natural light, that same vignette can look like a processing artifact, like something went wrong. My rule of thumb after years of selling prints: if you can immediately identify the vignette when you look at the image, reduce it by half. The best vignettes are invisible. They move the viewer’s attention without announcing themselves.
I also find this technique particularly valuable for images with active skies. A graduated filter handles broad tonal shifts from top to bottom, but a floating radial can quietly darken a bright patch of sky in just one corner without touching the horizon or the foreground. It gives you a level of spatial precision that the standard tools simply don’t offer.
The single most important shift this tutorial prompted for me was moving away from “apply vignette uniformly” as a default finishing step and toward “where does this specific image need the viewer’s eye to go, and how do I engineer that?” The floating vignette isn’t a shortcut. It’s a decision tool. Use it to make the photograph say what you intended when you were standing there in the cold, waiting for the light.
Watch the full tutorial on YouTube to see Mark walk through all five techniques in real time, including the remaining hacks he covers beyond the vignette work.
Comments (2)
Shared this with my photography group. Everyone loved it.
Well explained. I think my audience would really benefit from this — mind if I link to it?
Leave a Comment