I spent the better part of my first two years as a photographer treating editing like a chore I could outrun. I was convinced that if I just nailed the exposure in the field, the image would mostly take care of itself. It didn’t. I’d come home from a pre-dawn shoot in the Cascades, crack open Photoshop, push a few sliders around with no particular logic, and wonder why my images looked muddy or over-cooked or simply flat. The problem wasn’t the light I’d found. It was that I had no systematic approach to processing what I’d captured.
That changed when I started paying attention to photographers who could articulate their workflow as a sequence, not just a collection of moves. Which is exactly why I kept coming back to this William Patino tutorial on editing landscape photos without ruining them. Watch the full tutorial on YouTube. The framework he lays out is deceptively simple, but it gives you something most editing tutorials skip entirely: an order of operations. And in my experience, editing in the wrong order is one of the fastest ways to compound mistakes and lose an hour chasing your own tail.
The whole system comes down to three letters: LCL. Light, Color, Local Adjustments. You move through those categories in sequence, and you don’t jump ahead. Whether you’re working in Lightroom Classic or Adobe Camera Raw via Photoshop, the panels and sliders are nearly identical, so everything here applies to both.
Step 1: Set Your Intention Before You Touch a Single Slider
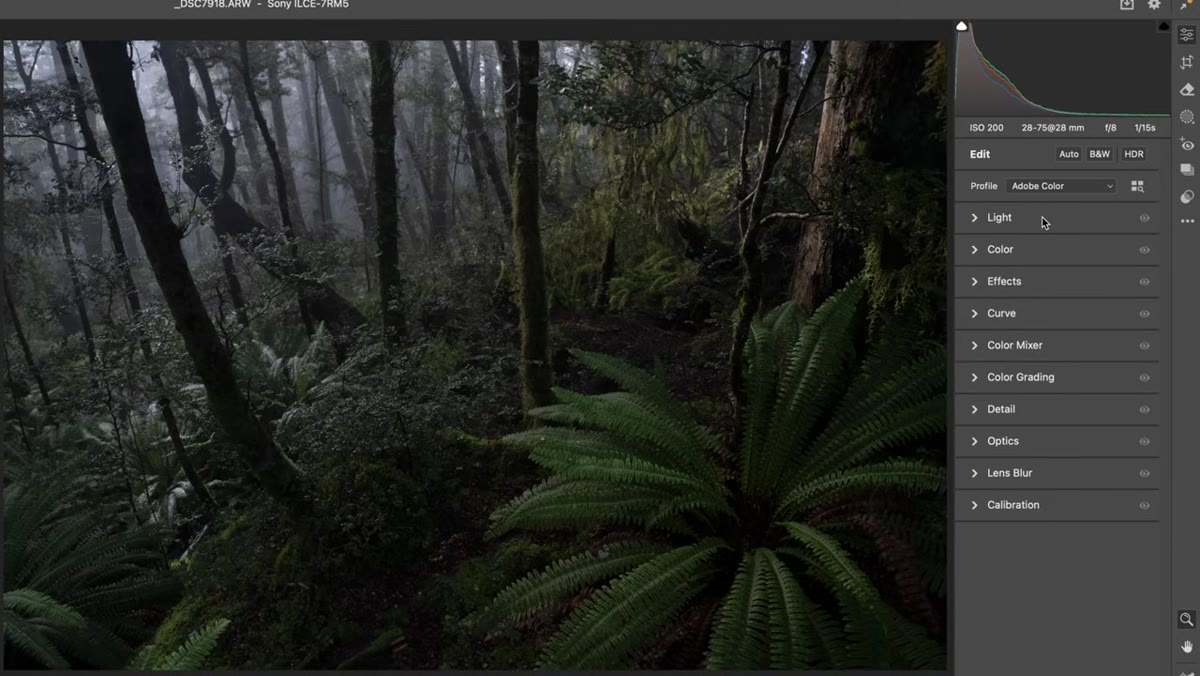 Unedited forest photo open in Adobe Camera Raw
Before Patino moves a single slider, he pauses to look at the image and decide what he actually wants it to become. For the forest photo he’s working on, the goal is clear: make the greens sing, and create a sense of light in the distance that pulls the viewer’s eye deeper into the frame. That’s a specific, visual target.
Unedited forest photo open in Adobe Camera Raw
Before Patino moves a single slider, he pauses to look at the image and decide what he actually wants it to become. For the forest photo he’s working on, the goal is clear: make the greens sing, and create a sense of light in the distance that pulls the viewer’s eye deeper into the frame. That’s a specific, visual target.
I do something similar on every edit. When I’m back from a shoot and sitting at my desk before five in the morning with coffee going cold, I’ll look at the raw file and ask: what made me press the shutter here? What did I see that the sensor didn’t fully capture? If you can answer that before you start editing, every slider decision has a purpose. If you can’t, you’re just pushing things around and hoping.
Step 2: Correct the Light Globally
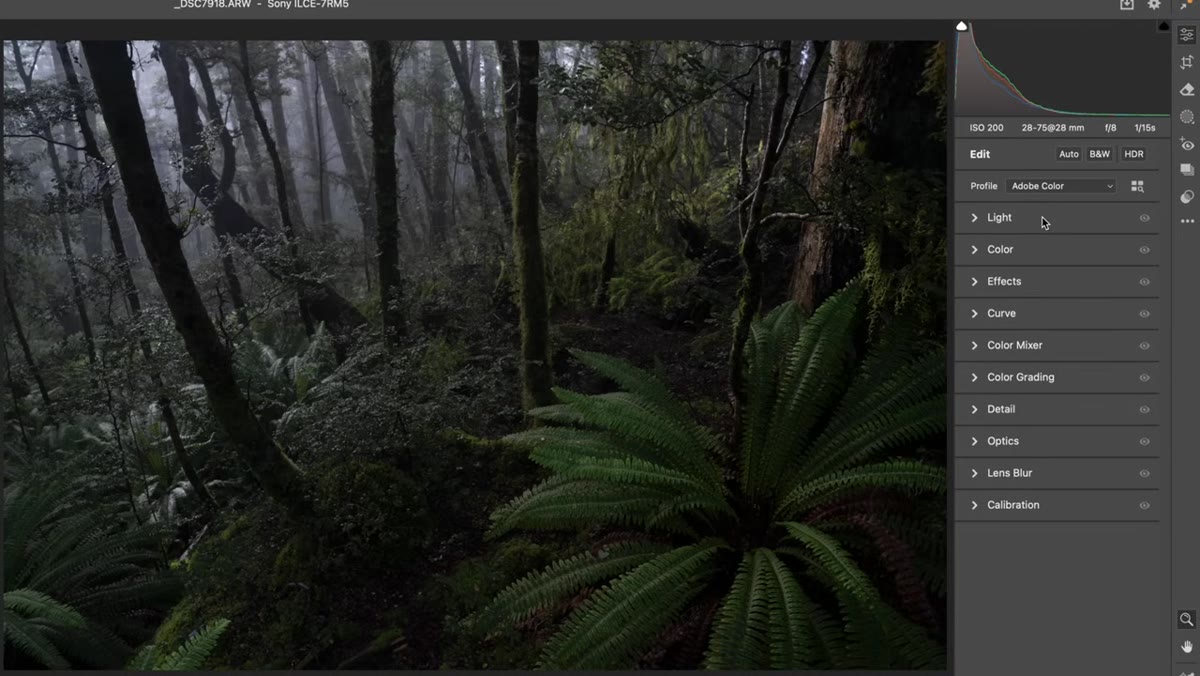 Light panel open, Exposure and Shadows sliders being adjusted
The first L in LCL is Light, and this means anything that touches exposure: the overall brightness, highlights, shadows, whites, and blacks. Patino opens the Light panel and checks the histogram first. In his forest image, there are no bright tones at all, so he lifts the Exposure slider to bring the image up to a more natural luminosity, then raises the Shadows to pull detail out of the darker areas of the frame.
Light panel open, Exposure and Shadows sliders being adjusted
The first L in LCL is Light, and this means anything that touches exposure: the overall brightness, highlights, shadows, whites, and blacks. Patino opens the Light panel and checks the histogram first. In his forest image, there are no bright tones at all, so he lifts the Exposure slider to bring the image up to a more natural luminosity, then raises the Shadows to pull detail out of the darker areas of the frame.
The key discipline here is restraint. You’re doing a rough global correction, not a final polish. Patino deliberately leaves some light adjustments for the Local Adjustments stage, where he can target specific areas rather than affecting the whole image. If you find yourself spending twenty minutes on the Light panel trying to make every part of the image perfect at once, you’ve skipped ahead.
Step 3: Apply a Camera Profile
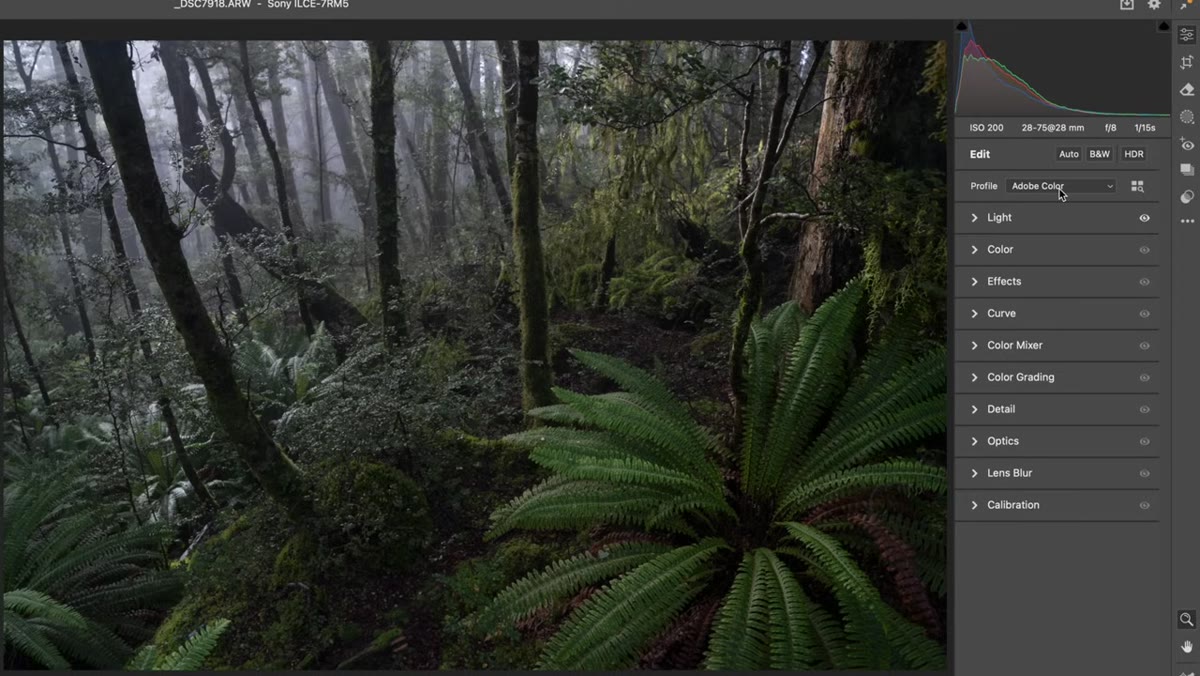 Profile browser open, Landscape profile selected
Inside the Color section, the first move Patino makes isn’t to the Vibrance or Saturation sliders. It’s to the Camera Profile, which is often overlooked entirely. By default, most raw files open with the Adobe Color profile applied. Switching to the Landscape profile adds punch and contrast to the colors immediately, and it often nudges the tones in a way that several manual adjustments would have taken much longer to achieve.
Profile browser open, Landscape profile selected
Inside the Color section, the first move Patino makes isn’t to the Vibrance or Saturation sliders. It’s to the Camera Profile, which is often overlooked entirely. By default, most raw files open with the Adobe Color profile applied. Switching to the Landscape profile adds punch and contrast to the colors immediately, and it often nudges the tones in a way that several manual adjustments would have taken much longer to achieve.
His caveat is worth noting: on images with an already saturated sunrise or sunset, the Landscape profile can push things into artificial territory. In those cases, he leaves it on Adobe Color. I’d add that it’s worth toggling back and forth a few times before committing. The difference is subtle on some images and dramatic on others, and you can’t always tell at a glance.
Step 4: Adjust White Balance and Saturation
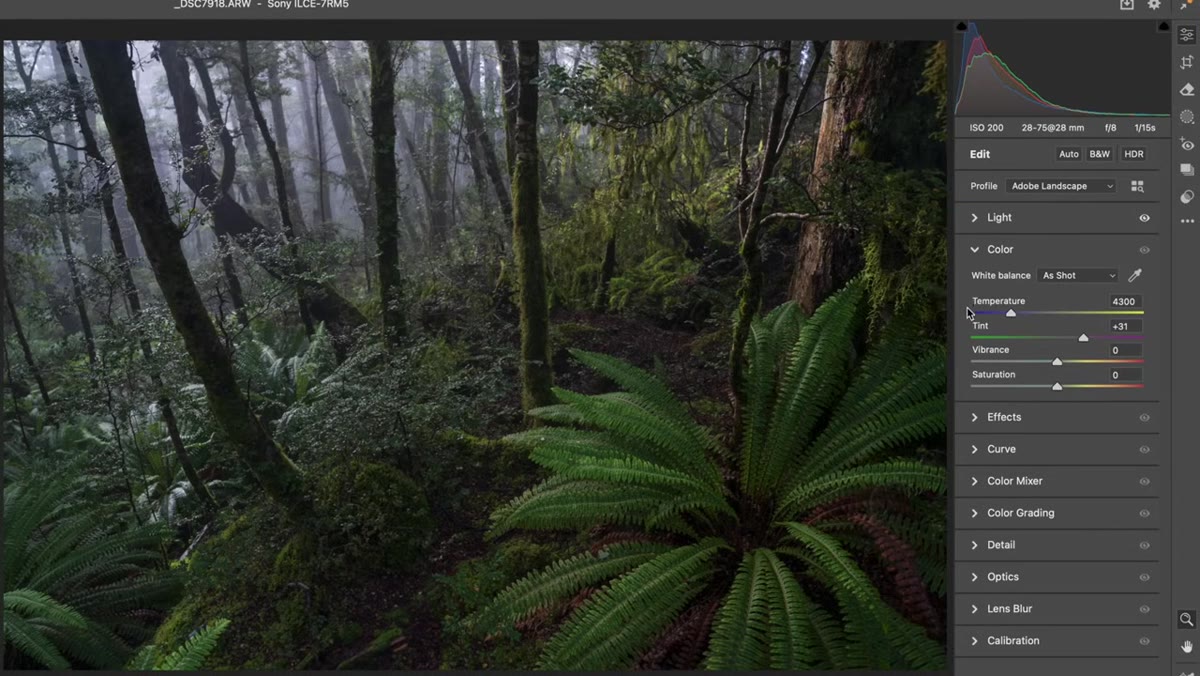 Color panel open, Tint slider being pulled toward green
With the profile set, Patino moves through the color controls: Temperature, Tint, Vibrance, and Saturation. For forest scenes specifically, he’s noticed that his camera tends to read a lot of Magenta into the image, so he pulls the Tint slider toward green to correct for it. This is a common issue with woodland and heavily vegetated scenes, and it’s worth checking your own camera’s tendencies across different shooting environments.
Color panel open, Tint slider being pulled toward green
With the profile set, Patino moves through the color controls: Temperature, Tint, Vibrance, and Saturation. For forest scenes specifically, he’s noticed that his camera tends to read a lot of Magenta into the image, so he pulls the Tint slider toward green to correct for it. This is a common issue with woodland and heavily vegetated scenes, and it’s worth checking your own camera’s tendencies across different shooting environments.
On Vibrance versus Saturation: Vibrance is the more surgical of the two. It lifts the less-saturated colors in the image while protecting skin tones and already-rich hues from blowing out. Saturation affects everything equally. For landscapes, I lean on Vibrance first and only add a touch of Saturation if the image still feels muted. Patino follows a similar logic.
Step 5: Use Local Adjustments to Finish the Light
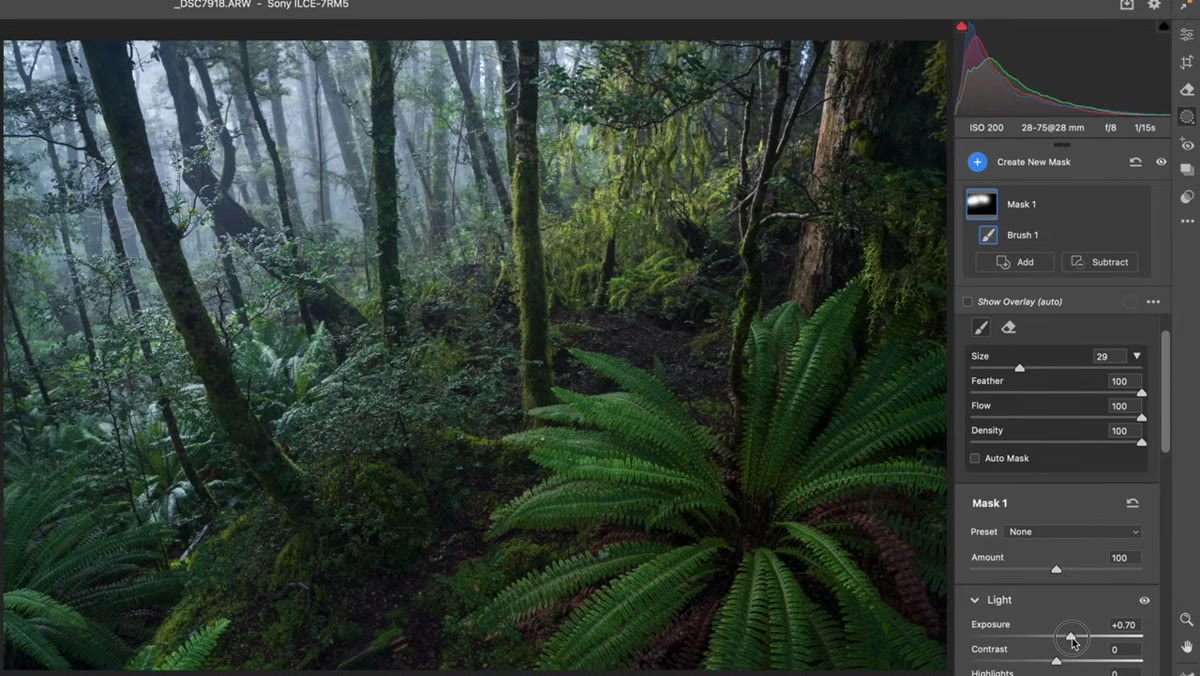 Radial or gradient mask applied to brighten a specific area of the forest
The second L, Local Adjustments, is where the edit goes from corrected to crafted. This is the stage where Patino returns to light adjustments, but now with precision. Instead of brightening the whole image, he targets specific regions: lifting exposure in the distance to simulate the feeling of light filtering through the trees, and darkening the edges slightly to keep the eye from wandering out of the frame.
Radial or gradient mask applied to brighten a specific area of the forest
The second L, Local Adjustments, is where the edit goes from corrected to crafted. This is the stage where Patino returns to light adjustments, but now with precision. Instead of brightening the whole image, he targets specific regions: lifting exposure in the distance to simulate the feeling of light filtering through the trees, and darkening the edges slightly to keep the eye from wandering out of the frame.
In both Lightroom Classic and ACR, the tools available here include gradient masks, radial masks, and the brush tool. The goal is to guide the viewer’s eye without them noticing your hand. If someone looks at your image and thinks “nice editing,” you’ve probably gone too far. If they just feel drawn into the scene, you’ve done it right.
A Note From My Own Workflow
The LCL sequence Patino describes matches closely with how I approach my own edits, but I’d add one thing for photographers working with forest or low-light woodland scenes specifically: do a final check on your color noise after the local adjustments are done. Lifting shadows globally and then again locally can reveal chroma noise in the darker areas that wasn’t visible before. A small move in the Noise Reduction panel’s Color slider, usually between 20 and 35, handles it cleanly without softening the image in the way Luminance noise reduction sometimes does.
I still occasionally pull out a roll of film when I’m working through a creative block, and one thing that practice reinforces is that every decision should have a reason. The LCL framework brings that same intentionality to digital editing. You’re not reacting to what looks wrong. You’re building toward what you already decided you wanted.
The single most transferable idea in this tutorial is the concept of editing in order, not all at once. Fix the light globally, then set the color foundation, then refine with local adjustments. That sequence prevents you from fighting yourself, and it makes it far easier to go back and fix a mistake without unraveling everything downstream.
Watch the full tutorial on YouTube to see Patino walk through the entire edit in real time, including the specific mask placements and values he uses on the forest image.
Comments
Leave a Comment