
There’s a particular kind of frustration that comes from returning home after a long shoot, loading your images into Lightroom, and realizing that something is off but you can’t name it. The photos look fine. The exposure is decent. The light was good. But nothing lands. I spent the better part of my first three years in landscape photography living in that frustration, repeating the same compositional and technical errors without anyone there to tap me on the shoulder and say, “that’s your problem right there.”
That’s exactly why I was nodding along when I watched this Mark Denney tutorial on the five biggest beginner landscape photography mistakes. Watch the full tutorial on YouTube. Mark is self-taught, candid about his own early failures, and the mistakes he outlines aren’t abstract theory. They’re the specific, repeatable habits that quietly stall a photographer’s growth for years before they’re ever identified. I’ve seen them in students at my workshops. I still catch echoes of them in my own work on tired mornings.
What follows is my breakdown of his core points, expanded with what I’ve learned after twenty years of shooting in places like the Cascades, the Oregon coast, and the red rock canyons of the Southwest. If you’re serious about accelerating your progress, this is worth your full attention.
Step 1: Define a Clear Subject Before You Raise the Camera
 Early snapshot photo with no clear focal point
The most common thing I see in beginner work, and the hardest thing to self-diagnose, is a photograph with no clear reason to exist. Every element competes equally for attention. Your eye enters the frame and wanders, finding nowhere to rest. Mark shows an early image of his where a rock, a distant island, a palm frond, and a sliver of sunset are all present and none of them are the subject. He loved that photo at the time because he’d finally learned to smooth water with a slow shutter speed. The technique worked. The composition didn’t.
Before you raise the camera, ask yourself one question out loud if you have to: what is this photograph of? Not “what is in this photograph,” but what is it of. If you can’t answer that in five words or fewer, keep walking, keep looking, or keep waiting. The scene isn’t ready, or you aren’t.
Step 2: Use Leading Lines to Direct Attention, Not Just Fill the Frame
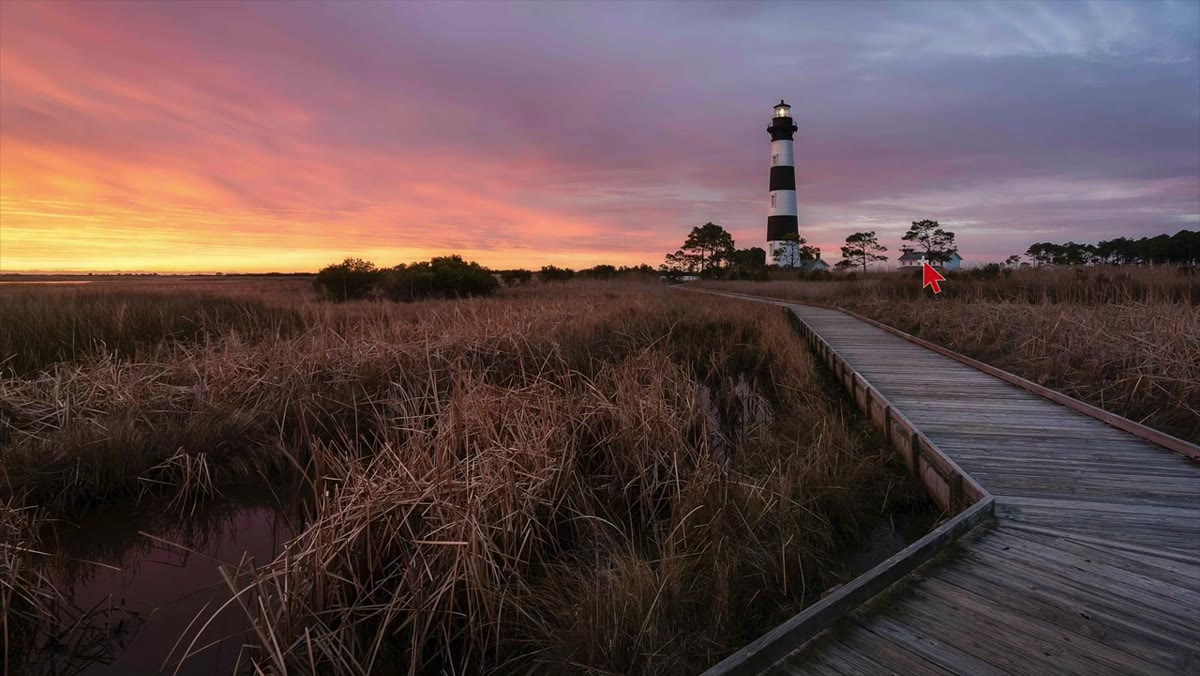 Boardwalk leading to lighthouse with clear visual pathway
Mark’s counterexample to the cluttered snapshot is a boardwalk leading directly to a lighthouse at sunrise. The moment you look at it, your eye follows the boards, arrives at the lighthouse, and settles. The secondary elements, the vegetation, the warm sky, the small structure near a tree, all support the journey without hijacking it.
Leading lines are a compositional tool most beginners know about in theory but underuse in the field because they require patience to find. A boardwalk is obvious. What’s less obvious is the curve of a shoreline, the shadow edge of a dune, or the angle of light falling across a meadow. When I’m scouting, I physically crouch, shift laterally, and look for lines that point somewhere meaningful. A line that leads to nothing is just a line. A line that leads your viewer’s eye to the heart of the image is architecture.
Step 3: Slow Down Before You Shoot, Especially When the Light is Good
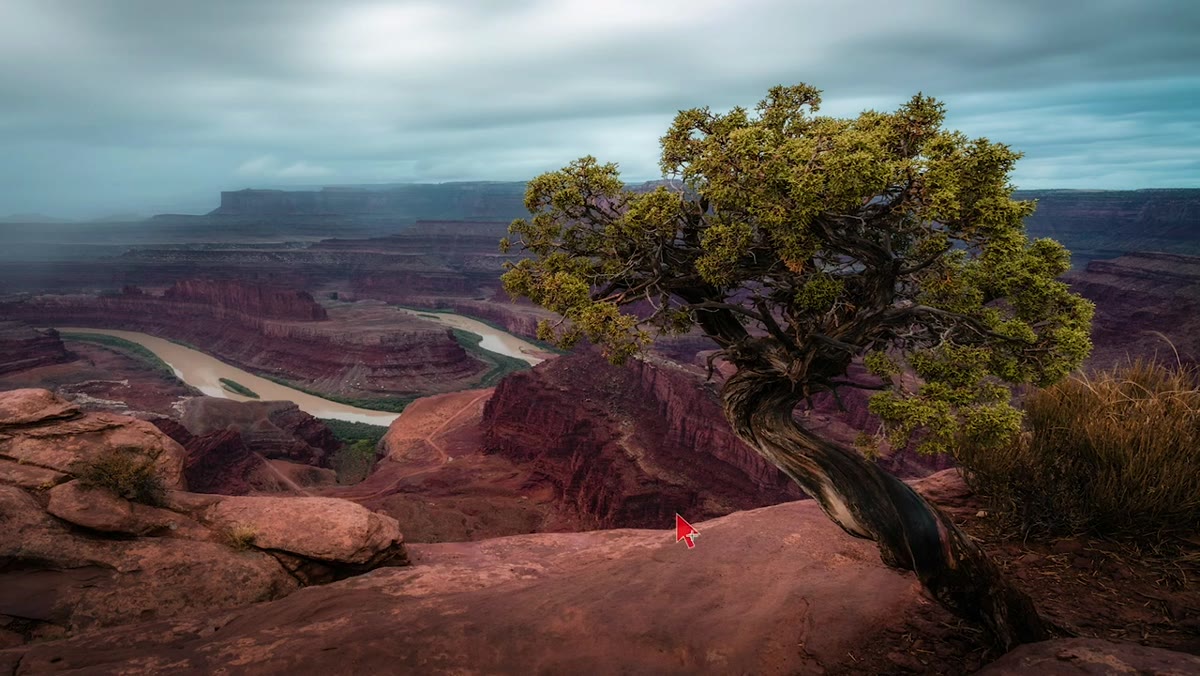
 Warm sunset light on cliff face at Moab
One of the quieter admissions Mark makes is that he still occasionally falls into this trap himself. He describes arriving at a Moab location with beautiful warm light raking across a cliff face and shooting before he’d fully worked out what the image was. Good light creates urgency, and urgency creates sloppy composition. It’s a trap that catches experienced photographers, not just beginners.
I learned a practice from a mentor years ago that I still use: arrive early enough to scout in flat or bad light, so that when the good light arrives, you already know where you’re standing. You’ve already solved the compositional problem in calm conditions. When the color hits, you’re not scrambling. You’re executing. If you’re reacting to beautiful light rather than preparing for it, you’re already a step behind.
Step 4: Stop Shooting Everything from Eye Level
 Comparison of standing height versus low angle composition
Eye level is where we move through the world. It’s comfortable. It’s also the least interesting perspective in most landscape scenes. Foreground elements that could anchor an image and create depth become irrelevant when you’re standing upright. Flowers flatten. Tide pools disappear. Rocks lose their texture.
Getting low costs you nothing and changes everything. I shoot from my knees, my elbows, and occasionally my stomach on cold, wet ground with my lucky hat stuffed under my chin for padding. When I’m low, the foreground becomes part of the story rather than a strip of nothing at the bottom of the frame. The scene gains dimension. Try dropping even six inches and recomposing. The difference is usually immediate and significant.
Step 5: Stop Chasing Perfect Conditions and Shoot What’s In Front of You
 Overcast or moody scene being reframed as an asset
Mark addresses something I hear constantly in workshop conversations: the habit of waiting for ideal conditions that rarely arrive on schedule. Beginners tend to pack up when clouds roll in or the golden hour doesn’t deliver. They’re hunting the postcard version of a landscape rather than engaging with the landscape as it actually is.
Overcast light is flat but it’s also diffuse, which means you can shoot into it without blowing highlights. Fog adds layers and mystery that clear skies can’t manufacture. Rain on a lens can ruin a shot or create one of the most compelling images of your season. Some of my most commercially successful prints came from days I almost didn’t bother going out. The mountain doesn’t care about your schedule, as someone once told me, and it turned out to be the most useful piece of photography advice I ever received.
What Twenty Years Adds to This List
Mark’s five mistakes are accurate and well-observed. The one thing I’d layer on top of all of them is the cost of not reviewing your mistakes systematically. It’s not enough to shoot and move on. After every significant outing, I sit with the images that didn’t work and I try to name exactly why. Not “the composition feels off” but “I didn’t have a clear subject, so my eye had no entry point.” Naming the mistake precisely is what prevents you from repeating it. Vague dissatisfaction just breeds more of itself.
If you’re keeping a field journal, add a line after each session: one thing that worked and one thing that didn’t, with a specific reason for each. Over time that log becomes an education you built yourself, which is the only kind that really sticks.
The single most transferable idea in this entire tutorial is the simplest one: know what your photograph is of before you press the shutter. Everything else, the leading lines, the low angles, the willingness to shoot in imperfect light, flows naturally from that discipline. If the subject is clear in your mind, the camera is just the last step.
Watch the full tutorial on YouTube to see Mark walk through each mistake with his own before-and-after examples. His early work is refreshingly honest, and seeing the comparison images is far more instructive than reading anyone’s description of them, including mine.
Comments
Leave a Comment