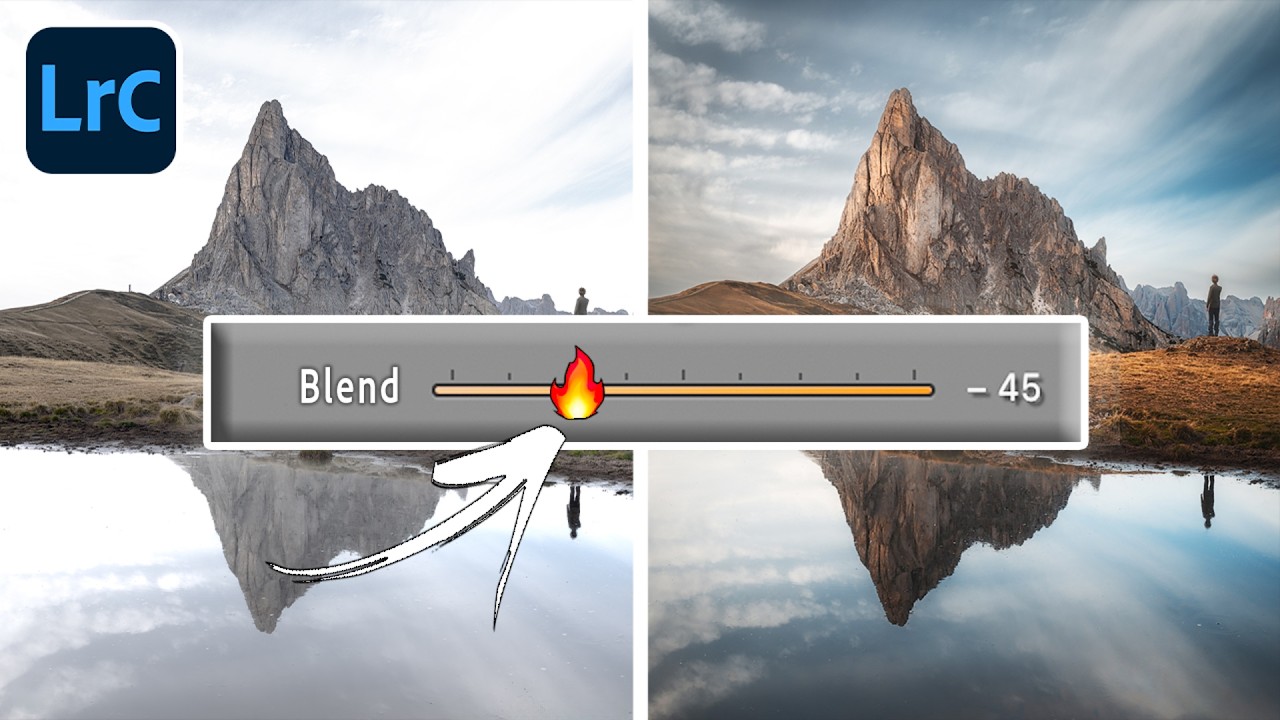
There’s a particular kind of frustration that lives in the zoom-in. You’ve done everything right. The sky mask selected cleanly, the clouds have drama and texture now, the exposure looks balanced. You toggle the edit on and off and feel that small, quiet satisfaction of a job done well. Then you zoom in to check your edges and there it is: a thin, glowing halo hugging the ridgeline like the mountain is lit from behind by something that was never there. I’ve been staring at this problem for years, assuming it was just the price of aggressive sky edits. It turns out the fix has been sitting in Lightroom the whole time, just not where anyone thinks to look.
Watch the full tutorial on YouTube
In this Mark Denney tutorial, he works through a shot from the Italian Dolomites with a badly blown sky and walks through exactly what creates that halo artifact and three different methods for dealing with it. What makes it useful is that he deliberately exaggerates the problem so you can actually see what’s happening at the pixel level. That kind of transparency is rare, and it changed how I think about sky mask adjustments.
The core issue is compounding. When you darken a sky with a mask, you’re not just pulling one slider. You’re typically stacking reduced exposure, boosted contrast, added clarity, dehaze, and pulled-back saturation all on top of each other. Each of those adjustments is reasonable on its own. Together, they push hard against the edge of that mask, and Lightroom’s sky selection, as good as it’s gotten, doesn’t create a perfectly clean boundary. That imperfect boundary plus heavy adjustments equals a visible halo along your horizon line.
Step 1: Create the Sky Mask and Make Your Standard Adjustments
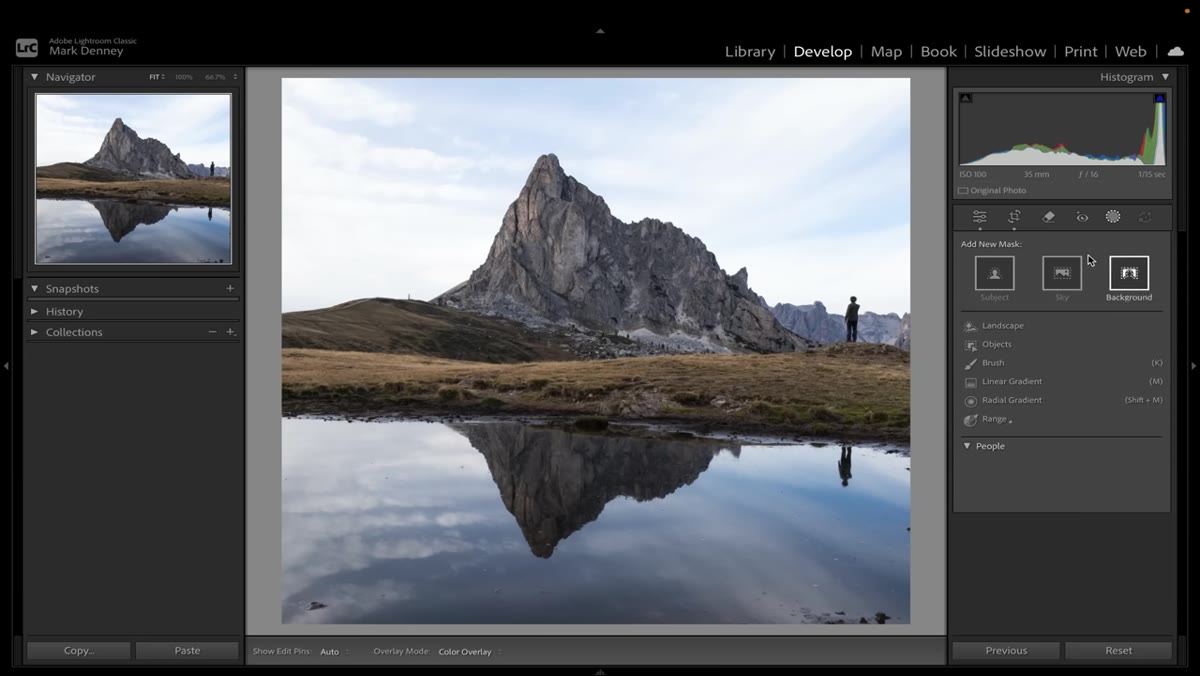 Sky mask applied over Dolomites image in Lightroom
Start by navigating to the Masking panel in Lightroom and selecting Sky. Let Lightroom generate the selection automatically. Once it’s active, apply the kind of adjustments you’d normally use for a dramatic sky: bring the highlights down significantly, add contrast and clarity to pull out cloud structure, increase dehaze to push the texture further, then pull saturation back to compensate for the color shift those last two sliders introduce. You might also lower the overall exposure slightly. This is normal, practical sky editing. The problem isn’t with the individual adjustments. It’s with how they behave together at the mask boundary.
Sky mask applied over Dolomites image in Lightroom
Start by navigating to the Masking panel in Lightroom and selecting Sky. Let Lightroom generate the selection automatically. Once it’s active, apply the kind of adjustments you’d normally use for a dramatic sky: bring the highlights down significantly, add contrast and clarity to pull out cloud structure, increase dehaze to push the texture further, then pull saturation back to compensate for the color shift those last two sliders introduce. You might also lower the overall exposure slightly. This is normal, practical sky editing. The problem isn’t with the individual adjustments. It’s with how they behave together at the mask boundary.
Step 2: Zoom In to Confirm the Halo
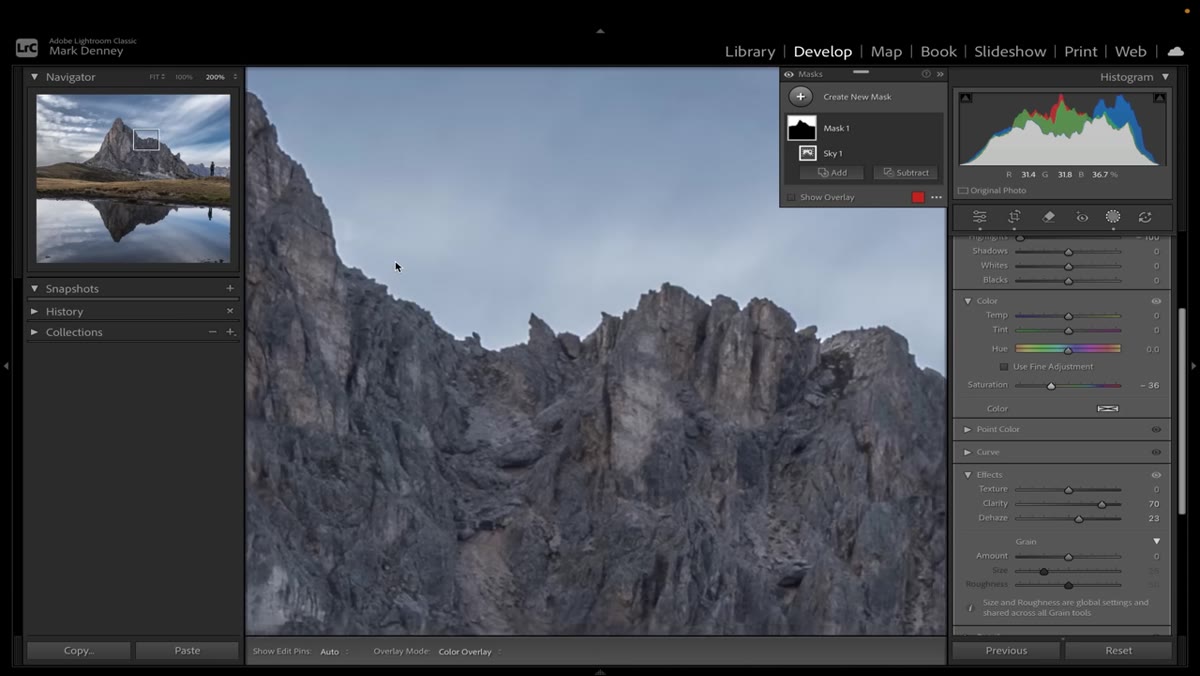 Close-up of mountain ridgeline showing white halo artifact
Before you try to fix anything, you need to actually see the problem clearly. Zoom into the area where sky meets land, specifically along ridgelines, treelines, or any hard horizontal edge. Toggle the mask on and off using the switch at the top of the mask panel. With heavier adjustments applied, you’ll notice a pale fringe along the boundary where the sky selection ends. It’s brightest where the sky is darkest, because the mask edge is slightly imprecise and the aggressive exposure reduction creates a visible seam. The stronger your overall edit, the wider and brighter that halo becomes. Once you’ve seen it, you’ll start catching it in shots you’ve already exported.
Close-up of mountain ridgeline showing white halo artifact
Before you try to fix anything, you need to actually see the problem clearly. Zoom into the area where sky meets land, specifically along ridgelines, treelines, or any hard horizontal edge. Toggle the mask on and off using the switch at the top of the mask panel. With heavier adjustments applied, you’ll notice a pale fringe along the boundary where the sky selection ends. It’s brightest where the sky is darkest, because the mask edge is slightly imprecise and the aggressive exposure reduction creates a visible seam. The stronger your overall edit, the wider and brighter that halo becomes. Once you’ve seen it, you’ll start catching it in shots you’ve already exported.
Step 3: Use the Amount Slider to Scale Back the Mask Strength
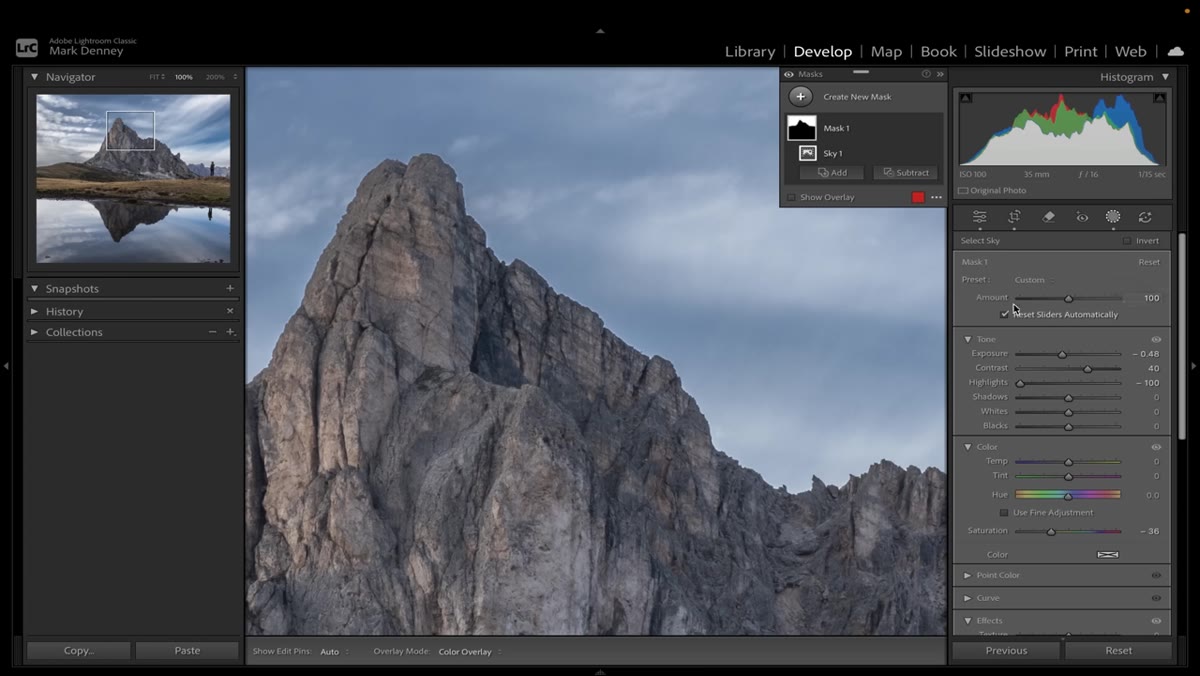 Amount slider in Lightroom mask panel pulled below 100
The first and most straightforward fix is the Amount slider, located in the mask’s settings area near where you’d expect to find preset controls. It’s easy to overlook because it sits in an unintuitive location, but it functions as a global intensity dial for every adjustment inside that specific mask. Dragging it down from 100 reduces the overall strength of the edit proportionally across all sliders. If your sky edit was doing good work at full strength but the halo was too aggressive, bringing Amount down to somewhere between 60 and 80 often preserves most of the sky drama while softening the edge artifact considerably. It’s a blunt instrument, but it’s fast and it works when you don’t want to rethink your individual slider values.
Amount slider in Lightroom mask panel pulled below 100
The first and most straightforward fix is the Amount slider, located in the mask’s settings area near where you’d expect to find preset controls. It’s easy to overlook because it sits in an unintuitive location, but it functions as a global intensity dial for every adjustment inside that specific mask. Dragging it down from 100 reduces the overall strength of the edit proportionally across all sliders. If your sky edit was doing good work at full strength but the halo was too aggressive, bringing Amount down to somewhere between 60 and 80 often preserves most of the sky drama while softening the edge artifact considerably. It’s a blunt instrument, but it’s fast and it works when you don’t want to rethink your individual slider values.
Step 4: Refine the Mask Edge to Pull It Away from the Horizon
 Mask refinement options with Subtract or edge-feathering controls
A more surgical approach is to modify where the mask actually lives. After generating the sky selection, you can subtract from it using a linear gradient or a brush, targeting just the area along the horizon where the halo appears. The goal is to pull the lower boundary of the sky mask slightly upward, creating a gap between the hard land edge and where your adjustments are being applied. This won’t work in every image, particularly when the sky dips into complex terrain. But for clean ridgelines and open horizons, pulling the mask away from the edge by even a small amount removes the halo almost entirely without weakening your sky edit overall.
Mask refinement options with Subtract or edge-feathering controls
A more surgical approach is to modify where the mask actually lives. After generating the sky selection, you can subtract from it using a linear gradient or a brush, targeting just the area along the horizon where the halo appears. The goal is to pull the lower boundary of the sky mask slightly upward, creating a gap between the hard land edge and where your adjustments are being applied. This won’t work in every image, particularly when the sky dips into complex terrain. But for clean ridgelines and open horizons, pulling the mask away from the edge by even a small amount removes the halo almost entirely without weakening your sky edit overall.
Step 5: Feather the Mask Boundary for a Smoother Transition
 Feathering control applied to sky mask edge in Lightroom
If pulling the mask inward creates an obvious gap between your edited sky and unedited land, feathering the edge is the cleaner solution. Within the mask refinement options, increasing feather softens the transition zone at the selection boundary so that your adjustments fade out gradually rather than cutting off hard. This spreads the effect across a wider area at the edge, which sounds counterintuitive but actually makes the halo disappear by eliminating the sharp contrast between full-strength adjustment and none at all. Start with a modest feather amount and check the edge at 100 percent zoom. You’re looking for the point where the sky edit still reads as strong and deliberate but blends smoothly into the land below.
Feathering control applied to sky mask edge in Lightroom
If pulling the mask inward creates an obvious gap between your edited sky and unedited land, feathering the edge is the cleaner solution. Within the mask refinement options, increasing feather softens the transition zone at the selection boundary so that your adjustments fade out gradually rather than cutting off hard. This spreads the effect across a wider area at the edge, which sounds counterintuitive but actually makes the halo disappear by eliminating the sharp contrast between full-strength adjustment and none at all. Start with a modest feather amount and check the edge at 100 percent zoom. You’re looking for the point where the sky edit still reads as strong and deliberate but blends smoothly into the land below.
What I Do Differently After Mountain Shoots
I photograph a lot of terrain here in the Pacific Northwest where ridgelines are jagged and treelines are irregular. The sky mask’s automatic selection handles those complex edges less gracefully than it handles a clean prairie horizon. What I’ve started doing is treating sky masks as a starting point rather than a finished selection. After Lightroom generates it, I immediately subtract along the bottom boundary using a brush at low flow before I apply any adjustments at all. It takes maybe ninety seconds, and it means I’m never fighting the halo retroactively. Fixing the edge before you edit is easier than correcting the artifact after you’ve already stacked adjustments on top of it.
The other thing worth saying plainly: this problem gets worse the more you process your sky. If you’re reaching for dehaze and clarity together on a regular basis, and I do, because the results when they’re controlled are genuinely beautiful, then mask edge quality has to become part of your workflow, not an afterthought. The image will look fine at full zoom-out. It will fall apart when a client or a print buyer looks closely, and they always do.
The most important thing Mark makes visible in this tutorial is that the halo isn’t a bug in Lightroom’s sky selection. It’s a consequence of aggressive adjustment meeting an imperfect boundary. The fix isn’t to edit less boldly. It’s to understand where the mask lives and make sure the boundary is clean before you push those sliders. That distinction changes how you approach every masked adjustment you make.
Comments (4)
This saved me so much time on my last edit. Wish I'd found this sooner.
This should be required reading for anyone starting out.
Great article! I actually covered something related on my site — the workflows angle is really complementary to this.
Love how you break down complex stuff into manageable steps.
Leave a Comment