There’s a particular kind of frustration I know well: you’re standing in golden light, the sky is doing something genuinely beautiful, you raise your phone and take the shot, and the result looks like a postcard from a gas station. The light was there. The scene was there. The phone just didn’t see what your eyes saw. After two decades of shooting landscapes, mostly with full-frame cameras and more glass than I care to admit to owning, I still reach for my iPhone on evening walks when I don’t want to haul gear. And those shots still need work before they’re worth sharing.
That’s exactly the problem Sean Tucker addresses in his tutorial on editing a sunset iPhone photo. Watch the full tutorial on YouTube. Tucker’s approach is methodical and honest. He doesn’t pretend the original image is good. He starts with a flat, slightly dull HDR shot taken through trees at sunset and works it into something that actually holds up. The workflow moves through two apps, Snapseed and one other, and each step has a clear purpose. No mystery adjustments, no slider-twisting for the sake of it.
What I appreciate most is the underlying philosophy Tucker brings to the walk itself. He treats the evening walk as practice for the same skill that matters in serious field work: learning to recognize good light before the shot, not after. That habit, repeated daily, is worth more than any app. But once you’ve seen the light and captured something rough, here’s how he cleans it up.
Step 1: Correct Perspective Distortion in Snapseed
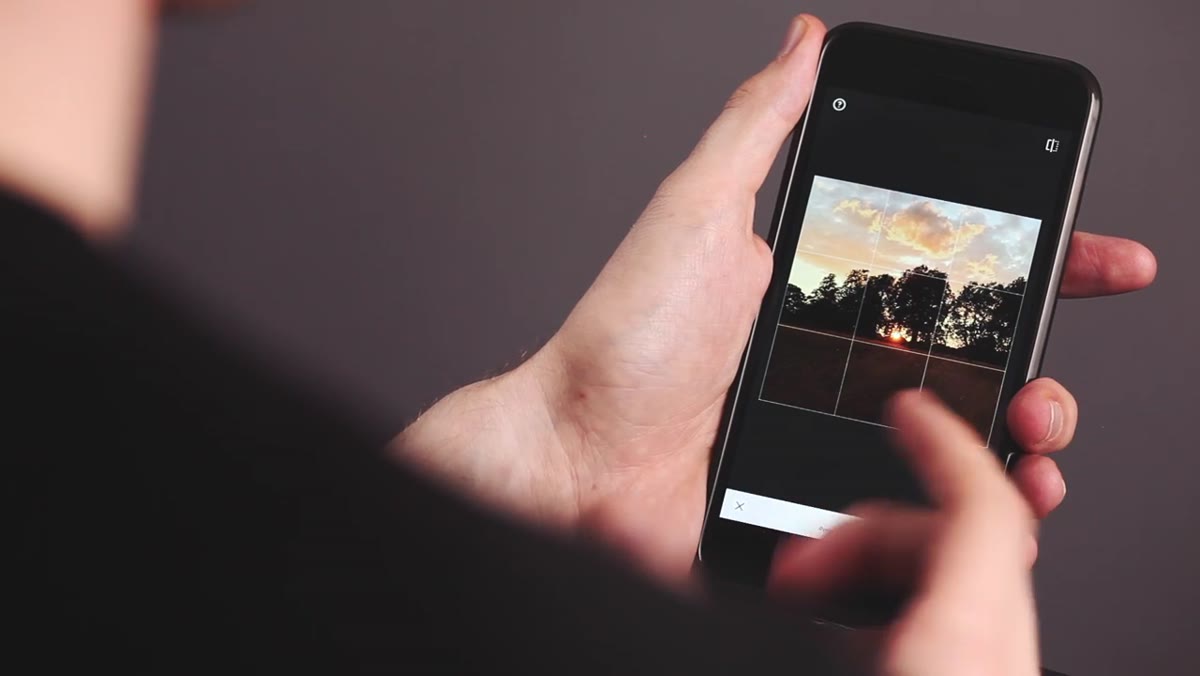 Transform tool warping trees and horizon line in Snapseed
Open the image in Snapseed and go directly to the Transform tool. iPhone lenses are wide, and that wide angle pulls vertical lines outward, bending trees, buildings, anything that should be straight. Tucker drags the perspective correction to bring those lines back in, centering the sun in the frame and straightening the geometry of the scene. Don’t overcorrect here. The goal is naturalism, not the sterile perfection of architectural photography. A slight leftward or rightward adjustment to fix horizontal lean is also available in this tool if the frame feels off-axis.
Transform tool warping trees and horizon line in Snapseed
Open the image in Snapseed and go directly to the Transform tool. iPhone lenses are wide, and that wide angle pulls vertical lines outward, bending trees, buildings, anything that should be straight. Tucker drags the perspective correction to bring those lines back in, centering the sun in the frame and straightening the geometry of the scene. Don’t overcorrect here. The goal is naturalism, not the sterile perfection of architectural photography. A slight leftward or rightward adjustment to fix horizontal lean is also available in this tool if the frame feels off-axis.
Step 2: Level the Horizon with Rotate
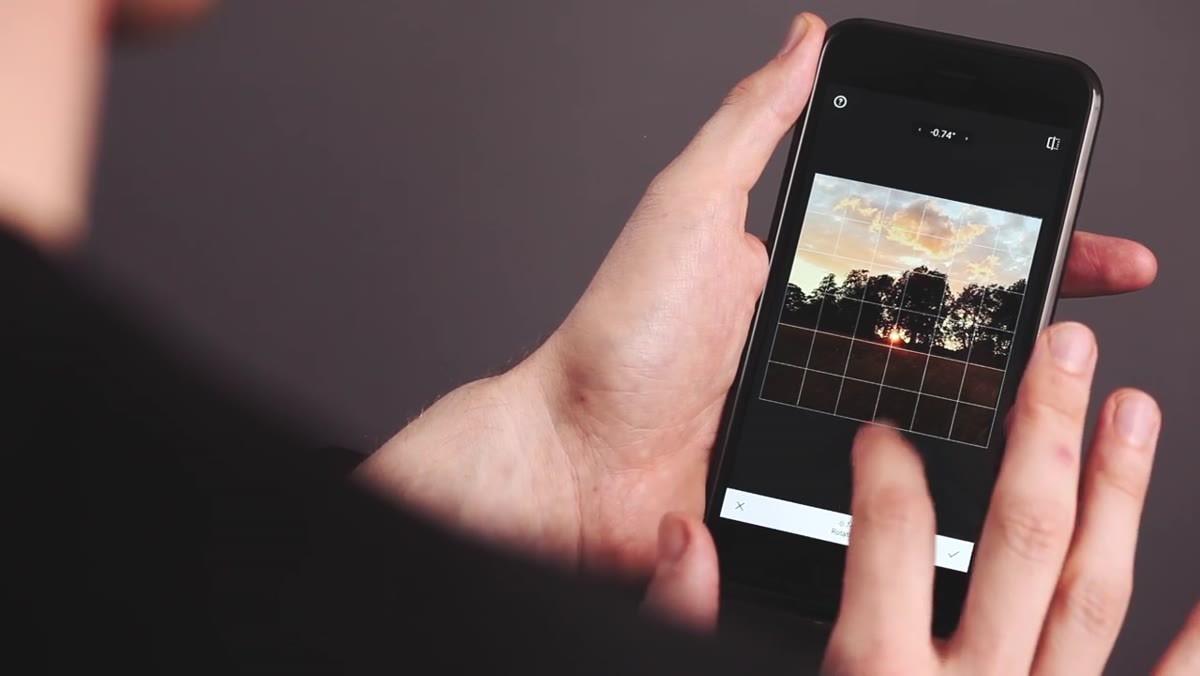 Rotate adjustment straightening the horizon line in Snapseed
Still inside Snapseed, drop into the Rotate function and check the horizon. Tucker’s original shot is nearly level but not quite. A horizon that’s even slightly tilted reads as amateur to anyone who’s spent time looking at landscape work. This is one of those small corrections that costs nothing and matters enormously. The rule of thumb Tucker is implicitly working with here is that the horizon should sit on the lower third of the frame, a basic compositional principle that still holds whether you’re shooting with a phone or a large format camera.
Rotate adjustment straightening the horizon line in Snapseed
Still inside Snapseed, drop into the Rotate function and check the horizon. Tucker’s original shot is nearly level but not quite. A horizon that’s even slightly tilted reads as amateur to anyone who’s spent time looking at landscape work. This is one of those small corrections that costs nothing and matters enormously. The rule of thumb Tucker is implicitly working with here is that the horizon should sit on the lower third of the frame, a basic compositional principle that still holds whether you’re shooting with a phone or a large format camera.
Step 3: Use Ambience to Reveal Hidden Detail
 Ambience slider pulled right showing recovered grass and sky detail
In Snapseed’s Tune Image panel, Tucker starts with the Ambience slider rather than jumping straight to exposure. This is the right instinct. Ambience works differently from a straight brightness boost. It pulls detail out of both the shadows and the highlights simultaneously, giving you a read on how much information the HDR capture actually preserved. Tucker pushes it far to the right first, not because that’s the finished look, but to see the ceiling. Then he dials it back to a point where the grass texture and cloud detail appear without the image going oversaturated and garish. Think of it as an audit of your raw material before you commit to any other adjustment.
Ambience slider pulled right showing recovered grass and sky detail
In Snapseed’s Tune Image panel, Tucker starts with the Ambience slider rather than jumping straight to exposure. This is the right instinct. Ambience works differently from a straight brightness boost. It pulls detail out of both the shadows and the highlights simultaneously, giving you a read on how much information the HDR capture actually preserved. Tucker pushes it far to the right first, not because that’s the finished look, but to see the ceiling. Then he dials it back to a point where the grass texture and cloud detail appear without the image going oversaturated and garish. Think of it as an audit of your raw material before you commit to any other adjustment.
Step 4: Lift Brightness and Open Up Shadows
 Brightness and Shadows sliders adjusted in Tune Image panel
With Ambience set, Tucker makes two supporting moves: a slight brightness lift to open the midtones, and a pull to the right on the Shadows slider to bring detail back into the darker areas of the frame, specifically the tree trunks and the lower grass. These are conservative adjustments. The HDR capture has done some of the heavy lifting already, and the job here is to reveal what’s there rather than manufacture something that wasn’t. I’d add that if your shadows start looking gray or washed rather than deep, you’ve gone too far. Shadow detail and shadow depth can coexist, but it takes restraint.
Brightness and Shadows sliders adjusted in Tune Image panel
With Ambience set, Tucker makes two supporting moves: a slight brightness lift to open the midtones, and a pull to the right on the Shadows slider to bring detail back into the darker areas of the frame, specifically the tree trunks and the lower grass. These are conservative adjustments. The HDR capture has done some of the heavy lifting already, and the job here is to reveal what’s there rather than manufacture something that wasn’t. I’d add that if your shadows start looking gray or washed rather than deep, you’ve gone too far. Shadow detail and shadow depth can coexist, but it takes restraint.
Step 5: Pull Back Highlights to Recover the Sky
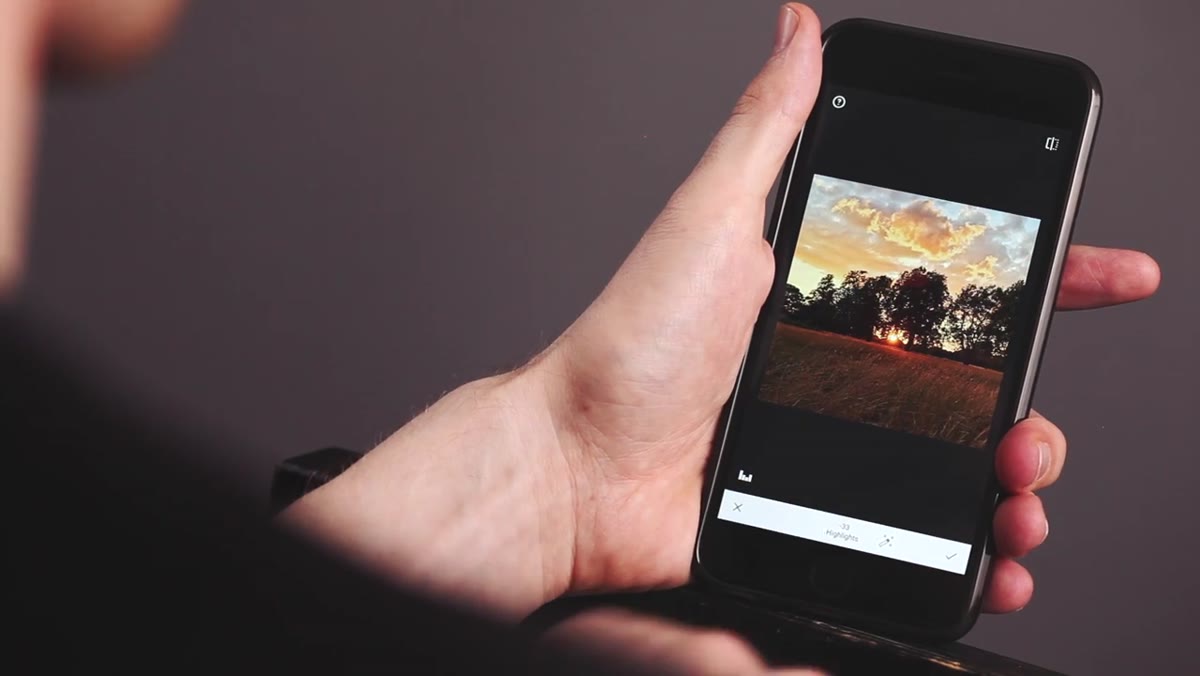
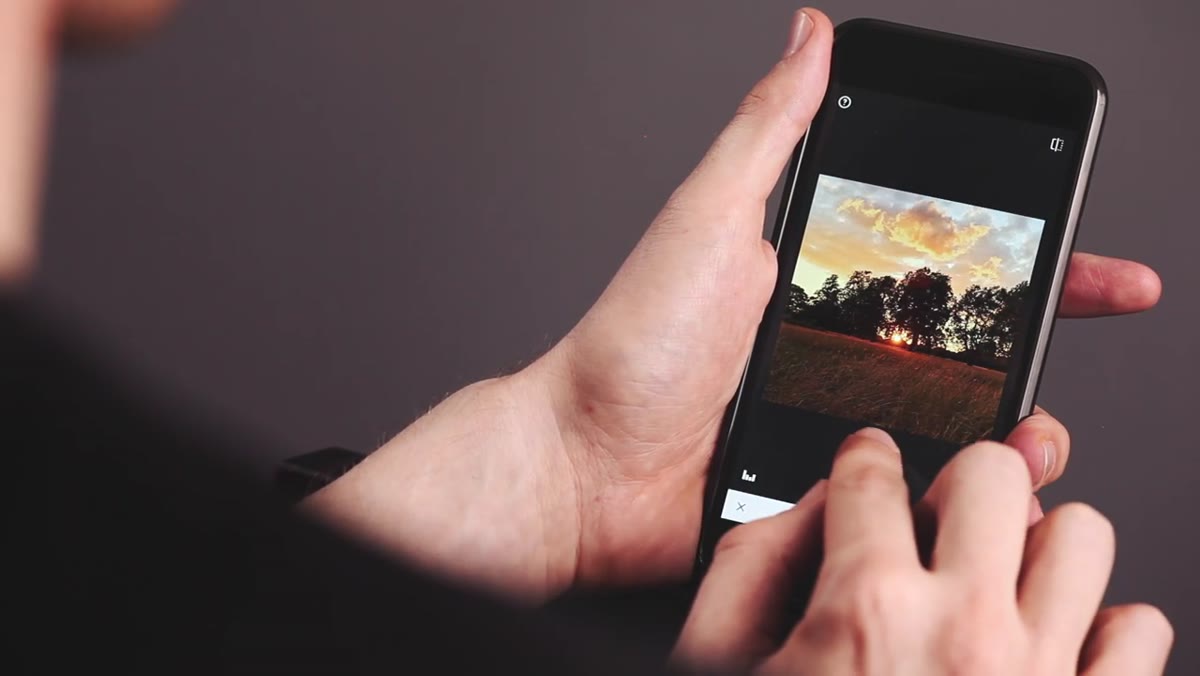 Highlights slider pulled left to recover cloud detail in bright sky
This is the adjustment that separates a sunset photo from a blown-out orange rectangle. Tucker slides the Highlights control to the left, darkening the brightest areas of the sky and pulling cloud texture back into view. On a sunset, this is almost always necessary. The sky is dramatically brighter than the ground, and the phone’s sensor, even in HDR mode, tends to bias toward protecting the foreground. Recovering highlights in Snapseed isn’t as powerful as doing it in Lightroom from a raw file, but it’s effective enough to matter, especially if the HDR bracketing has done its job.
Highlights slider pulled left to recover cloud detail in bright sky
This is the adjustment that separates a sunset photo from a blown-out orange rectangle. Tucker slides the Highlights control to the left, darkening the brightest areas of the sky and pulling cloud texture back into view. On a sunset, this is almost always necessary. The sky is dramatically brighter than the ground, and the phone’s sensor, even in HDR mode, tends to bias toward protecting the foreground. Recovering highlights in Snapseed isn’t as powerful as doing it in Lightroom from a raw file, but it’s effective enough to matter, especially if the HDR bracketing has done its job.
Step 6: Evaluate Color Temperature Before Moving On
 Warm orange-toned image after tune adjustments, pre-color correction
At this stage in Tucker’s workflow, the image is warm, very warm, because it’s a sunset and that’s correct. He makes a deliberate choice to look at the color temperature here and decide whether it needs intervention before moving to a second app. This is a habit worth borrowing. Snapseed’s White Balance control is available in Tune Image, and a sunset shot often benefits from a very slight cooling of the overall temperature, just enough to keep the oranges from going neon without losing the warmth that makes the image feel like the right time of day.
Warm orange-toned image after tune adjustments, pre-color correction
At this stage in Tucker’s workflow, the image is warm, very warm, because it’s a sunset and that’s correct. He makes a deliberate choice to look at the color temperature here and decide whether it needs intervention before moving to a second app. This is a habit worth borrowing. Snapseed’s White Balance control is available in Tune Image, and a sunset shot often benefits from a very slight cooling of the overall temperature, just enough to keep the oranges from going neon without losing the warmth that makes the image feel like the right time of day.
A Note from Twenty Years of Chasing Light
Tucker’s workflow is tight and fast, which makes sense for a daily Instagram discipline. What I’d add for anyone doing this seriously is to pay attention to what you’re correcting and why, not just how. Every adjustment you make in Snapseed is teaching you something about the image: where the sensor struggled, where the light was uneven, where the composition is pulling your eye in the wrong direction. I still shoot film occasionally, not because I think it produces a better image, but because it forces me to read the scene before I press anything. Editing on a phone can become the same kind of practice if you treat each slider as a question rather than a fix.
The deeper takeaway from Tucker’s tutorial isn’t any specific setting. It’s the daily commitment to shooting in good light, even with modest equipment, and then learning to see what the camera missed and correct it deliberately. That skill transfers to every camera you’ll ever own.
Watch the full tutorial on YouTube to see Tucker’s complete edit, including the second app he reaches for once Snapseed has done its job on the base image.
Comments (2)
Never thought of approaching it this way. Really creative.
Simple but effective. Sometimes that's all you need.
Leave a Comment