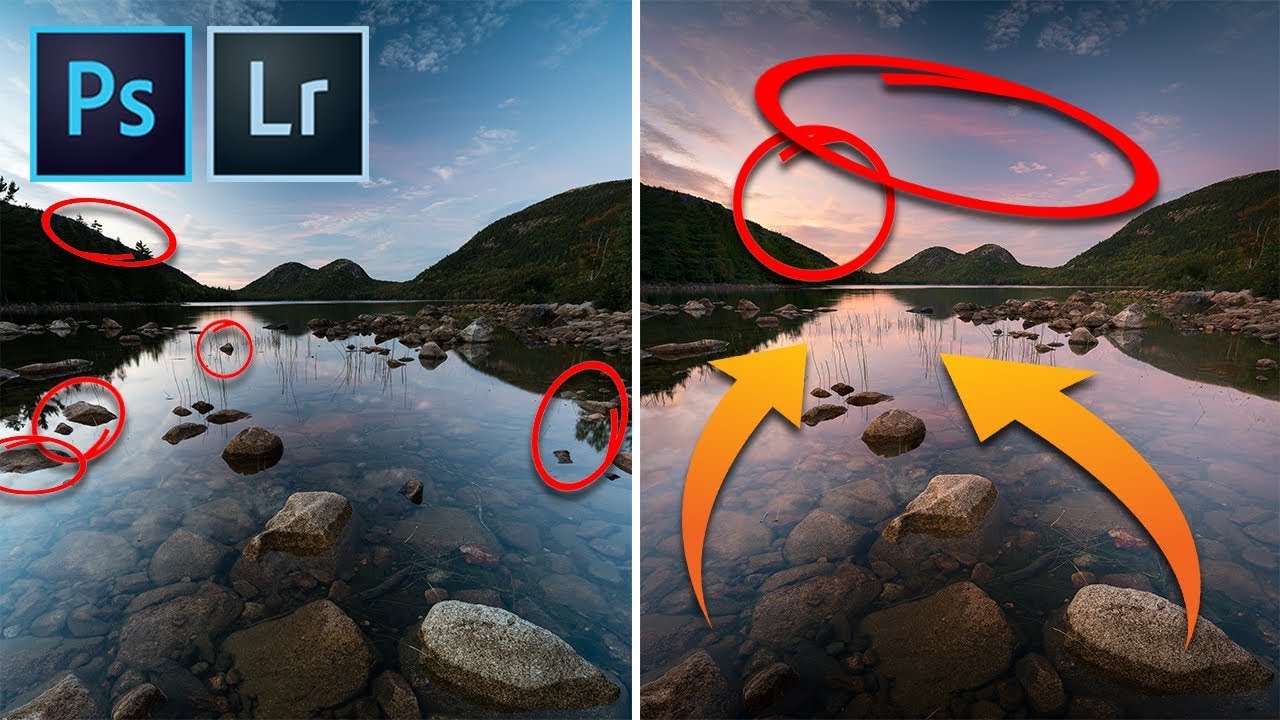
There’s a habit most of us fall into without realizing it. We come home from a shoot, load our raw files, and immediately start pulling sliders. Exposure. Highlights. Vibrance. Saturation. We treat editing like a color correction problem, and somewhere in that process, the composition of the image, the actual reason we pressed the shutter, gets almost no deliberate attention. I’ve been shooting landscapes full-time for two decades, and I’ll be honest: I still catch myself doing this. So when I came across a tutorial by Mark Denney where he describes having an almost identical epiphany mid-edit, it stopped me cold.
In this Mark Denney tutorial, he’s working on an image from Jordan Pond in Acadia National Park, a stunning scene with a setting sun, symmetrical mountain reflections, and a rocky foreground. He realized he’d spent twice his normal editing time on the photo, but not because of anything to do with color. He was wrestling with the composition of the image, cleaning it up, reinforcing it, making sure every element was doing its job. That realization prompted him to rethink his whole editing workflow, and the resulting process is worth walking through step by step. Watch the full tutorial on YouTube
The approach he outlines is straightforward, but the mindset shift underneath it is significant. Before you touch a single tonal slider, you need to understand what you actually like about the photo, and why you took it in the first place. Everything that follows in the edit should serve that answer.
Step 1: Analyze the Composition Before You Edit Anything
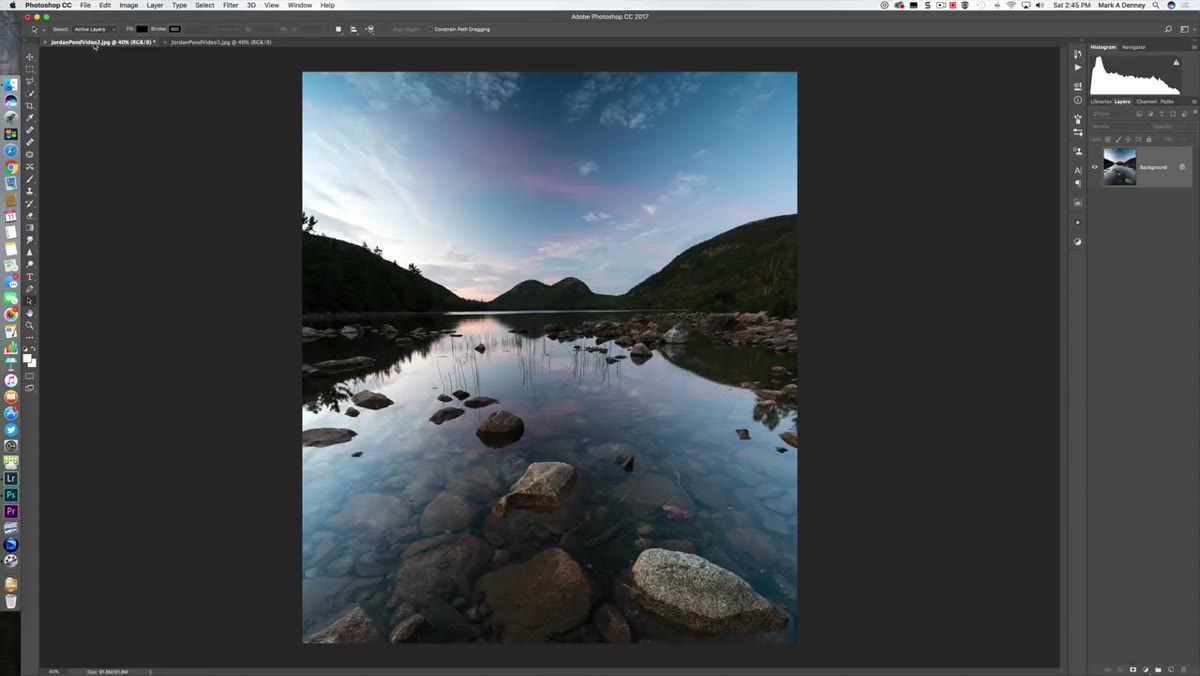 Raw image open in Lightroom showing Jordan Pond at sunset
Pull up your raw file and resist the urge to adjust anything immediately. Instead, look at it the way you’d look at someone else’s photo. Ask yourself three questions: What drew my eye when I took this? What is the intended focal point? And what elements are helping or hurting the path the viewer’s eye takes through the frame?
For Mark, the focal point was clear: the setting sun, the brightest part of the image. He identified two strong leading lines formed by the mountain reflections on either side of the water, both converging symmetrically toward the sun. He also noted that the foreground stones served as an entry point, walking the viewer’s eye from the bottom of the frame upward through the mid-ground water and into the background sky. Breaking the image into these three layers, foreground, mid-ground, background, is a useful framework for any landscape. If any layer is missing or muddied, the composition loses its depth.
Step 2: Identify What’s Competing With Your Focal Point
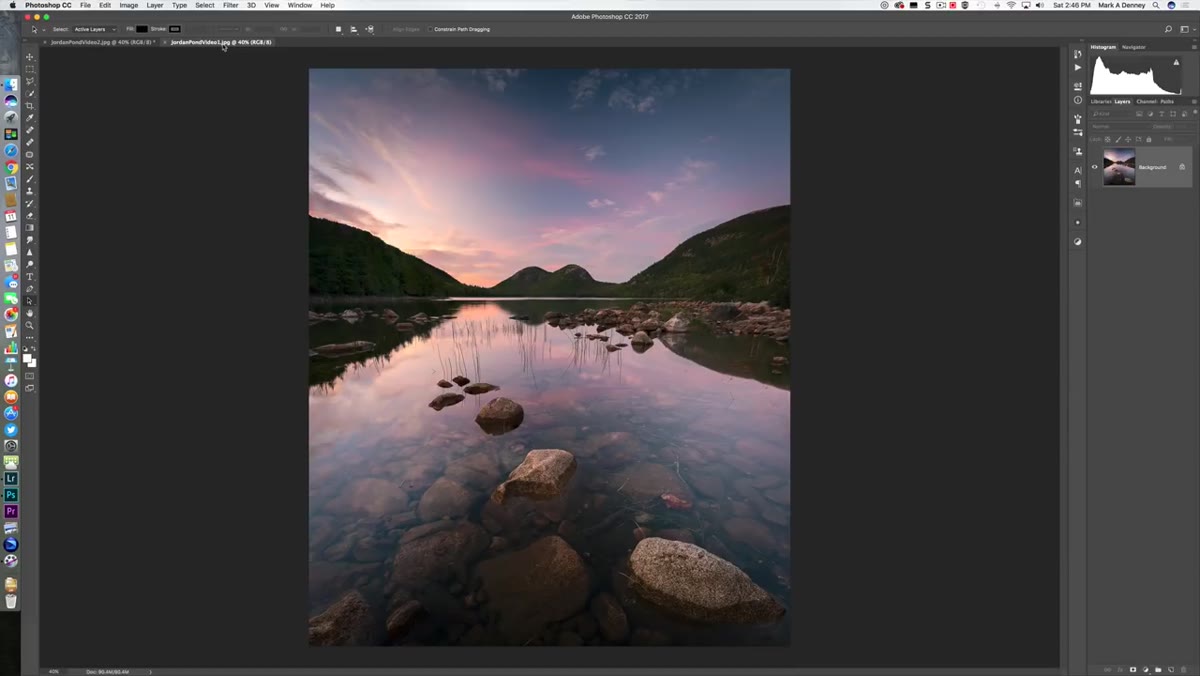 Before and after comparison showing extra stones in raw file
Compare your raw file to your mental image of what the final photo should look like. Look for anything that interrupts the visual path you mapped out in Step 1. In Mark’s case, the raw image had additional stones scattered across the foreground that made the scene feel chaotic and visually noisy. They didn’t lead the eye anywhere useful. They just created clutter.
This is the diagnostic step. You’re not fixing anything yet. You’re making a list. Distracting elements, dead corners, anything that pulls the viewer’s gaze away from the focal point before it’s supposed to arrive there. Write it down or keep it clearly in mind before you open any tool.
Step 3: Clean the Foreground to Strengthen the Leading Lines
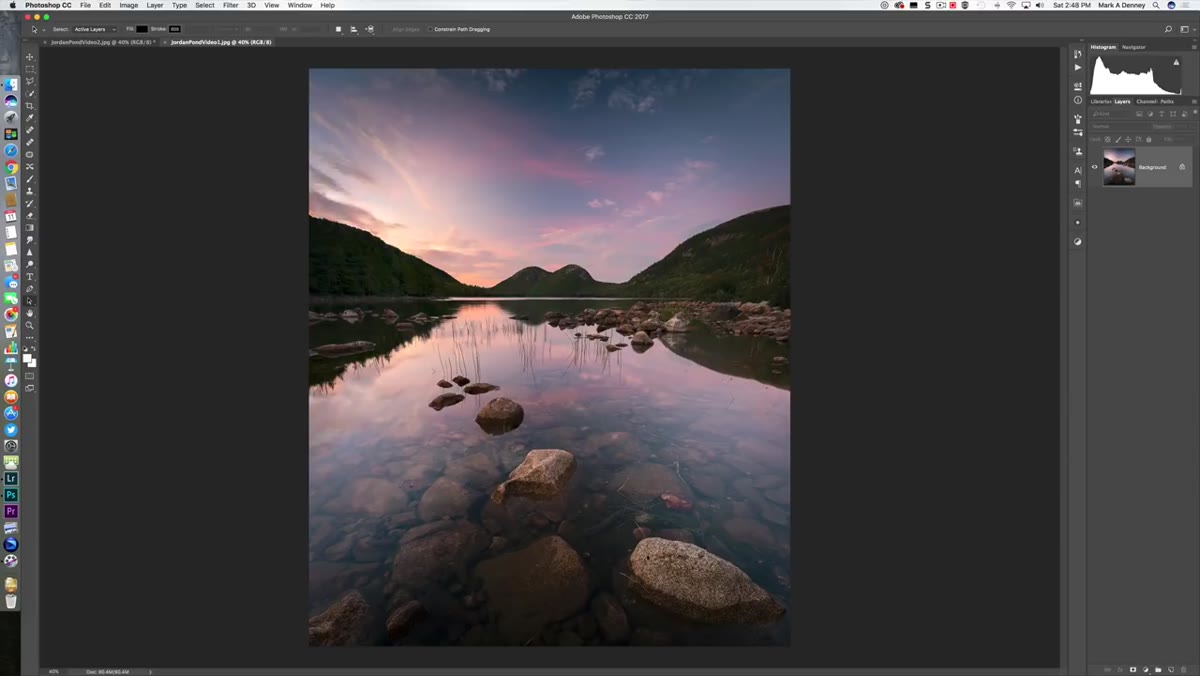 Healing or cloning tool removing excess stones from foreground
With your problem areas identified, move into Photoshop to remove or reduce the distracting elements. Mark used this stage to clean up the excess stones in the foreground. The goal isn’t to make the scene look artificial. It’s to let the compositional bones of the image breathe. In a natural landscape, there will always be visual noise. Your job in editing is to decide which pieces of that noise serve the image and which ones undermine it.
Use the Clone Stamp or Healing Brush for natural textures like rock and water. Work in small strokes and zoom in closely. For foreground elements especially, sloppy cloning is easy to spot at full resolution or in print. If you’re removing something large, consider doing it in layers so you can dial back the opacity if the result looks too clean.
Step 4: Reinforce the Focal Point With Light
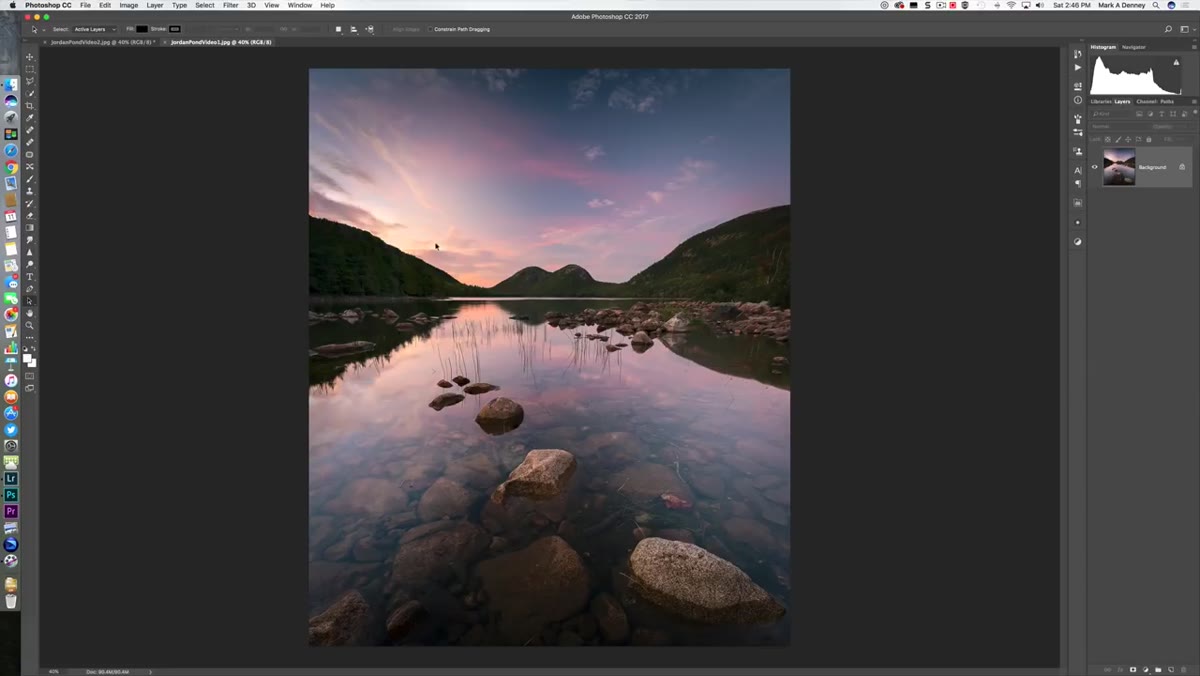 Viewer’s eye path traced toward the brightest point in image
Once the composition is cleaned up, use Lightroom’s radial or graduated filters to intentionally brighten or add contrast around your focal point. The eye naturally travels to the brightest part of any image. If your focal point is already the brightest area, your job is partly done. But you can reinforce it by slightly darkening the edges of the frame and the areas that aren’t part of the primary visual path.
This isn’t heavy vignetting. It’s subtle directional light shaping. Keep the adjustments conservative. A one or two stop shift in exposure over a large radial area is often all you need. If a viewer can see the vignette, it’s too strong.
Step 5: Confirm the Three-Layer Journey Is Still Intact
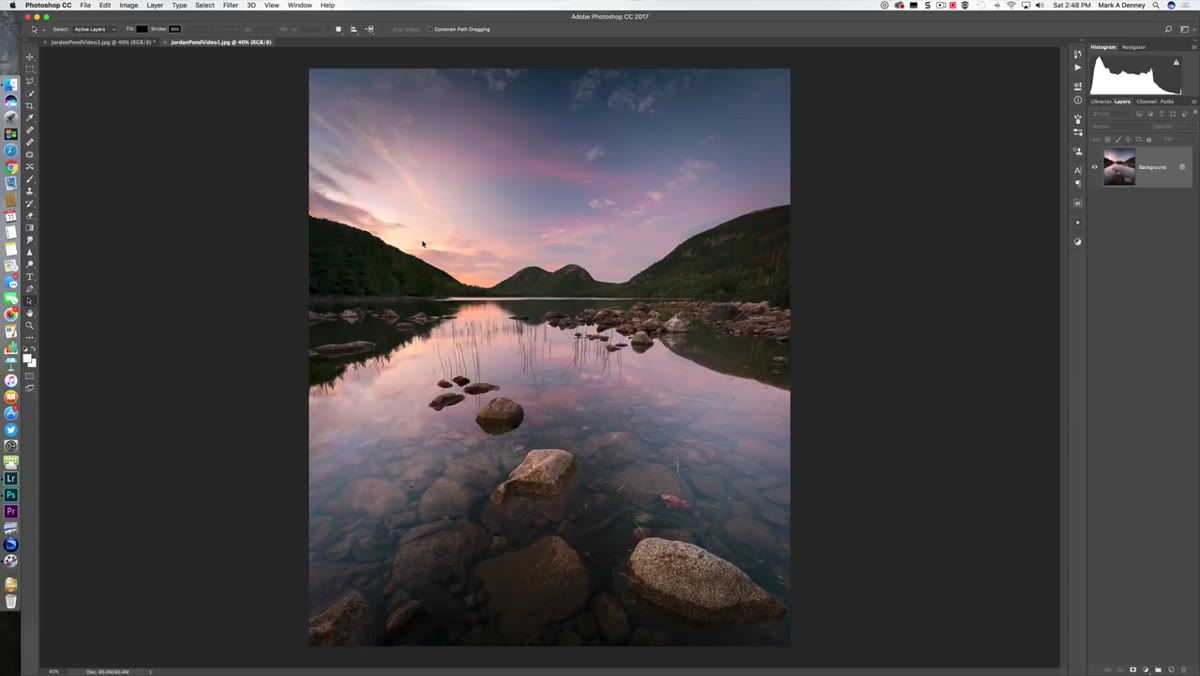 Final edited image showing foreground stones, mid-ground water, background sky
Before you move into color work, do one final compositional check. Can a viewer’s eye enter the image at the foreground, travel through the mid-ground, and arrive at the background focal point without getting lost or snagged? In Mark’s finished image, the stones invite you in, the reflections guide you across the water, and the converging mountain shadows point directly at the sun. Each layer connects to the next.
If something is breaking that chain, go back and address it before moving on. Color grading on top of a broken composition just makes the problem prettier without solving it.
What I Do Differently in the Field (and Why It Changes the Edit)
Mark’s tutorial focuses on the editing side of this problem, but after twenty years of standing in cold water before sunrise, I’ve found that the edit goes faster when the compositional thinking happens before the shutter. I still shoot film occasionally, partly because a 36-exposure roll forces you to genuinely commit to a frame before you fire. That discipline carries into my digital work. I spend more time at a location studying the scene than most photographers expect. I’m looking for those same three layers, foreground anchor, mid-ground movement, background payoff, and I’m tracing the leading lines with my eyes before I ever pick up the camera.
That doesn’t mean I don’t do compositional editing. I do, and Mark’s approach here is exactly right. But if you’re spending an hour in Photoshop removing distractions, it’s worth asking whether some of those decisions could have been made at the location with a small shift in position or a different focal length. The best edits reinforce a composition that was already working. The hardest edits try to rescue one that wasn’t.
The single most important idea in this tutorial is also the simplest: before you edit color, edit composition. Know what you love about the image, map how the viewer’s eye moves through it, and clear out anything that interrupts that path. Everything else in your workflow should serve that structure.
Watch the full tutorial on YouTube to see Mark walk through each of these steps on his Jordan Pond image. The before and after comparison alone is worth the watch.
Comments (1)
Simple but effective. Sometimes that's all you need.
Leave a Comment