
There’s a specific kind of disappointment I’ve felt more times than I’d like to admit. You’re standing at a location before dawn, the light is doing something extraordinary, your heart is hammering, and you’re firing frames as fast as your cold fingers will allow. You get home, load the cards, and the light is all there. But the composition? It’s soft. Not wrong, exactly. Just not as tight or as intentional as it felt in the field. After twenty years of this, I still feel that gap between what I see in the moment and what the sensor actually recorded.
That’s exactly why a recent tutorial from Mark Denney stopped me mid-scroll. Watch the full tutorial on YouTube — it’s worth your full attention. The premise is straightforward but genuinely underutilized: Lightroom’s crop tool, specifically its grid overlays, isn’t just a cleanup instrument. It’s a compositional tool you can use after the fact to rebuild a frame you didn’t quite nail in the field. I’d been using the crop tool the same lazy way for years — trimming a stray branch on the left edge, lifting the bottom border to cut out a cluttered foreground rock. That’s it. Denney’s tutorial reframed the whole thing for me.
Step 1: Open the Crop Tool and Access the Grid Overlays
 Lightroom crop tool panel open with overlay menu visible
In Lightroom’s Develop module, press R to open the crop tool. Once you’re in the crop view, press O to cycle through the available grid overlays. Lightroom gives you seven options. Denney works with five of them regularly, and each one is designed to draw your eye to a different structural logic within the frame. The key habit shift here is to stop treating this tool as a trimmer and start treating it as a compositional lens you apply after the shot.
Lightroom crop tool panel open with overlay menu visible
In Lightroom’s Develop module, press R to open the crop tool. Once you’re in the crop view, press O to cycle through the available grid overlays. Lightroom gives you seven options. Denney works with five of them regularly, and each one is designed to draw your eye to a different structural logic within the frame. The key habit shift here is to stop treating this tool as a trimmer and start treating it as a compositional lens you apply after the shot.
Step 2: Use the Rule of Thirds Overlay to Rebalance Your Primary Subject
 Rule of thirds grid over Boulder Beach Acadia image
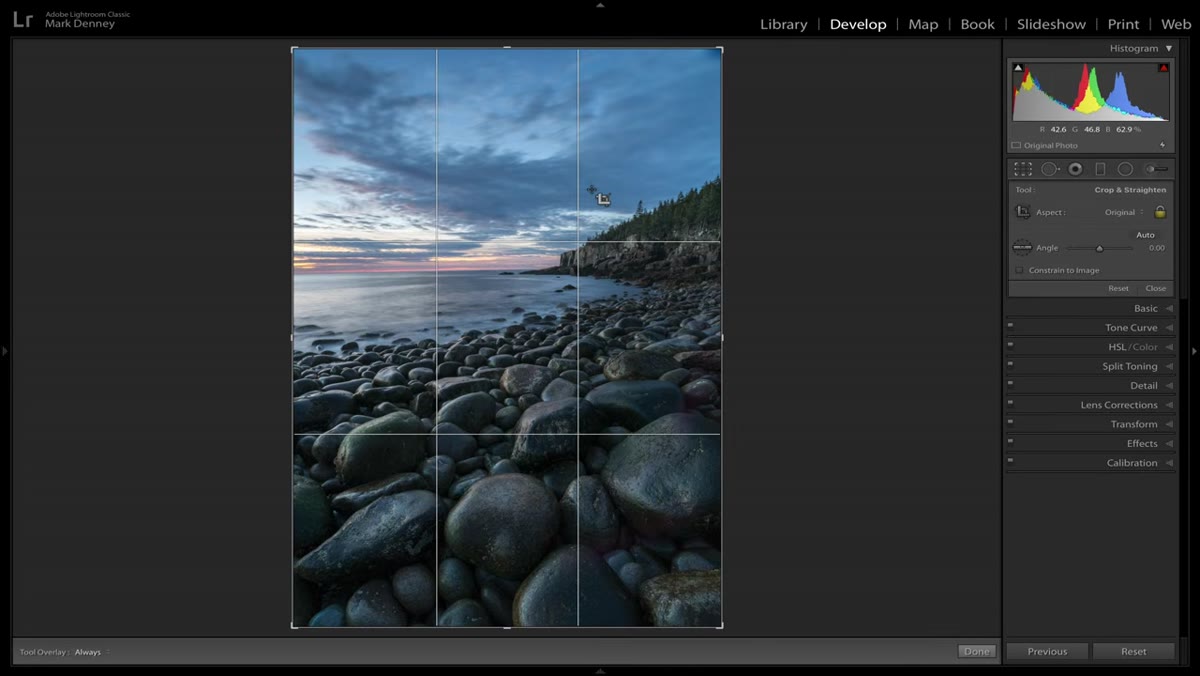
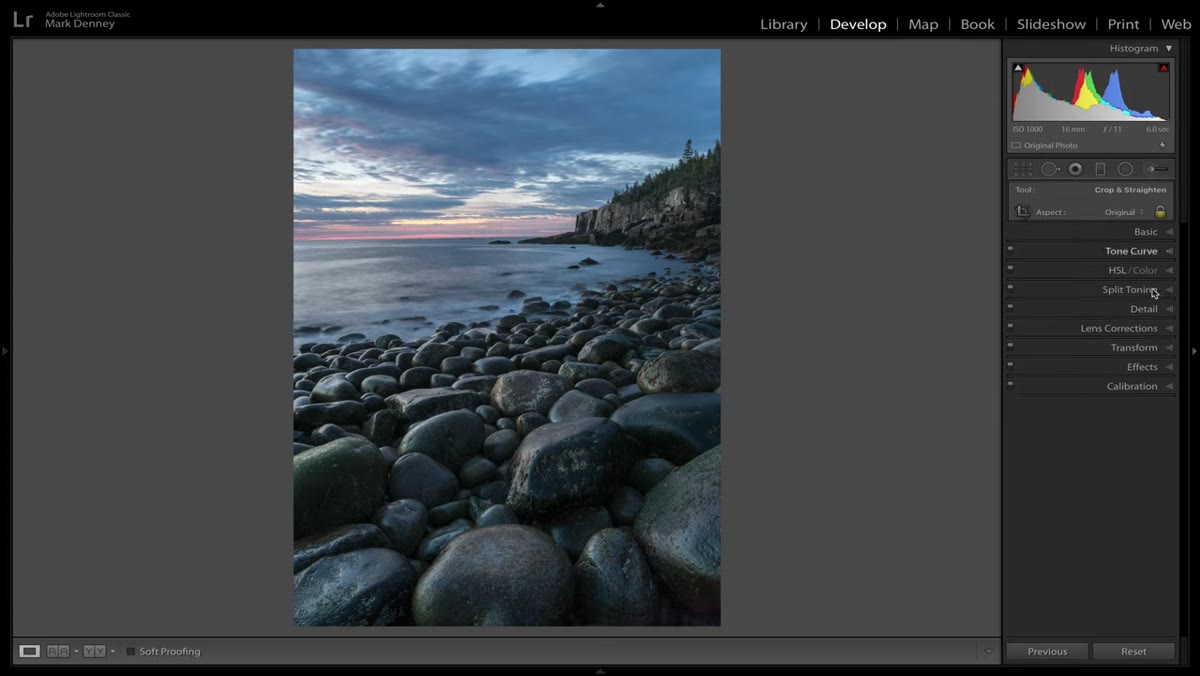
The first overlay is the rule of thirds, the one most photographers already know by name but frequently misapply in the field under pressure. The grid divides your frame into nine equal sections using two horizontal and two vertical lines. The four intersection points are where visual weight tends to anchor naturally for a viewer’s eye. Using Denney’s Boulder Beach image from Acadia National Park as the working example, the out-of-camera version had the cliff in the background getting swallowed by heavy foreground rocks. By adjusting the crop so the cliff and the horizon sit closer to a horizontal grid line and the primary rock formation aligns with an intersection point, the image immediately reads with more intention. These aren’t rules you have to apply rigidly. Think of them as a way of asking: is my subject sitting in a visually comfortable place, or did I just plant it wherever it landed?
Rule of thirds grid over Boulder Beach Acadia image
The first overlay is the rule of thirds, the one most photographers already know by name but frequently misapply in the field under pressure. The grid divides your frame into nine equal sections using two horizontal and two vertical lines. The four intersection points are where visual weight tends to anchor naturally for a viewer’s eye. Using Denney’s Boulder Beach image from Acadia National Park as the working example, the out-of-camera version had the cliff in the background getting swallowed by heavy foreground rocks. By adjusting the crop so the cliff and the horizon sit closer to a horizontal grid line and the primary rock formation aligns with an intersection point, the image immediately reads with more intention. These aren’t rules you have to apply rigidly. Think of them as a way of asking: is my subject sitting in a visually comfortable place, or did I just plant it wherever it landed?
Step 3: Apply the Diagonal Overlay to Find Tension and Movement
 Diagonal grid overlay applied to landscape image in Lightroom
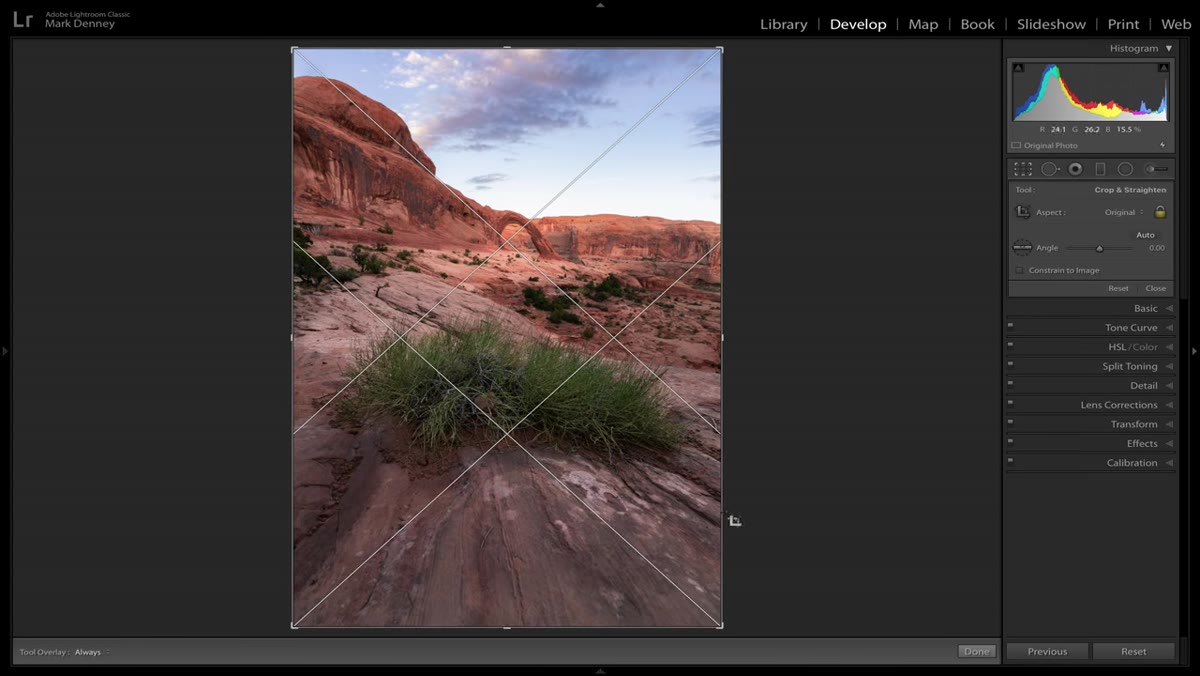
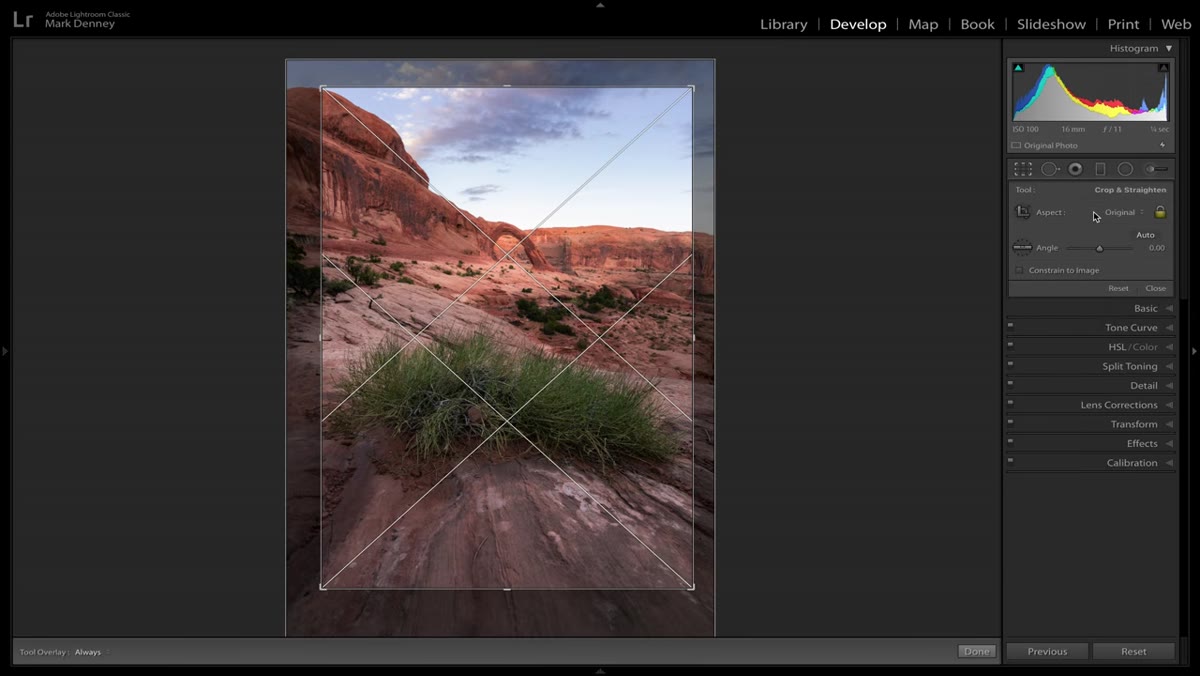
Press O again to cycle to the diagonal overlay. This one draws lines from corner to corner and adds additional diagonals from the midpoints of the sides. It’s most useful when your scene has a strong leading line — a river, a ridge line, a receding shoreline. The idea is to align that natural movement in your scene with one of the structural diagonals in the overlay. When it lines up, the image takes on a sense of energy and direction. When it doesn’t, you can drag and resize the crop until the elements click into place. This overlay helped me rethink several shots of the Deschutes River where the water’s curve felt listless in the frame. Shifting the crop so the river aligned with the diagonal gave the whole image a pull toward the background.
Diagonal grid overlay applied to landscape image in Lightroom
Press O again to cycle to the diagonal overlay. This one draws lines from corner to corner and adds additional diagonals from the midpoints of the sides. It’s most useful when your scene has a strong leading line — a river, a ridge line, a receding shoreline. The idea is to align that natural movement in your scene with one of the structural diagonals in the overlay. When it lines up, the image takes on a sense of energy and direction. When it doesn’t, you can drag and resize the crop until the elements click into place. This overlay helped me rethink several shots of the Deschutes River where the water’s curve felt listless in the frame. Shifting the crop so the river aligned with the diagonal gave the whole image a pull toward the background.
Step 4: Try the Golden Ratio Overlay as an Alternative to Rule of Thirds
 Golden ratio spiral overlay over landscape photo
The golden ratio overlay, sometimes shown as a spiral (the Phi grid), is a compositional structure found throughout nature and classical art. It looks more complex than the rule of thirds but operates on a similar principle: place your primary subject where the spiral’s center lands. The spiral creates a visual path that draws the viewer’s eye inward toward that focal point. In practice, you may need to flip or rotate the overlay (press Shift + O to rotate it) so the spiral opens toward the natural movement in your scene rather than fighting against it. This overlay works particularly well with images where you have a single, strong anchor point — a lone tree, a prominent rock formation, a reflection.
Golden ratio spiral overlay over landscape photo
The golden ratio overlay, sometimes shown as a spiral (the Phi grid), is a compositional structure found throughout nature and classical art. It looks more complex than the rule of thirds but operates on a similar principle: place your primary subject where the spiral’s center lands. The spiral creates a visual path that draws the viewer’s eye inward toward that focal point. In practice, you may need to flip or rotate the overlay (press Shift + O to rotate it) so the spiral opens toward the natural movement in your scene rather than fighting against it. This overlay works particularly well with images where you have a single, strong anchor point — a lone tree, a prominent rock formation, a reflection.
Step 5: Use the Triangle Overlay for Scenes with Strong Geometric Structure
 Triangle overlay showing diagonal corner-to-corner structure
The triangle overlay draws a diagonal line from one corner to the opposite corner, then drops perpendiculars from the other two corners to meet it. It creates a set of triangles that define the frame’s natural geometric tension. This one is less intuitive at first, but it’s especially effective with mountain scenes or images that have strong angular foreground elements. The goal is to let a natural edge in your scene — the slope of a ridge, the angle of a rock shelf — follow one of those triangle borders. When it works, the composition feels structurally inevitable.
Triangle overlay showing diagonal corner-to-corner structure
The triangle overlay draws a diagonal line from one corner to the opposite corner, then drops perpendiculars from the other two corners to meet it. It creates a set of triangles that define the frame’s natural geometric tension. This one is less intuitive at first, but it’s especially effective with mountain scenes or images that have strong angular foreground elements. The goal is to let a natural edge in your scene — the slope of a ridge, the angle of a rock shelf — follow one of those triangle borders. When it works, the composition feels structurally inevitable.
Step 6: Cycle Through Overlays Without a Preconceived Answer
 Cycling through multiple overlays on the same image
The most important thing Denney demonstrates isn’t any single overlay — it’s the practice of cycling through all of them on the same image without locking in early. Start pressing O repeatedly and let each overlay ask a different question of your frame. Some will clearly not apply. Others will reveal a compositional adjustment you hadn’t considered. The crop doesn’t have to be massive to matter. Sometimes moving the frame by just a few percentage points on one side shifts where the visual weight falls and transforms the image from competent to considered.
Cycling through multiple overlays on the same image
The most important thing Denney demonstrates isn’t any single overlay — it’s the practice of cycling through all of them on the same image without locking in early. Start pressing O repeatedly and let each overlay ask a different question of your frame. Some will clearly not apply. Others will reveal a compositional adjustment you hadn’t considered. The crop doesn’t have to be massive to matter. Sometimes moving the frame by just a few percentage points on one side shifts where the visual weight falls and transforms the image from competent to considered.
What Twenty Years in the Field Adds to This
One thing I’d layer on top of Denney’s tutorial: bring this practice back into your fieldwork. I started keeping a small printed reference card in my bag with thumbnail sketches of each overlay. When conditions are calm and I have time to think, I’ll physically try to visualize these grids before I press the shutter. I still shoot film occasionally, one roll a month with my old Pentax 67, purely because it forces me to slow down and commit to a frame before I fire. The crop overlays in Lightroom have become the digital equivalent of that discipline for me. You’re not fixing a mistake in post. You’re finishing a decision you started in the field.
The single most valuable idea in this tutorial is also the simplest one: the crop tool is a compositional instrument, not a cleanup brush. Most of us leave enormous creative potential sitting untouched inside every frame we’ve ever captured. Denney’s walkthrough of Lightroom’s grid overlays gives you a systematic, repeatable way to find it.
Watch the full tutorial on YouTube and spend time with each overlay on a few of your recent images. Pick shots you were almost happy with. You may find the composition you wanted was already inside the frame, waiting for you to find it.
Comments (4)
Tried this technique this morning. Game changer for real.
My workflow just got 10x faster. Not even kidding.
Great breakdown. The step-by-step approach really helps.
Well explained. I think my audience would really benefit from this — mind if I link to it?
Leave a Comment