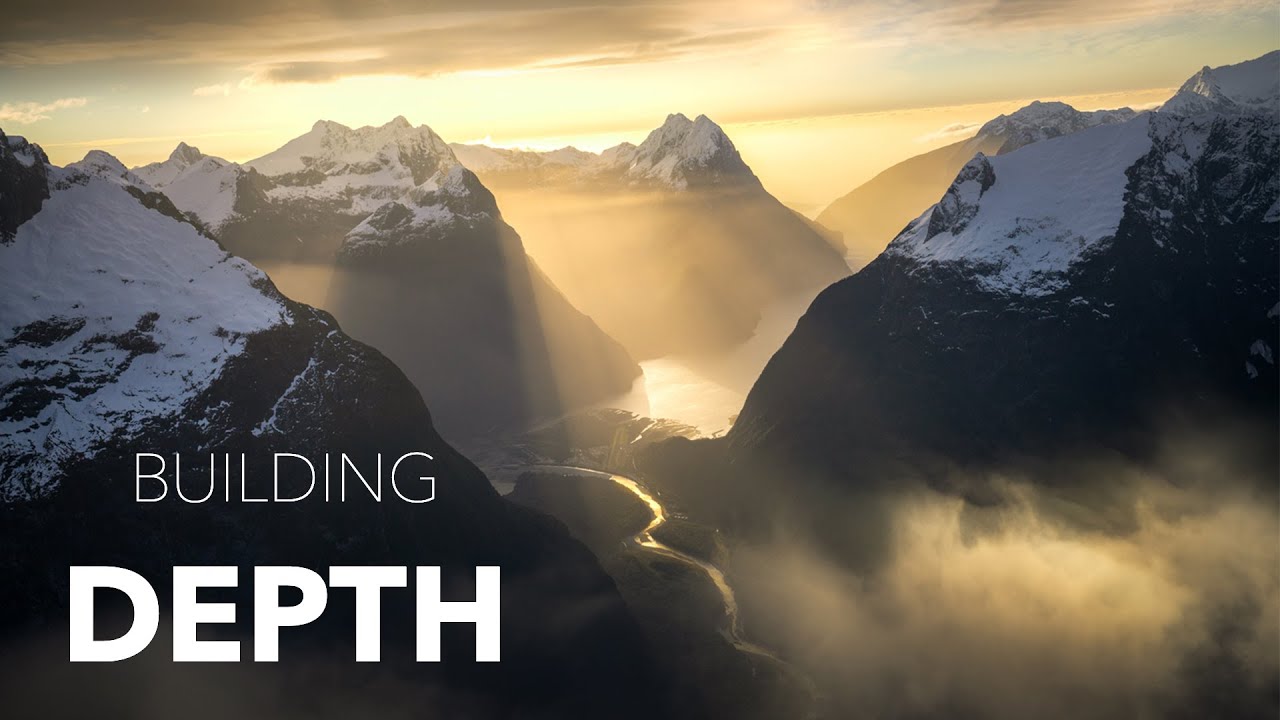
There’s a specific kind of disappointment that comes from returning home after a genuinely beautiful morning in the field and realizing your images are flat. The light was there. The location was right. But something in how you arranged the frame let the whole thing collapse. After two decades of shooting landscapes professionally, I still run into this. Not as often as I used to, but it happens. What I’ve found is that when a shot fails, it’s rarely the light’s fault. It’s almost always composition.
That’s why I keep returning to tutorials like this one from William Patino, whose approach to composition cuts through a lot of the noise that surrounds the subject. Watch the full tutorial on YouTube before or after reading this breakdown. Patino’s core argument is that composition doesn’t need to be complicated, and honestly, he’s right. The problem most of us have is that we overthink it in the field, usually while the light is changing fast and our boots are filling with water.
What follows is my walkthrough of his framework, with some field notes from my own experience layered in. If you’ve been struggling to get your images to feel balanced and spacious rather than cluttered and directionless, this approach is worth building into your shooting habits.
Step 1: Think in Big Dominant Shapes, Not Details
 Three dominant shapes identified in a fjord landscape image
Before you raise the camera, look at the scene and identify the two or three largest visual masses in front of you. Not the interesting rock or the patch of flowers. The big, dominant shapes that carve up the frame. Patino demonstrates this with a fjord image where the main elements break down into roughly three shapes: a large foreground mass on one side, the open expanse of water and mountains on the other, and a sunstar anchoring the upper portion of the frame. Composition, at its root, is just the act of aligning those shapes in a way that feels intentional.
Three dominant shapes identified in a fjord landscape image
Before you raise the camera, look at the scene and identify the two or three largest visual masses in front of you. Not the interesting rock or the patch of flowers. The big, dominant shapes that carve up the frame. Patino demonstrates this with a fjord image where the main elements break down into roughly three shapes: a large foreground mass on one side, the open expanse of water and mountains on the other, and a sunstar anchoring the upper portion of the frame. Composition, at its root, is just the act of aligning those shapes in a way that feels intentional.
This reframing changed how I pre-visualize a scene. Instead of hunting for a subject, I’m now looking for a shape arrangement that will hold together structurally. It sounds abstract, but in practice it makes decision-making faster. You’re not weighing a hundred small options. You’re placing three or four large building blocks.
Step 2: Establish Your Center Point First
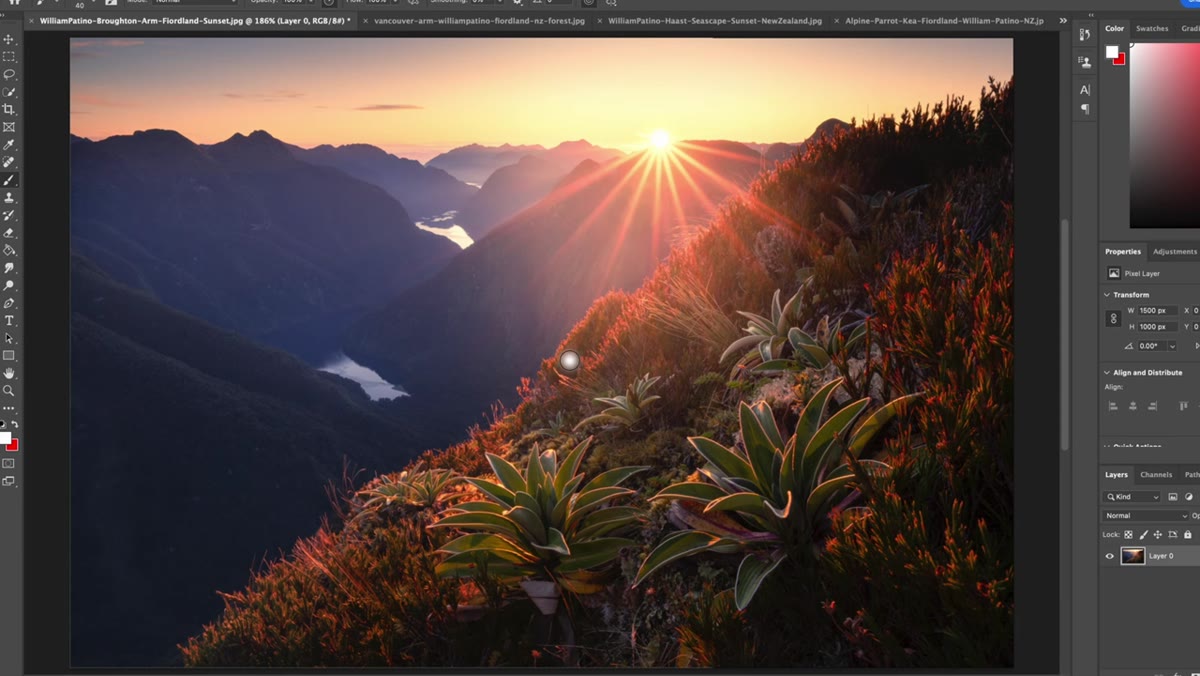 Diagram or overlay showing the centralized zone in the image frame
Patino’s advice here runs counter to how most people are taught to think about framing. Rather than starting at the edges and working inward, start from the center of the frame and build outward. The reason is practical: the edges of the frame are danger zones. Anything with strong detail or visual weight sitting at the edge will pull the viewer’s eye off the image entirely. That’s not drama. That’s just a viewer who can’t settle.
Diagram or overlay showing the centralized zone in the image frame
Patino’s advice here runs counter to how most people are taught to think about framing. Rather than starting at the edges and working inward, start from the center of the frame and build outward. The reason is practical: the edges of the frame are danger zones. Anything with strong detail or visual weight sitting at the edge will pull the viewer’s eye off the image entirely. That’s not drama. That’s just a viewer who can’t settle.
His concept of the “centralized zone” is a loose region around the middle of the frame where you want the eye to eventually rest. Not the dead center, necessarily, but somewhere in that general territory. When I started thinking about my compositions this way, I noticed I was placing my horizon lines and my main subjects with more intention, rather than just reacting to whatever was in front of me.
Step 3: Use Edge Elements as Inward-Facing Boundaries
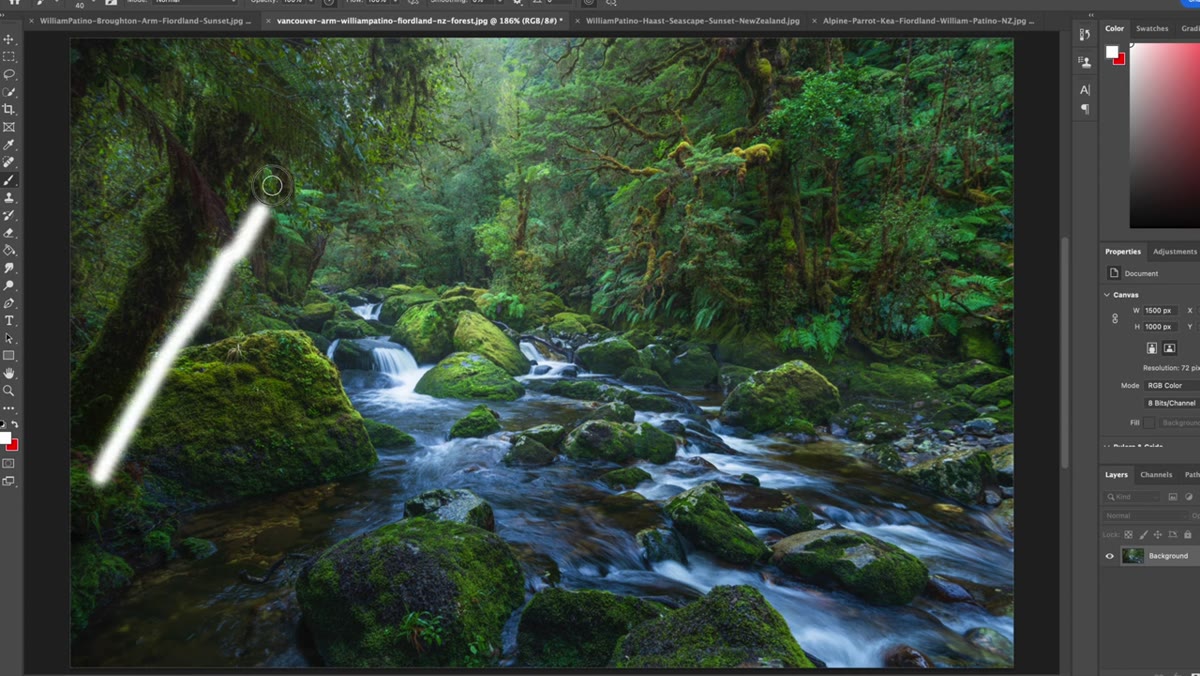 Tree on left side of frame curving inward, creating edge control
This is one of the most practically useful ideas in the entire video. Patino talks about “edge control,” which is the practice of placing shapes near the frame’s edges that curve or point inward, keeping the viewer’s eye from drifting out of the picture. A tree whose branches lean toward the center, a rock formation that angles inward, a hillside that slopes toward the subject. These act as soft walls.
Tree on left side of frame curving inward, creating edge control
This is one of the most practically useful ideas in the entire video. Patino talks about “edge control,” which is the practice of placing shapes near the frame’s edges that curve or point inward, keeping the viewer’s eye from drifting out of the picture. A tree whose branches lean toward the center, a rock formation that angles inward, a hillside that slopes toward the subject. These act as soft walls.
In my own work, I’ve started scouting specifically for these anchoring elements when I arrive at a new location. If I can find something on the left that frames inward and something on the right that does the same, I already have the skeleton of a strong composition. The foreground or midground subject almost places itself at that point.
Step 4: Balance the Left and Right Masses Around an Open Center
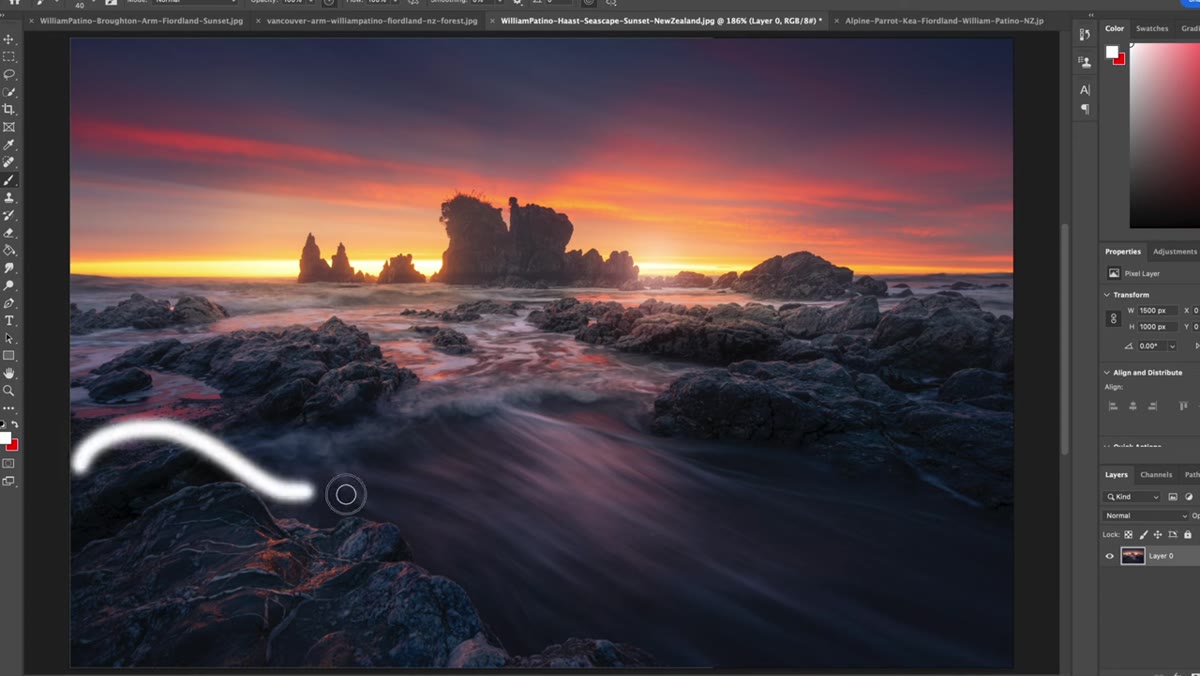 Large foreground rock on left balanced by rocks on right, open water in middle
Once your edge elements are in place, look at what’s left in the middle of your frame. Patino’s example here shows a large shape on the lower left balanced by a cluster of rocks on the right, with slow-moving water flowing through the open center. That open channel isn’t empty space. It’s a pathway for the eye to travel through, especially when the water carries motion blur from a longer shutter speed.
Large foreground rock on left balanced by rocks on right, open water in middle
Once your edge elements are in place, look at what’s left in the middle of your frame. Patino’s example here shows a large shape on the lower left balanced by a cluster of rocks on the right, with slow-moving water flowing through the open center. That open channel isn’t empty space. It’s a pathway for the eye to travel through, especially when the water carries motion blur from a longer shutter speed.
This is something I’d encourage you to physically try in the field: crouch down, shift left or right a foot or two, and watch how the balance between your left and right masses changes. Small movements have outsized effects. A shape that felt crowded and heavy on one side will often find its natural counterpart if you shift your position even slightly.
Step 5: Place the Horizon Line with Purpose
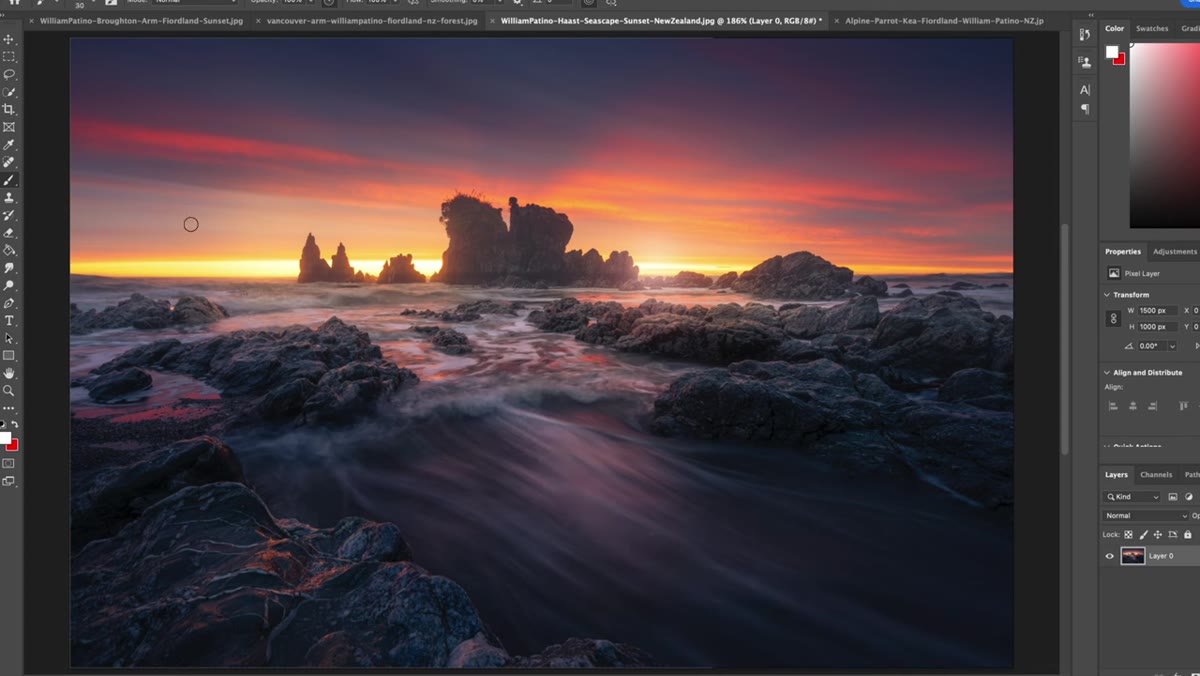 Horizon placed at roughly one-third from the top of the frame
Patino is direct about horizon placement: putting it dead center divides the frame into two equal halves and forces the viewer to assign equal importance to the sky and the foreground. That’s rarely what you want. Most of the time, one of those zones is significantly more interesting than the other, and your horizon should reflect that by giving more real estate to whichever element carries the story.
Horizon placed at roughly one-third from the top of the frame
Patino is direct about horizon placement: putting it dead center divides the frame into two equal halves and forces the viewer to assign equal importance to the sky and the foreground. That’s rarely what you want. Most of the time, one of those zones is significantly more interesting than the other, and your horizon should reflect that by giving more real estate to whichever element carries the story.
Patino uses a roughly one-third placement in his examples, though he frames it less as a rule and more as a consequence of where the visual weight falls. I think about it similarly. If the sky is dramatic and the foreground is merely supporting, I’ll drop the horizon lower. If the foreground has texture, water, or leading lines that carry the composition, the horizon comes up. The thirds rule is a starting point, not a destination.
A Field Note on Slowing Down
I shoot film occasionally, not as a romantic gesture but because it costs real money to press the shutter. That constraint forces me to evaluate the composition thoroughly before committing. Patino’s framework gives you the same discipline even if you’re shooting digital. The practice of identifying your big shapes, finding your center zone, and checking your edge control before you shoot will slow you down in exactly the right way.
The compositions I’ve been most proud of over the years weren’t the ones where I moved fast. They were the ones where I stood still for ten minutes, let the scene settle into something legible, and then made one deliberate choice about where to stand. The mountain, as someone once told me early in my career, doesn’t care about your schedule. But it will reward you for paying attention.
The single most transferable idea from this tutorial is to stop composing from the edges and start composing from the center outward. Identify your dominant shapes, guide the eye toward a centralized zone rather than toward the frame borders, and use your edge elements as inward-facing walls rather than decoration. That’s the structural logic behind images that feel balanced and invite the viewer to stay.
Watch the full tutorial on YouTube to see Patino walk through these concepts with his own images. Seeing the shapes identified in real photographs makes the framework click in a way that text alone can’t fully replicate.
Comments
Leave a Comment