I’ve driven six hours to a location, sat in thick fog for two days, and come home with exactly one usable frame. That shot is now my best-selling print. I tell that story not to romanticize suffering but because it made something permanent and true in the way I approach this work: the conditions you get are not always the conditions you planned for, and your ability to adapt in the field separates a good photographer from a great one. Planning matters enormously. But so does knowing what to do when the plan falls apart.
That tension between preparation and improvisation is exactly what Adam at First Man Photography unpacks in a recent photo critique session, where he reviews a set of images from photographer Alex Wedlake, who spent three months traveling the US and Canada specifically to shoot landscapes. Alex is working with a Canon 6D and a 16-35mm f/4 lens, which is solid full-frame kit, and Adam adjusts his critique accordingly. If you have good gear, the bar for execution rises. Watch the full tutorial on YouTube before or after reading this breakdown.
What makes this tutorial valuable to me as a working photographer isn’t the gear talk. It’s the way Adam approaches each image as a problem-solving exercise. He looks at what the photographer was trying to do, identifies the gap between intent and result, and offers a concrete fix. That’s the same mental process I run through every time I’m reviewing my own work after a shoot.
Step 1: Read the Light Before You Read the Scene
 Dawlish seafront image displayed for critique
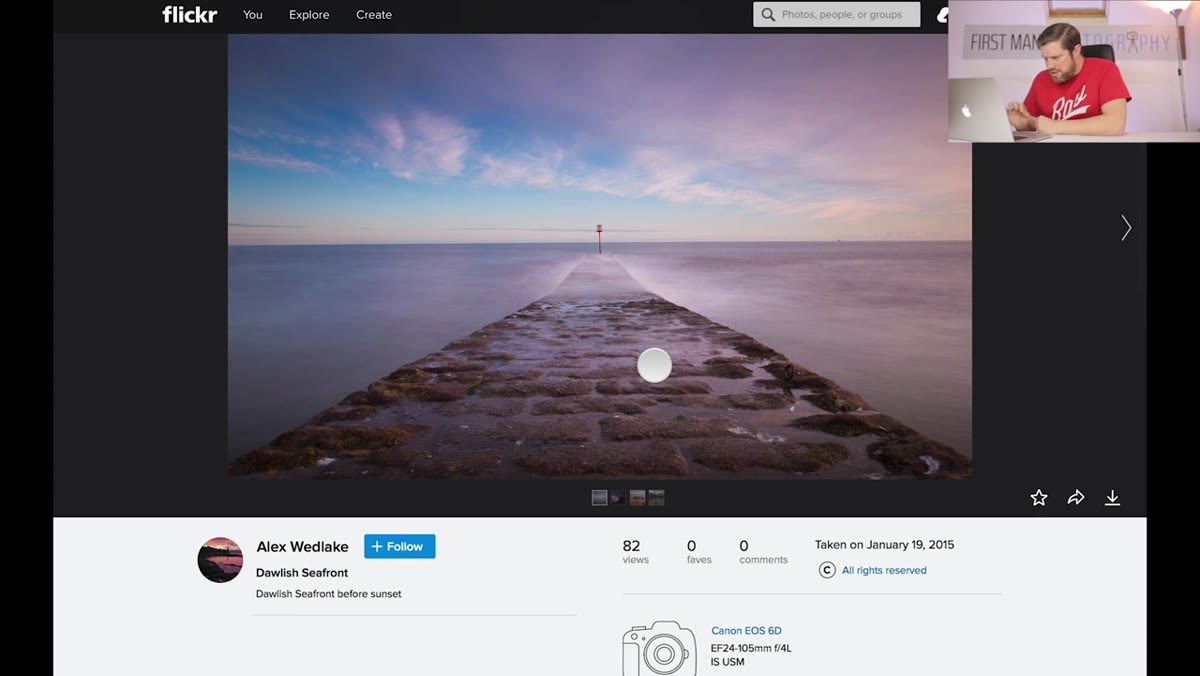
Adam opens with a coastal long-exposure shot taken before sunset at Dawlish seafront. The photographer used f/8 and a 10-second exposure to smooth out the water while retaining some texture. This is a deliberate choice, and it works. But the deeper lesson here is that Alex clearly timed this shot for the pre-sunset window, when the light is directional but not yet blown out. Before you ever set up a tripod, you need to know what the light is going to do and when. Apps like PhotoPills or The Photographer’s Ephemeris are worth using every single time you scout a new location. I check them the night before and again the morning of a shoot, even for spots I’ve visited dozens of times.
Dawlish seafront image displayed for critique
Adam opens with a coastal long-exposure shot taken before sunset at Dawlish seafront. The photographer used f/8 and a 10-second exposure to smooth out the water while retaining some texture. This is a deliberate choice, and it works. But the deeper lesson here is that Alex clearly timed this shot for the pre-sunset window, when the light is directional but not yet blown out. Before you ever set up a tripod, you need to know what the light is going to do and when. Apps like PhotoPills or The Photographer’s Ephemeris are worth using every single time you scout a new location. I check them the night before and again the morning of a shoot, even for spots I’ve visited dozens of times.
Step 2: Use a Leading Line, but Commit to the Angle
 Wall leading line toward the sea visible in composition
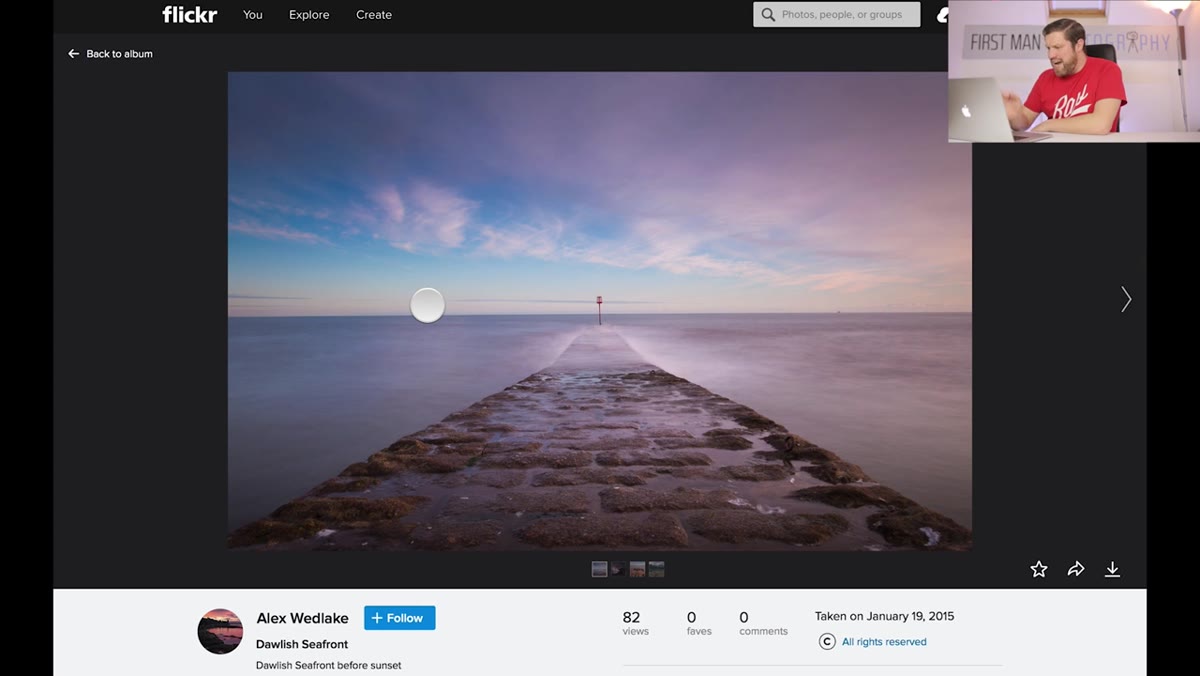
The Dawlish image uses a classic compositional technique: a sea wall that draws the eye from the foreground into the middle distance, where a red structure anchors the frame. Adam points out that this works, but he wants to see Alex push closer to the water to strengthen that lead. This is something I see constantly in workshop students. They find the line, they see the potential, and then they play it safe. Get lower. Get closer. Let the foreground breathe into the frame. The physical discomfort of crouching near cold water at dusk is exactly the thing that separates a postcard from a print.
Wall leading line toward the sea visible in composition
The Dawlish image uses a classic compositional technique: a sea wall that draws the eye from the foreground into the middle distance, where a red structure anchors the frame. Adam points out that this works, but he wants to see Alex push closer to the water to strengthen that lead. This is something I see constantly in workshop students. They find the line, they see the potential, and then they play it safe. Get lower. Get closer. Let the foreground breathe into the frame. The physical discomfort of crouching near cold water at dusk is exactly the thing that separates a postcard from a print.
Step 3: Extend Your Exposure When in Doubt
 Adam discussing longer exposure recommendation for the coastal shot
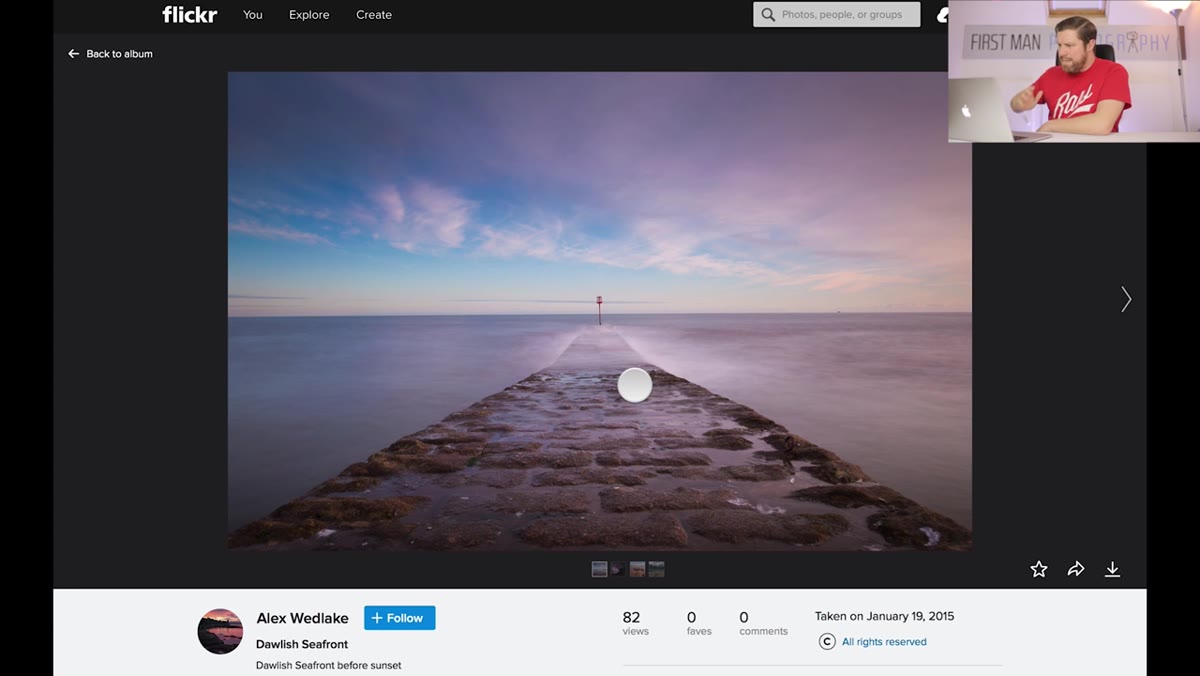
Adam’s suggestion for the Dawlish image isn’t to reshoot from scratch. It’s to push the exposure time further, smoothing the water completely and introducing motion blur into the clouds. A 10-second exposure gives you silky water. A 60-second or 2-minute exposure gives you atmosphere. The difference between the two is a good ND filter and patience. I shoot long exposures almost exclusively with a 10-stop ND and I manually calculate my base exposure first, then apply the filter factor. Never guess. Set a timer on your phone for the exposure duration so you’re not hovering over the shutter release counting seconds in your head.
Adam discussing longer exposure recommendation for the coastal shot
Adam’s suggestion for the Dawlish image isn’t to reshoot from scratch. It’s to push the exposure time further, smoothing the water completely and introducing motion blur into the clouds. A 10-second exposure gives you silky water. A 60-second or 2-minute exposure gives you atmosphere. The difference between the two is a good ND filter and patience. I shoot long exposures almost exclusively with a 10-stop ND and I manually calculate my base exposure first, then apply the filter factor. Never guess. Set a timer on your phone for the exposure duration so you’re not hovering over the shutter release counting seconds in your head.
Step 4: Recognize When Timing Was the Whole Shot
 Lubach thunderstorm image displayed with lightning visible in sky
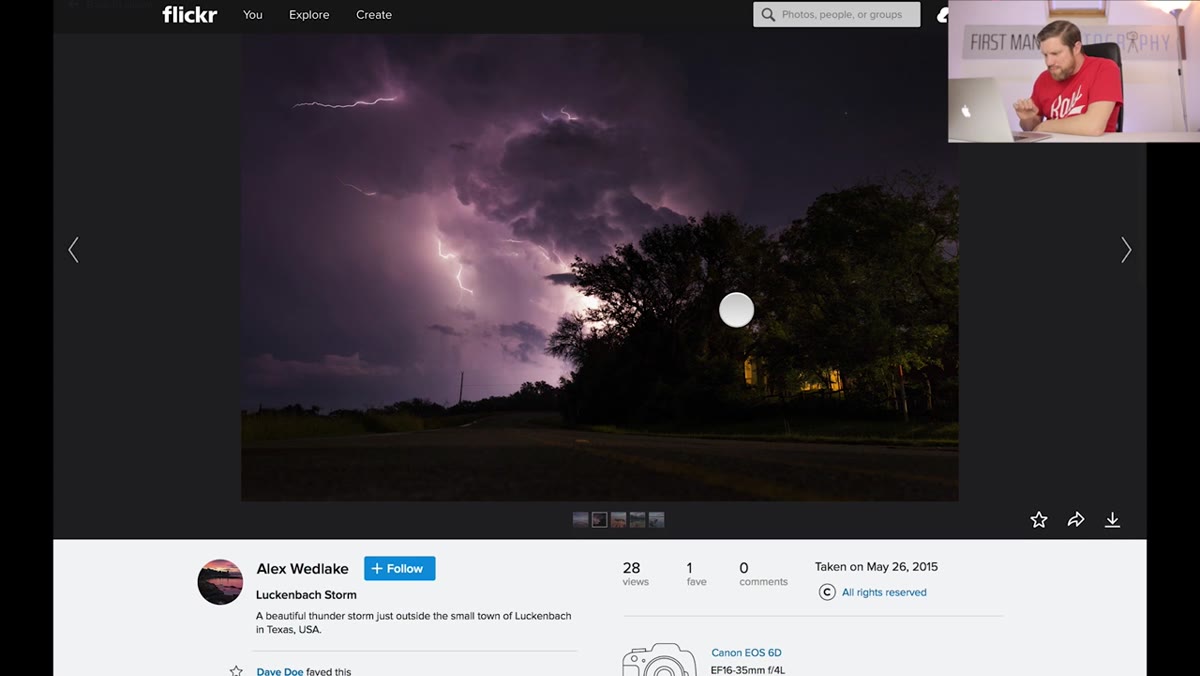
The second image in Adam’s critique is a thunderstorm shot outside Lenbach, Texas, with lightning filling a purple-bruised sky above a flat Texas road. Adam’s response is immediate: the sky is the image. The lightning capture is excellent. The color is doing real work. What distracts is a light source in the lower portion of the frame, which pulls the eye away from the drama above. This is a timing and location problem, not a post-processing problem. You can’t always control what’s in your foreground when you’re chasing a storm. But you can move, even a few steps, to eliminate a competing light source. When the sky is that active, your job is to get out of your own way.
Lubach thunderstorm image displayed with lightning visible in sky
The second image in Adam’s critique is a thunderstorm shot outside Lenbach, Texas, with lightning filling a purple-bruised sky above a flat Texas road. Adam’s response is immediate: the sky is the image. The lightning capture is excellent. The color is doing real work. What distracts is a light source in the lower portion of the frame, which pulls the eye away from the drama above. This is a timing and location problem, not a post-processing problem. You can’t always control what’s in your foreground when you’re chasing a storm. But you can move, even a few steps, to eliminate a competing light source. When the sky is that active, your job is to get out of your own way.
Step 5: Crop Intentionally, Not Apologetically
 Adam sketching a tighter crop composition over the storm image
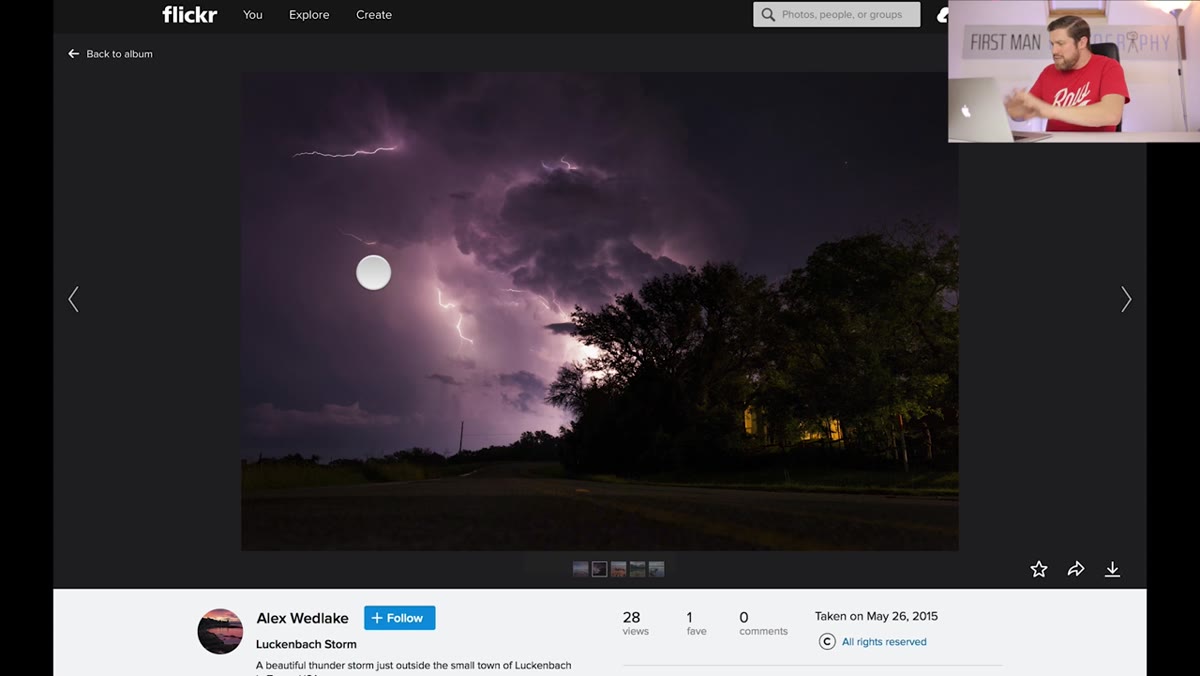
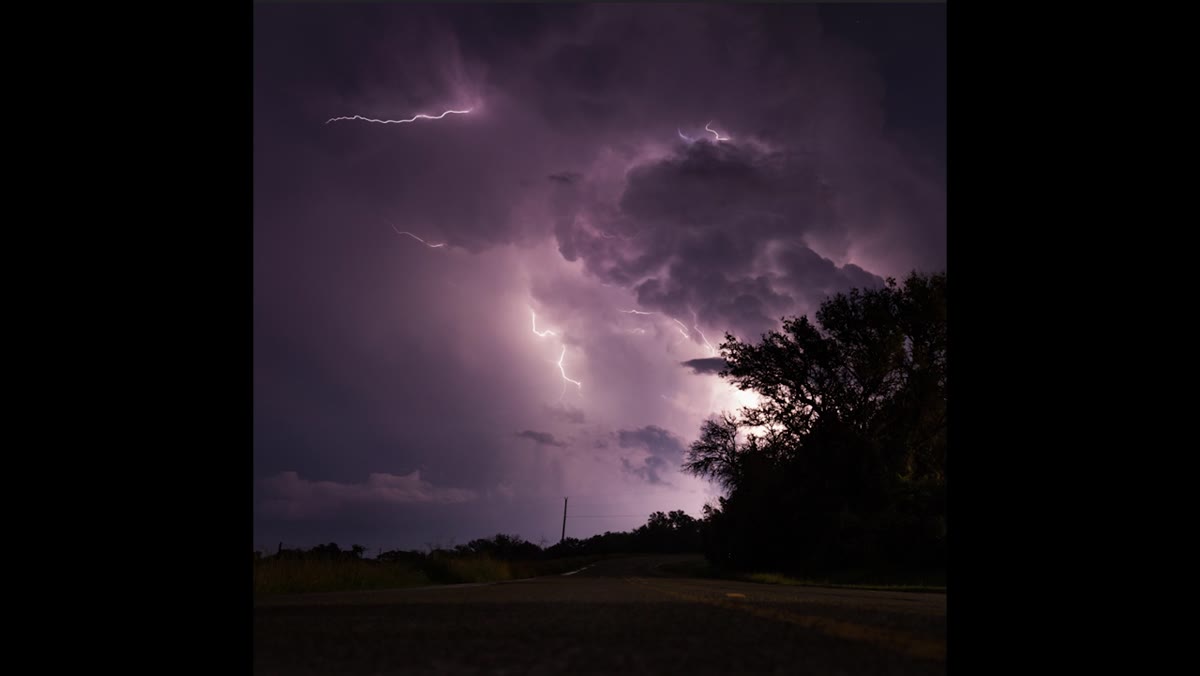
Adam’s fix for the Texas storm image is a square crop that eliminates the distracting building and centers the road leading into the lightning. This is smart editing, and I want to be direct about something: cropping is not a failure. It is a compositional decision made after the fact. The best version of an image is the version that works, full stop. I shoot RAW with plenty of resolution, and I give myself permission to crop in post if the framing in the field wasn’t ideal. What Adam is modeling here is the discipline of looking at an image and asking, “What is this actually about?” The answer to that question tells you exactly where the edges of your frame should be.
Adam sketching a tighter crop composition over the storm image
Adam’s fix for the Texas storm image is a square crop that eliminates the distracting building and centers the road leading into the lightning. This is smart editing, and I want to be direct about something: cropping is not a failure. It is a compositional decision made after the fact. The best version of an image is the version that works, full stop. I shoot RAW with plenty of resolution, and I give myself permission to crop in post if the framing in the field wasn’t ideal. What Adam is modeling here is the discipline of looking at an image and asking, “What is this actually about?” The answer to that question tells you exactly where the edges of your frame should be.
Step 6: Plan for Spontaneity
 Adam discussing the challenge of composing in real-time during weather events
One of Adam’s quiet observations about the storm image is that you don’t always have the luxury of perfect composition when nature is moving fast. Lightning doesn’t wait while you adjust your tripod. This is where pre-planning earns its keep. If you’ve scouted a location before the weather rolls in, you already know where to stand. You’ve thought about your foreground, your horizon line, your exit route if things get dangerous. Spontaneous images that look planned are almost always the result of a photographer who knew the location before the moment arrived.
Adam discussing the challenge of composing in real-time during weather events
One of Adam’s quiet observations about the storm image is that you don’t always have the luxury of perfect composition when nature is moving fast. Lightning doesn’t wait while you adjust your tripod. This is where pre-planning earns its keep. If you’ve scouted a location before the weather rolls in, you already know where to stand. You’ve thought about your foreground, your horizon line, your exit route if things get dangerous. Spontaneous images that look planned are almost always the result of a photographer who knew the location before the moment arrived.
What I’d Add from Twenty Years in the Field
Adam’s critique focuses primarily on composition and exposure, which are the right things to focus on. What I’d layer on top of this, particularly for photographers planning long trips like Alex’s US and Canada journey, is the concept of seasonal and daily timing stacked together. It’s not enough to know that golden hour is at 6:47am. You also need to know that a particular canyon is in shadow until 9am, or that a coastal fog typically clears by 10am but rolls back in by 2pm. The photographers I see getting consistently strong results are the ones keeping detailed location journals. Notes on time of year, time of day, weather conditions, and what they’d do differently. I’ve filled about a dozen of those notebooks over the years. They’re worth more to me than any piece of gear.
The single most important thing I take from this tutorial is something Adam demonstrates rather than states outright: look at your own images like an editor, not like a parent. Ask what’s working, what’s fighting for attention, and what a tighter version of the idea looks like. That discipline, applied consistently after every shoot, is what actually makes you better.
Watch the full tutorial on YouTube to see Adam’s full critique and the complete range of images Alex submitted.
Comments (2)
Clear and practical. No fluff. Appreciate that.
Great article! I actually covered something related on my site — the retouching angle is really complementary to this.
Leave a Comment