
There’s a version of composition advice that stops at rule of thirds, leading lines, and foreground interest. I taught that version for years. It’s not wrong, but it leaves out the one element that overrides every geometric trick you’ve ever learned. Light. Not the quality of light, not the color temperature, but the placement of light within the frame and what it does to a viewer’s eye before they even consciously register what they’re looking at.
I came across William Patino’s tutorial on this exact idea and it clarified something I’ve felt in the field for two decades without ever putting clean language to it. Watch the full tutorial on YouTube - it’s worth the full sit-down. What Patino does well is use real images from working photographers to show how light and compositional structure either reinforce each other or work against each other. That’s the tutorial I wish I’d had when I was starting out, standing in the dark somewhere outside Bend wondering why technically correct shots still felt flat.
The core problem this solves: you can nail every compositional principle and still produce an image where the eye wanders to the wrong place, or worse, drifts off the frame entirely. If the brightest part of your shot is sitting in a corner with nothing to hold the viewer in, all your careful foreground work is fighting against itself. Patino’s tutorial gives you a framework for thinking about light placement the same way you think about where to put your horizon line.
Step 1: Recognize That Brightness Commands Attention First
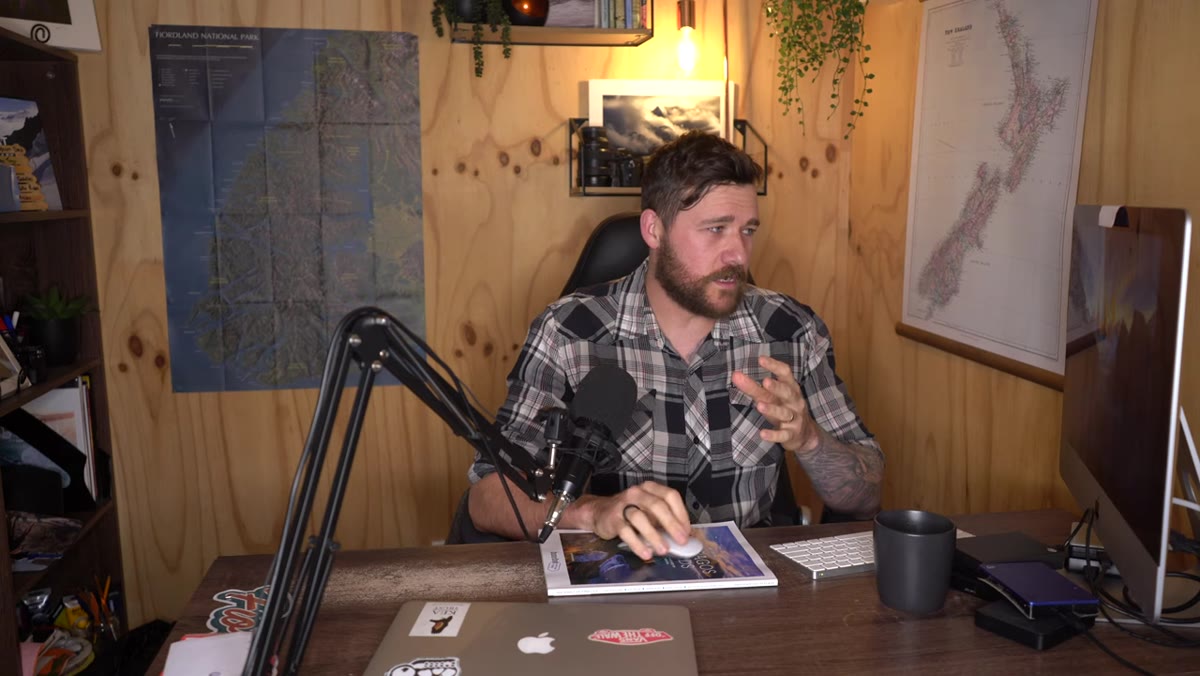
 Presenter introducing light as the overlooked compositional element
Before you compose anything else, understand that the human eye moves to the brightest part of an image automatically. This isn’t a photography rule. It’s a biological one. We evolved to look toward light. In a visual frame, that instinct means whatever you make the brightest point becomes the entry point, whether you intend it or not. The practical implication is immediate: before you set up your tripod, identify where your brightest light is falling and ask whether that’s actually where you want the viewer to look first.
Presenter introducing light as the overlooked compositional element
Before you compose anything else, understand that the human eye moves to the brightest part of an image automatically. This isn’t a photography rule. It’s a biological one. We evolved to look toward light. In a visual frame, that instinct means whatever you make the brightest point becomes the entry point, whether you intend it or not. The practical implication is immediate: before you set up your tripod, identify where your brightest light is falling and ask whether that’s actually where you want the viewer to look first.
In practice this means scouting isn’t just about finding interesting subjects. It’s about understanding where the light will land relative to those subjects at the specific moment you plan to shoot. I’ve started asking myself during golden hour scouting walks, “if I exposed this scene right now, where would the eye go?” If the answer isn’t my subject, I either move or I wait.
Step 2: Align Your Compositional Lines With Your Light Source
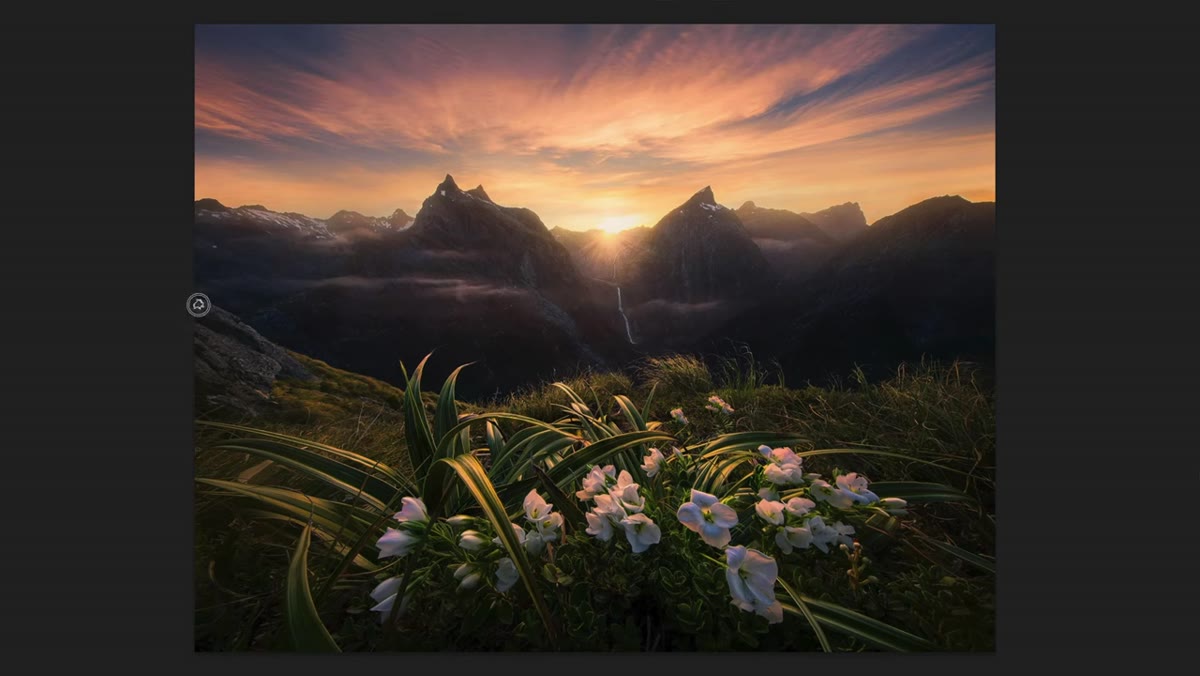 Wide-angle landscape showing leading lines converging toward bright center
Patino walks through an image where multiple leading lines, slopes, flowers, and mountain ridges, all converge toward a central point. The compositional geometry is doing what it’s supposed to. But the reason the image works as powerfully as it does is that the brightest part of the frame, the sun itself, sits right at that convergence point. The lines are leading somewhere the eye already wants to go.
Wide-angle landscape showing leading lines converging toward bright center
Patino walks through an image where multiple leading lines, slopes, flowers, and mountain ridges, all converge toward a central point. The compositional geometry is doing what it’s supposed to. But the reason the image works as powerfully as it does is that the brightest part of the frame, the sun itself, sits right at that convergence point. The lines are leading somewhere the eye already wants to go.
The actionable version of this for fieldwork: trace your leading lines to their natural endpoint, then check whether your light source or your lightest tonal area falls near that endpoint. If your lines lead to shadow and your light is somewhere else, you’re creating a tug-of-war inside the frame. Adjust your position, your timing, or both until the geometry and the light are pulling in the same direction.
Step 3: Use Dark Surrounds to Funnel Attention Inward
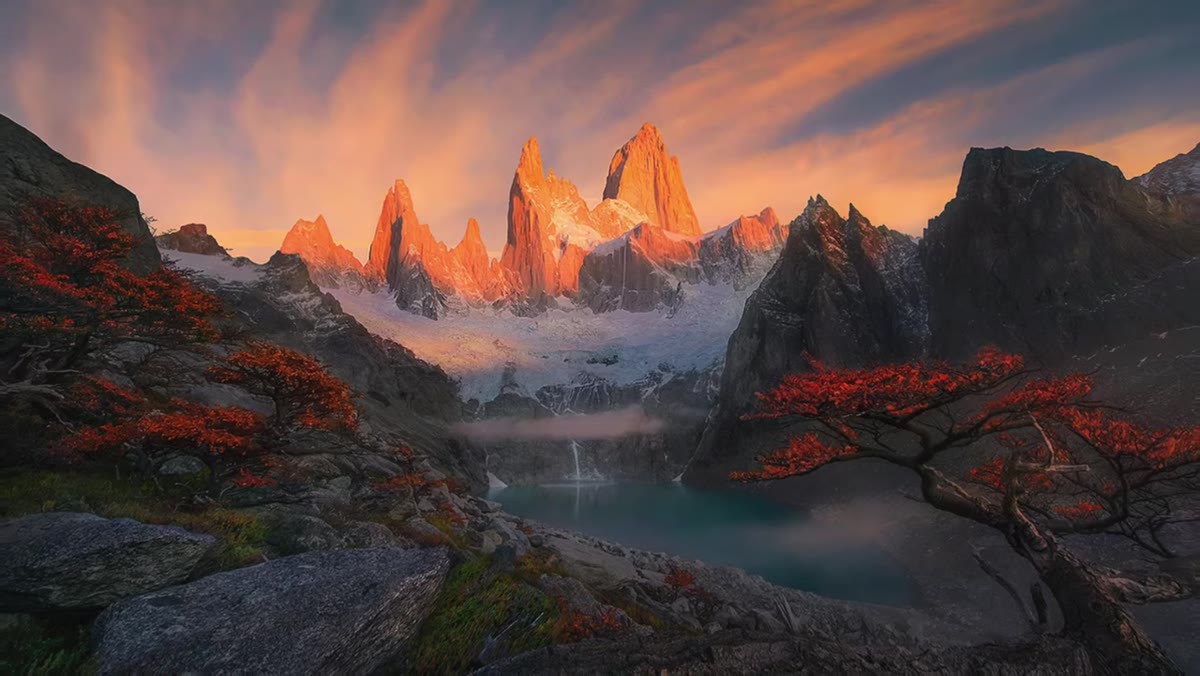
 Dark mountain edges framing a bright central peak with sweeping clouds
One of the clearest examples Patino presents shows a mountain scene where dark terrain frames the left and right edges, a tree curves inward from one side, and clouds sweep across the upper frame toward the center. The mountain itself sits in the only real pool of light in the image. The darkness around the edges isn’t just the absence of light. It’s an active compositional element pushing the eye toward the center.
Dark mountain edges framing a bright central peak with sweeping clouds
One of the clearest examples Patino presents shows a mountain scene where dark terrain frames the left and right edges, a tree curves inward from one side, and clouds sweep across the upper frame toward the center. The mountain itself sits in the only real pool of light in the image. The darkness around the edges isn’t just the absence of light. It’s an active compositional element pushing the eye toward the center.
This is something you can plan for rather than stumble into. During blue hour or when clouds are moving through, watch for moments when your subject catches light while the surrounding landscape goes darker. That contrast differential does compositional work you can’t achieve through cropping or placement alone. I’ve waited forty minutes at a single location for exactly this kind of split, where the ridgeline behind my subject goes into shadow and the subject itself stays lit. Those are the frames that hold together.
Step 4: Keep Your Brightest Tones in the Centralized Zone of the Frame
 Diagram or image showing bright areas drifting toward frame edges
Patino makes a specific spatial point here that I think about on almost every shot now. If your brightest tonal area lands in a corner or along a hard edge, the eye arrives there and then has nowhere to go but off the frame. It’s not that bright corners are always wrong. It’s that they require something else in the frame to pull the viewer back in, and that’s a harder compositional problem to solve.
Diagram or image showing bright areas drifting toward frame edges
Patino makes a specific spatial point here that I think about on almost every shot now. If your brightest tonal area lands in a corner or along a hard edge, the eye arrives there and then has nowhere to go but off the frame. It’s not that bright corners are always wrong. It’s that they require something else in the frame to pull the viewer back in, and that’s a harder compositional problem to solve.
The simpler approach is to position yourself so that your light source or your lightest subject sits somewhere in the central half of the frame. Not necessarily dead center, but away from the outer edges. This is especially relevant when shooting directly into the sun, which is far more common now that modern sensors can handle the dynamic range. If you’re shooting into a sunrise or sunset, your composition should be built around that bright source being the anchor, with your other elements arranged to support it rather than compete.
Step 5: Let the Scene’s Tonal Map Drive Your Shooting Position
 Photographer discussing how light placement affects where you stand
This is where the tutorial moves from analysis into active field decision-making. Once you understand that brightness placement is a compositional choice, your shooting position is no longer just about framing your subject. It’s about controlling where the light falls in the frame relative to your subject. Moving ten feet left or right, or shooting twenty minutes earlier or later, can shift the lightest tonal area from a distracting corner into the exact center of your compositional structure.
Photographer discussing how light placement affects where you stand
This is where the tutorial moves from analysis into active field decision-making. Once you understand that brightness placement is a compositional choice, your shooting position is no longer just about framing your subject. It’s about controlling where the light falls in the frame relative to your subject. Moving ten feet left or right, or shooting twenty minutes earlier or later, can shift the lightest tonal area from a distracting corner into the exact center of your compositional structure.
I think of it now as a two-part check before I press the shutter. First, where are my compositional anchors: foreground, subject, leading lines? Second, where is the light landing and is it reinforcing or undermining those anchors? When both answers point to the same place in the frame, the shot usually works.
What I’d Add From Twenty Years in the Field
The tutorial focuses on single-image composition, which is the right place to start. What I’d layer on top for anyone shooting in changing light: this analysis needs to happen in real time, not at the computer afterward. The light that makes an image great is usually present for three to eight minutes, sometimes less. If you’re still deciding where to stand when it arrives, you’ll miss it.
My habit now is to pre-compose in flat light, trace the likely path of the good light based on the sun’s angle, and identify in advance where the bright zone will be when conditions change. Then when it happens, I’m already in position, already focused, already knowing what I’m waiting for. The mountain doesn’t care about your schedule, as someone once told me. But it will occasionally hand you exactly what you need if you’ve done the thinking in advance.
The single most important thing to take away from this tutorial: light placement is a compositional decision, not a lighting decision. You are not just waiting for good light. You are positioning yourself so that the light lands where your composition needs it to land. Everything else follows from that.
Watch the full tutorial on YouTube to see William Patino walk through the example images himself. Seeing the actual photographs while he analyzes them is where the lesson really locks in.
Comments
Leave a Comment